Search This Blog

Showing posts with label Chicken. Show all posts

Saturday, July 18, 2015

Southwestern Roasted Corn and Grilled Chicken Pizza

Last weekend is one of the weekends of the year that I look forward to with unbridled anticipation.  Yes, it was the weekend that our favorite farm market, Ambrose Farm Market, was open for business.    They offer various types of greens, peppers, cucumbers, melons, and squash.  But, what they are known for is their butter and sugar corn.  This corn is the best corn in Butler County, period.  Never starchy, always sweet.  It is worth the hour round trip drive.  Last weekend, my bounty also included some beautiful Early Girl tomatoes and jalapeño peppers.  Life is good.

Last night was pizza night.  I wanted something different.  We had three ears of corn left in the refrigerator.  Not enough for a meal, but enough to experiment with a nice little spicy pizza pie.  I had been concocting this recipe in my head all day long.  If you are a Chilihead, you will not be disappointed.

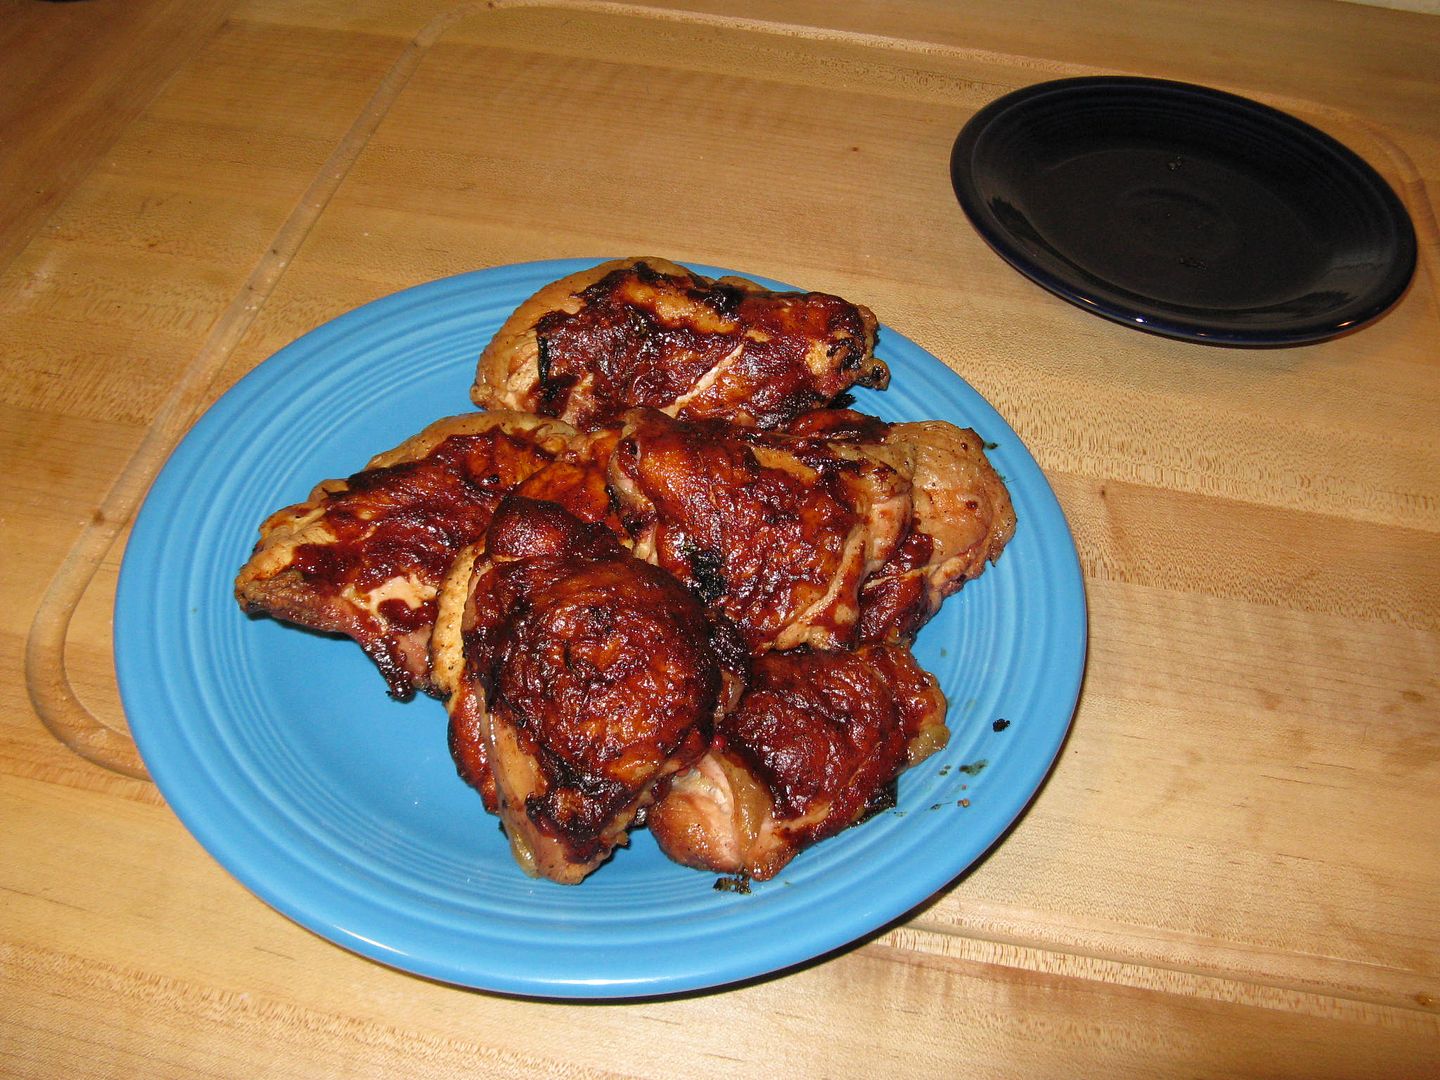
First, I thawed some chicken thighs and threw them on a hot grill.  While the thighs were grilling, I whipped up a spice blend:

1 tsp Chili Powder
1 tsp Cumin
1 tsp Dried Parsley (you can substitute Cilantro here, but I am in the class of people that think Cilantro tastes like a bar of soap)
1 tsp kosher salt
1/2 tsp Cayenne Pepper
1/2 tsp oregano

After Hope removed the kernels from three small ears of corn and I thinly sliced half of a sweet onion.  The corn, onion, and two large cloves of minced garlic went into a bowl with three tsp of the spice blend and two tbsp of olive oil.  After mixing well, I placed this mixture into a cast iron skillet, then roasted on my grill when the chicken was done.  With the remaining spice blend, I added two cloves of minced garlic and enough olive oil to make the mixture mobile.  I placed this off to the side while I was roasting the corn.


The grill was around 400 F, so I closed the lid to help with the roasting process.  Every five minutes or so I gave the mixture a good mix.  After about 20 minutes the corn was starting the brown and caramelize.  So I removed the skillet from the grill and let cool while I prepared the final pieces of this pie.


While Hope sliced a jalapeño into rings, I removed the chicken from two thighs and diced an Early girl tomato.  Normally I would use a roma tomato, but, if you quarter an Early Girl and remove the pulpy interior, you can dice the flesh and substitute for a meatier roma.

The final piece was thinly sliced smoked chipotle cheddar cheese.  Time to build this pie.


On my dough, I brushed on a thin coat of the olive oil spice mix.  Next up I layered the cheese, followed by the roasted corn, onion, and garlic.  This was followed by the chicken, tomatoes, and jalapeño slices.  This pizza was ready to bake.


After 15 minutes in a 450 degree oven, my creation was ready.


I waited five minutes for the cheese to set up a bit, then I sliced this pie, grabbed a cold beer, and sat down to try this creation.


The first flavor that came though was the sweetness from the roasted corn, onions, and fresh tomato.  Where was the heat?  Well, that kicked in about five seconds later.  Lightly roasted jalapeño pepper, followed by the chili powder and cayenne, all tied together with the cumin.  This was one balanced pie.  Not that grab your tonsils, Atomic wing hotness.  But, rather that satisfying dull burn that deepens with each satisfying bite.  The chicken was a nice touch, but not needed.  If you wanted a protein on this pizza, you could even substitute shrimp instead of chicken.  Black beans maybe?  Why not.

I was more than happy with how this pizza turned out.  This recipe requires a bit of preparation, but it was well worth the work.

Thanks for stopping by,

Bill

Saturday, July 11, 2015

Rethinking Chicken - Sticky Fish Sauce Chicken

Every year at the Crossboarder Blues, Brews, and Que competition the organizers, Carol and Frank have two extra categories in addition to the four standard KCBS entries.  One is always an entry where you have to make something with your leftovers.  The second category changes from year to year.  This year the entry was Rethinking Chicken.  Carol challenged teams to make a chicken entry that conforms to KCBS turn in rules, but did not conform to the rubbed and sauced standard that every team turns in every competition.  Alabama White Sauce, go for it if you choose.  Peri-Peri?  Why not.  While flipping through my one of m recipe feeds on Clipboard one evening, I found an entry that would definitely fit the "outside the box" spirit of this competition.  As a matter of fact, the idea was not only outside the box, but it was off the table as well.  I chose a Sticky Fish Sauce chicken.

The recipe came from this website over at White on Rice Couple.  It appealed to my tastes: sweet and sour with an Asian flair.  Perfect for this competition.  To practice, I whipped up a batch of sauce for some chicken I was grilling one night.  I liked how it turned out.  The honey started to caramelize and was complemented by the sriracha, lime, and fish sauce.  A nice alternative to sweet American style chicken.  We were a go for Wilson.

Come competition day, I chose legs for this entry and I also chose to cook using my KCBS chicken recipe with some changes.  For seasoning, I lightly seasoned the chicken with garlic powder, onion powder, salt, and pepper.  After the first 30 minutes on the smoker, I eliminated the butter bath component from the cooking method.  Our cooking method turned out to be one and a half hours at 275 F.  The legs were dunked in the sauce after 30 minutes and then cooked in a pan.  After 30 more minutes, I reapplied the sauce and let the chicken cook for 30 minutes more.  That is it.


Our entry turned out pretty good.  But, there was an issue.  The fish sauce this time around was a bit on the overpowering side.  I realized that the sauce needed that caramelization that you get from the grill.  I should have finished these legs over a hot fire.  Live and learn I suppose.

The entry came in 22nd out of 27 teams.  I would say though that we scored in the top 10 for Rethinking Chicken.  Would I make chicken like this again?  Yes I would, The Youngest scarfed these legs down.  But, I would not use the smoker and make these strictly on the grill.

Thanks for stopping by,

Bill

Monday, December 16, 2013

Adventures in Chili: White Bean Chicken Chili

A few weeks ago I was sautéing some onions, garlic, and poblano peppers for some spanish rice that I was making for dinner.  The smell was so intoxicating, I decided that I needed to work this mix into a dish.  So, last weekend, I made some White Bean Chicken Chili.

First, I poached a chicken, adding some oregano and cumin into the poaching liquid for some Mexican flavor.


Once the chicken cooled down, I pulled the meat from the bone and saved six cups of the broth for my chili.


White Bean Chicken Chili

1 medium sweet onion, diced
2 poblano peppers, roughly diced
4 garlic cloves, minced
2 tsp cumin
1 tsp granulated garlic
1 tsp chili powder
1 tsp oregano
1/2 tsp parsley
Pinch of thyme
2 cups of cooked, shredded chicken
2 cans of Great Northern Beans, with the liquid
6 cups of chicken broth
Olive Oil for sautéing
Salt to taste

Heat up about 1-2 tbsp of olive oil in your pan on low heat.  Add onion, garlic, poblano pepper and a grinding of sea salt.  Sauté on low heat until the veggies are tender and starting to caramelize.


Add spices and allow to sauté for two more minutes.


Add the broth and beans and bring to a boil.  Allow the mixture to simmer with the lid cracked for two hours.


After the two hour simmer, turn off your heat, add your shredded chicken, and stir to incorporate.  After about 10 minutes, your chicken has warmed up.  So, ladle into a bowl and serve.


This is good stuff.  I like the creamy texture of the Great Northern Beans.  The poblano adds a nice kick.  All of the spices mingle to provide a taste treat.  This is a nice change of pace from your basic red chili.  Give it a shot.  You won't be disappointed.

Thanks for stopping by,

Bill

Saturday, December 14, 2013

Chicken Enchiladas

So, you have poached the chicken.  Now, what to do with the meat and broth.  Well, you make chicken enchiladas of course.

First, I made a batch of enchilada sauce with this recipe.

Then, I preheated the oven to 350 F.  While the oven is heating, you start building.

Take a tortilla (I used corn tortillas) and add a dollop of sauce.


Add chicken, roll up, and stack neatly in a 9 x 13 baking dish.


Cover with sauce and the shredded Mexican cheese of your choice.


Put in the oven and back until brown and bubbly on top.


I served with a side of spanish rice and refried beans.  This was a nice stick to your ribs kind of meal.

Thanks for stopping by,

Bill

Wednesday, December 11, 2013

How to Poach a Chicken

Poaching a chicken is a great way to obtain moist and tender chicken for many uses.  You even get some nice stock for all types of cooking uses.  The process is simple.  So, lets have a look.

I use Amish raised fryers that I get from my butcher for my poached chicken.  They average 2-3 pounds.  Just right for my needs.

I rinse the bird well with cold water.  Then, I place in my 12 quart stock pot with the following:

Two ribs of celery, broken in half
Four carrots, broken in half
One sweet onion, quartered
3 cloves of garlic, skin removed, left whole
1 tbsp of dried parsley
Enough water to cover the bird

Note:  You can also add other flavors depending upon the end use for your meat.  In this instance, I added 1 tsp each of cumin and oregano as this meat was headed for some chicken enchiladas later in the week.


Next, bring to a boil, then simmer at low heat for 80 minutes.  After 80 minutes of simmer, remove the bird from the broth and let cool.


Once cooled, pull the meat from the bone and shred.


I like to add the meat to homemade chicken soup, or add to other dishes such as the aforementioned enchiladas.  This meat also makes a great deli style chicken salad.

Finally, save the broth for soups or recipes that call for chicken broth.  I cool overnight and skim off the fat.  Then, the broth that I do not immediately use, I freeze for later use.

Stay tuned for the recipes where this bird was used.

Thanks for stopping by,

Bill

Sunday, October 27, 2013

Simple Roasted Carrots with Olive Oil, S&P

I heard about this recipe while listening to sports talk radio on the way home from work one day.  Of all places to get a recipe.  Josh Miller, the ex-Steelers punter, was talking about this recipe and I decided to give it a try as a side for some BBQ'd chicken.

First, clean and peel some whole carrots, slice thinly lengthwise, then cut in half.  Keep your dog out of the kitchen if they love carrots.


I took some olive oil and added some sea salt and fresh grated black pepper.  Then, I put the carrots in a bag with some olive oil and let sit.


Spread into a single layer on a cookie sheet for roasting.  I did some asparagus at the same time.


I placed on the top rack of our smoker at 350 F.  After 20 minutes, I stirred with a spatula, then let cook for 20 more minutes.  Here is what the final product looked like.


Crispy and sweet with a hint of salt.  They tasted just like sweet potato fries.  Good stuff.  We will be making this again for sure.

They went really well with our BBQ'd chicken.


Thanks for the idea Josh.

Thanks for stopping by,

Bill

Friday, August 16, 2013

Chicken Fajita Pizza

A few months ago, the siren song of a Costco sampler pulled us in to try some Chicken Fajita Pizza.  I forget the brand name.  But, the sample was delicious and the Costco business model was confirmed: we ended up with a box in our cart.  The pizza was a very thin, tortilla like crust.  The sauce was enchilada in nature.  The cheese was Monterrey jack with grilled chicken, onion, and green pepper toppings.  But, why buy frozen when you can make fresh?  So, we decided to try and recreate at home.

The day before, I made a batch of enchilada sauce from a recipe that I found on the web.  Here is the recipe.  My only substitution was olive oil for the lard.  After a two hour cook down, I cooled and placed in the refrigerator for use the next day.  The finger test told me that I have a nice base sauce for future experimentation.  But, I digress.

The next day, I made a simple marinade for two, boneless chicken breasts:

1 Tsp of Stubbs Chile Lime Rub
Juice of 1 lime
Enough olive oil to become flowable


Into a plastic bag with the chicken for a four hour marinade:


After the marinade, I fired up the grill.  When ready, I carefully grilled the breasts till an internal temperature of 155 F, then I wrapped in foil to rest until ready for use:


Meanwhile, Hope made a batch of homemade pizza dough.  When complete, she spread the dough on a pan, then layered with a thin coat of the enchilada sauce, a thin sprinkling of queso blanco, a layer of Kraft Four Cheese Mexican, sweet onion and green pepper with a small dice, and the chicken breast, diced small.

The pizza went on the top rack of our Stumps Stretch at 425 F.  After 10 minutes, the pie was rotated 180 degrees and allowed to cook 10 more minutes (20 minutes total).  Then, the pizza was brought inside, allowed to cool for five minutes, then sliced.  Here is the final product:


This chicken fajita pizza was very close to what we had purchased from Costco.  The dough was thin and crisp.  The onion and pepper still had some crunch and the chicken was grilled to perfection with a great taste.  The only thing I would do different in the future is to add a bit more sauce, but not much more.  This pie has become a new family favorite.

Thanks for stopping by,

Bill

Sunday, April 21, 2013

Slappin my Chicken: Slap Yo Daddy Chicken Rub Review and Chicken Practice

A couple of weeks ago we did a practice chicken cook to try and perfect our recipe for 2013.  At the same time we tried a new rub:  Harry Soo's Slap Yo Daddy Chicken Rub...


After opening the package, we performed the obligatory sniff and finger test.  The chili, onion, garlic, and cumin flavors where obvious upon nasal spectroscopy.  The finger test added a taste of citrus that brought it all together.  This was a rub I could fall in love with.  But, the biggest test was up next: competition style chicken...

We are trying to get away from thighs.  I love a good chicken thigh, smoked to perfection with a blend of rub and sauce.  What I do not like is trimming a scraping a thigh to get bite through skin.  So, we have been experimenting with legs and thighs this off season.  First, I started with some whole chicken legs...


Using poultry shears, I separated the leg from the thigh, removed the knuckles from the thigh bone, and marinaded overnight in Italian dressing.  In the morning, I removed from the marinade, patted dry and placed into foil pans.  Then, I seasoned both sides with a coating of Slap Yo' Daddy Chicken rub...


Once the rub became "wet", I applied a second coat on the top...


The chicken then hung out in the refrigerator all day until hitting the smoker.  The cooking process is as follows:

30 minutes on the rack, 275 F, skin up.
Dunk in sauce, placed into a foil pan, skin side down, 30 minutes at 275 F.
Remove from pan and place on rack, skin side up.  Applied sauce at start, then after 15 minutes.  Ramped temperature up to 300 F.  Pulled after 30 minutes.  So, that is a total cook time of 1.5 hours for those keeping score.  Here is how they looked:


I have to say, I love the SYD chicken rub.  I nice mix of spices with a bit of heat.  Actually, if you go a little heavy handed, it is a lot of kick.  But, after a night in the frig, the heat did mellow out a bit.  So, if you are adverse to spice, watch how much you put on your yardbird.  I will be backing off the rub a bit for competition.

As for the chicken, I am liking the tender and moist meat that the higher cook temperature is creating.  The skin on half of the thighs was bite through and the skin on all of the legs was bite through.  I believe that for our first competition this year, we will be turning in legs that are separated from the thighs on a whole leg.

Overall, the Slap Yo' Daddy Chicken rub will be part of our first competition.  The blend of spices and citrus flavor is perfect with the dressing marinade and sauce.  Rating?  3.5 out of 4 stars.  I can't wait to try this rub on some other cuts of meat...

Thanks for stopping by...

Bill

Friday, May 25, 2012

The Great Ginger Garlic Paste Experiment

A friend of mine brought a bottle of this stuff in for me to try in recipes:  Ginger Garlic Paste...


There is so much garlic in this stuff, you can smell it through the seal.  Here is what is looks like inside...


It basically looks like prepared horseradish.  Anyway, I decided to make a marinade for chicken.

Ginger Garlic Paste Marinade:

1/4 cup olive oil
1 tsp ginger garlic paste
1 tsp onion powder
1 tsp honey
1 tsp Sriracha sauce
Juice of 1 lemon
S&P to taste


Place the chicken in a plastic bag with the marinade and let sit for about an hour and a half...


Tossed on the grill.  Indirect heat for about 30 minutes then about 5 minutes of direct heat to crisp up the outside...


Good stuff.  Moist, tender, with a nice ginger garlic taste.  The sriracha gives a nice kick as well.

You'll be seeing this paste in other recipes in the future.

Thanks for stopping by,

Bill

Tuesday, May 15, 2012

Oink, Cluck, and Moo... Last Full Practice on Ole Blue...

Did a full practice on ole Blue yesterday. I would say everything turned out real good...

Image

Image

Brisket and Butt...

Image

Image

I am staying with the baby backs. My butcher gets some beautiful ones that are good and meaty...

Image

Going with legs and pulled chicken. The pulled chicken is a big hit for sure...

Image

I was never a Dodge fan, but my friends new Challenger is Bad... I think the bra ruins the look. Any other opinions?

Image

Image

Enjoy,

Bill

Friday, May 11, 2012

Competition Style Chicken

After seasoning Ole Blue, I threw some yardbird on the racks for some chicken practice...

We use thighs for competition.  They are nice and juicy and full of flavor.  The only problem is, they take a ton of work.

So you get bite through skin, you need to remove the skin and scrape the fat off of the back side...


I use a single blade, disposable razor.  Just hold one end of the skin and pull back...


I used to use a butter knife, but it tends to rip the skin if you are not careful.  The razor is perfect.  It is a tough job that in my opinion, is the worst in the competition BBQ world.  You would not believe the amount of fat that comes off of 10 chicken thighs.  Nasty!

Anyway, after scraping the fat, I trim the thigh to ensure the skin will wrap around the meat.

I am also trying some legs to see if I can get nice bite through skin on them with less work.


So, I tossed the chicken and a fryer in a batch of Poultry Brine and let them go for a 6 hour swim.

I seasoned the thighs and legs with Butchers Honey BBQ rub, then wrapped the skin back around the thigh meat.  I also did a beer can chicken as we would like to try and add some pulled chicken in our boxes this year.

The thighs and legs go on the top rack at 250 and the beer can chicken went on the bottom rack.  I used a 50/50 mix of hickory and peach for this cook.

30 minutes on the rack, dunk in sauce, 30 minutes in a pan, then 30 more minutes on a rack with a sauce glaze...


Beer can chicken is looking nice and brown...


Finished product...


Nice color, good taste, and bite through skin on both the thighs and legs.  A very successful practice.

As for the pulled chicken, we mixed some dark meat in with the breast, then lightly sauced and tossed to mix it all up...


Nice taste and very moist.  We might just put this in a box this year.  We are not 100% there, but we are very close...

Thanks for stopping by...

Bill