Recently, we were fortunate enough to receive a few cookbooks to peruse and review. One of the books that stood out was a cookbook on different ways to gill pizza: Grilled Pizza The Right Way by John Delpha. From John's biography, he is a former Army officer and helicopter pilot turned chef. His first professional job as a chef was at Al Forno in Providence, RI where he learned the art of grilling pizza. In addition, he is a member of iQue, a championship cooking team won the 2009 Jack Daniel's World Barbecue Championship and the associated the "I Know Jack About Grillin" two times. I think he might know a little something about grilling pizza.

The book is broken down into nine sections, covering everything from the basics of dough and sauce, classic style pizzas, seafood, veggie, dessert, and flatbreads. There is even a section titled "The Masqueraders" where John recreates sandwiches in pizza form. Two examples are the Thanksgiving Pizza and The Reuben Pizza. In addition, there are some great recipes in the book for various sauces. More on the sauces later.
I was instantly drawn to the Shaved Brussels Sprouts, Bacon, Pecorino, and Mozzarella Pizza. At the same time, I made batch of the Basic Tomato Sauce to make some traditional pies for the less adventurous. But, lets go to the beginning and start with the dough.
Now, I hate working with dough. But, the recipe is simple. Dissolve yeast in warm water with some sugar, let sit five minutes, add your dry ingredients, knead in a mixer with a dough hook, then bam, you have some dough. I went outside the box and tried the recipe in our bread maker. Dissolved the yeast and sugar in the warm water, added my dry ingredients, and pressed start. I let the dough go through one knead and raise cycle, then I removed and let the dough sit in a bowl covered with a towel until I was ready to make pizzas.

Guess what? It works and it works well. I actually like this dough better than my go to recipe. This dough made a nice, easy to handle, thin and crisp crust.
Next I made the Basic Tomato sauce. When reading the recipe, it took me back to conversations that I have had with my Italian colleagues concerning the correct way to make sauce. How is that? Garlic, olive oil, salt, and peeled tomatoes. Period.

Good stuff. Add some basil and you have a quick sauce to put over some pasta as well.
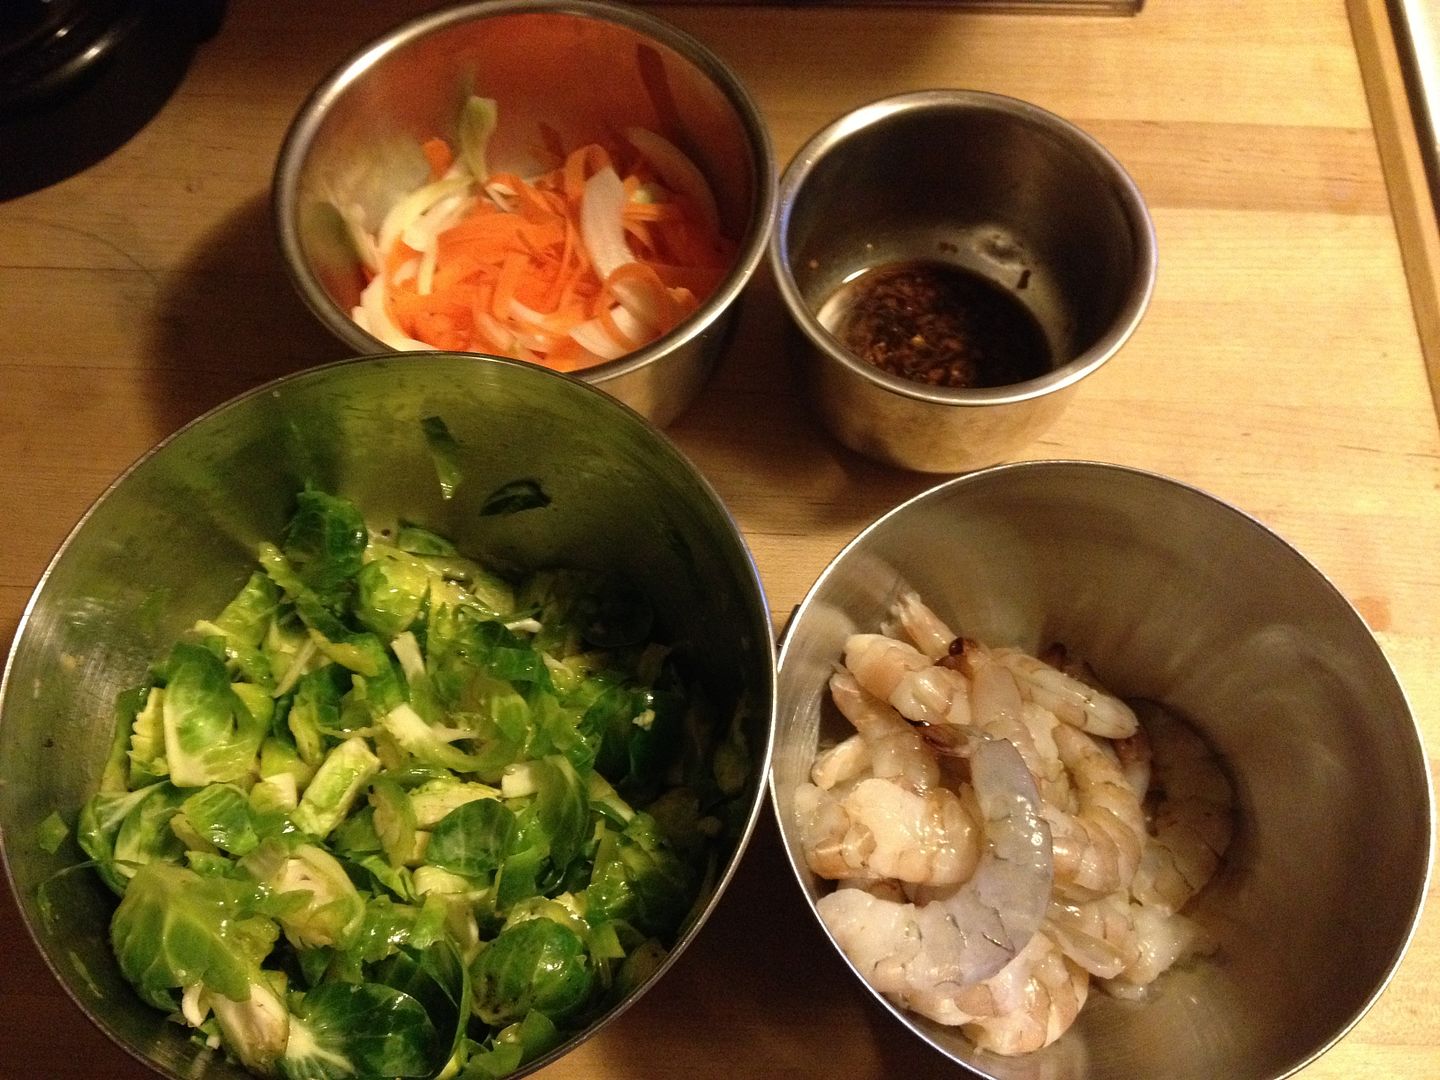
For the Brussels sprout pizza, I followed the directions exactly:
Clean and thinly slice your spouts:

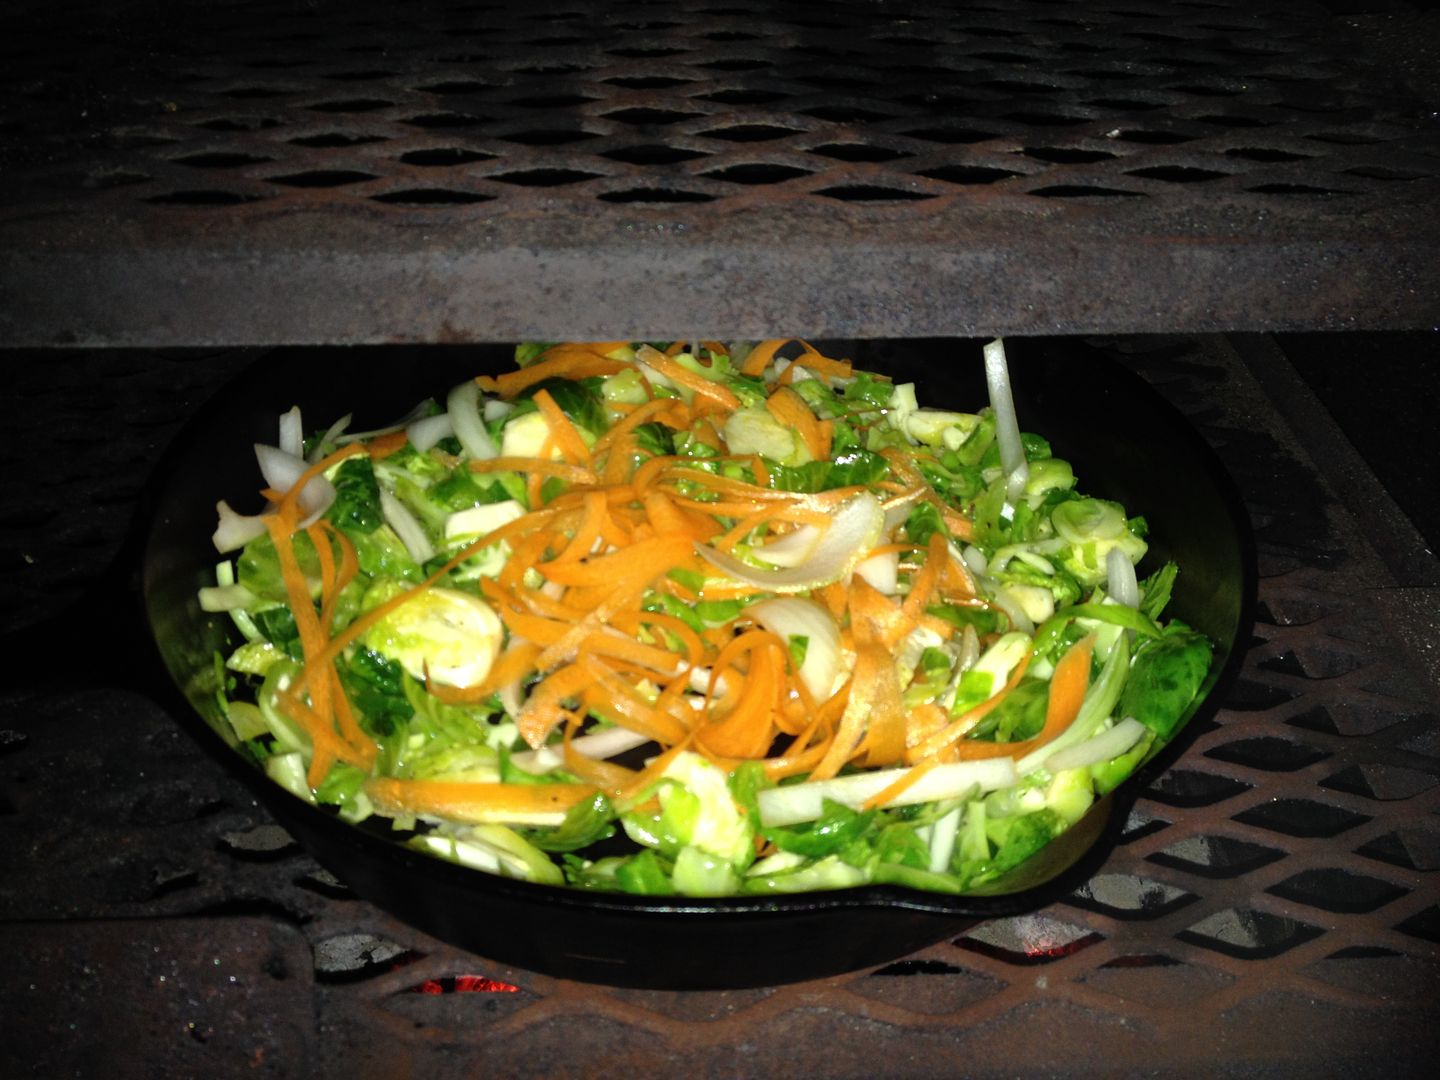
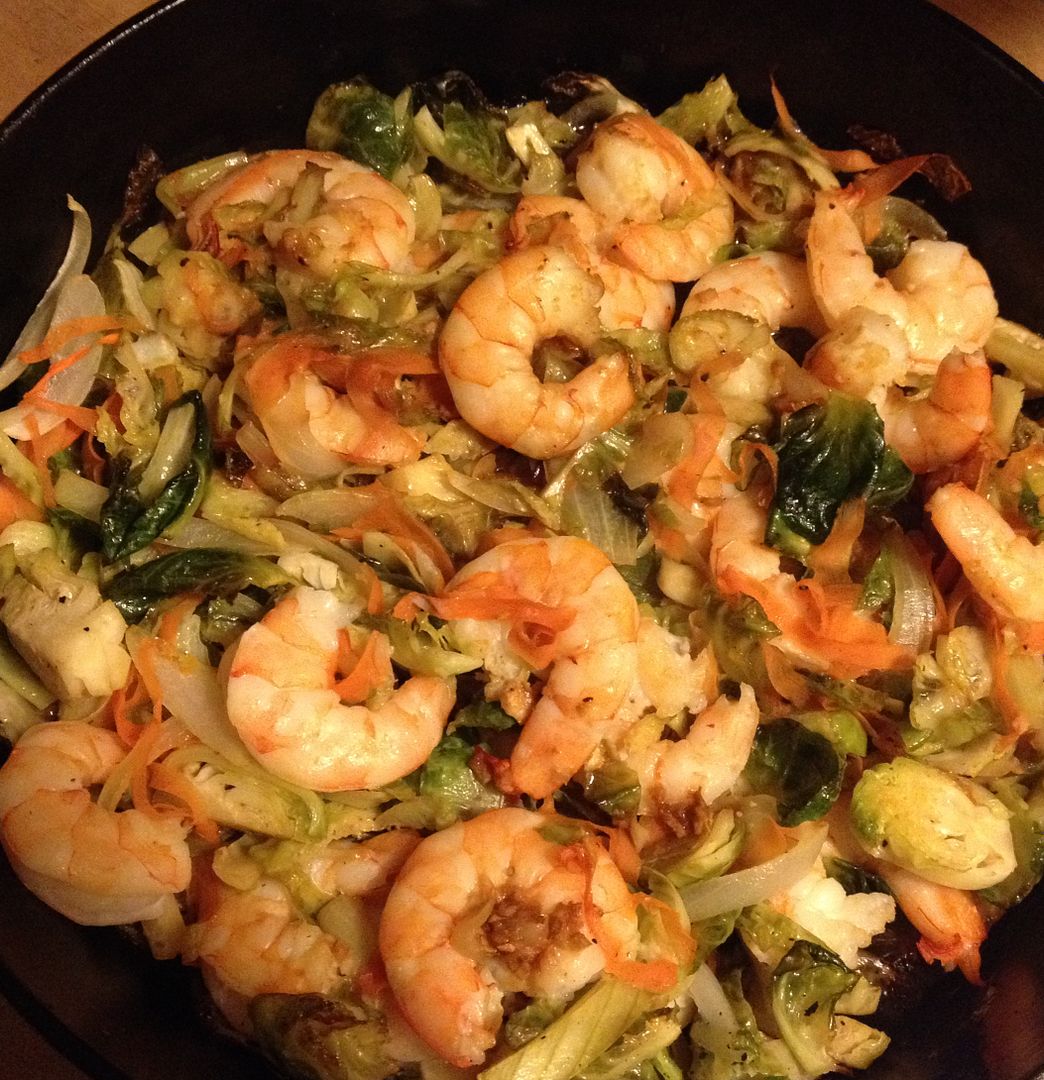
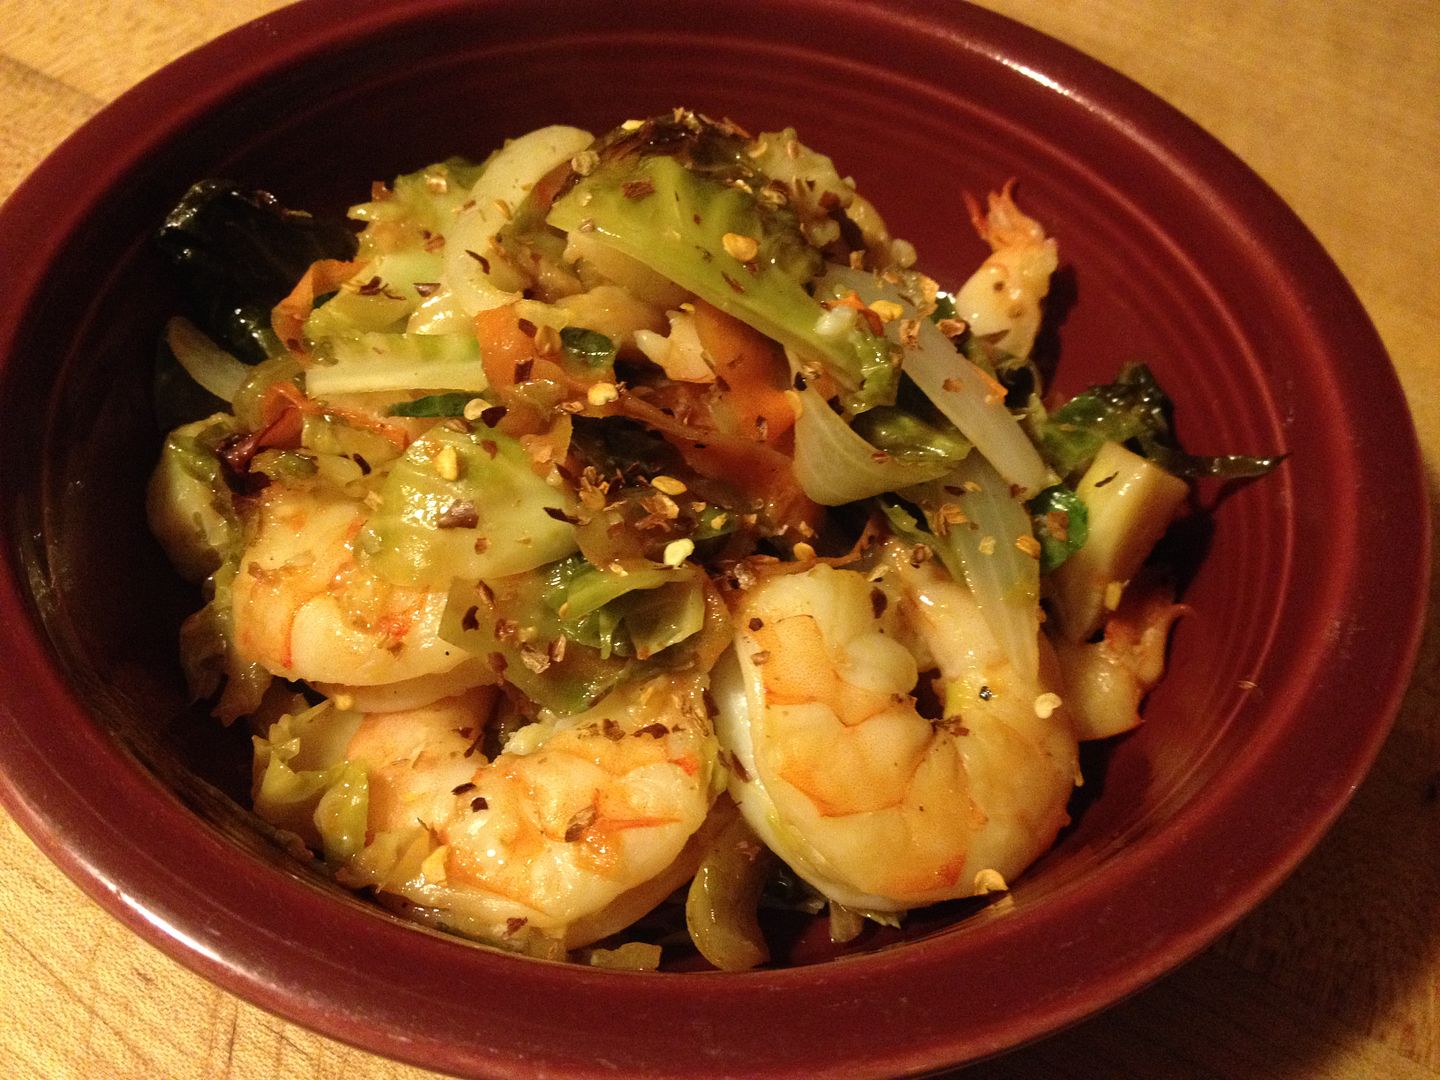
Saute in olive oil at high heat until the smaller pieces get crispy and the larger pieces start the caramelize, about three minutes.
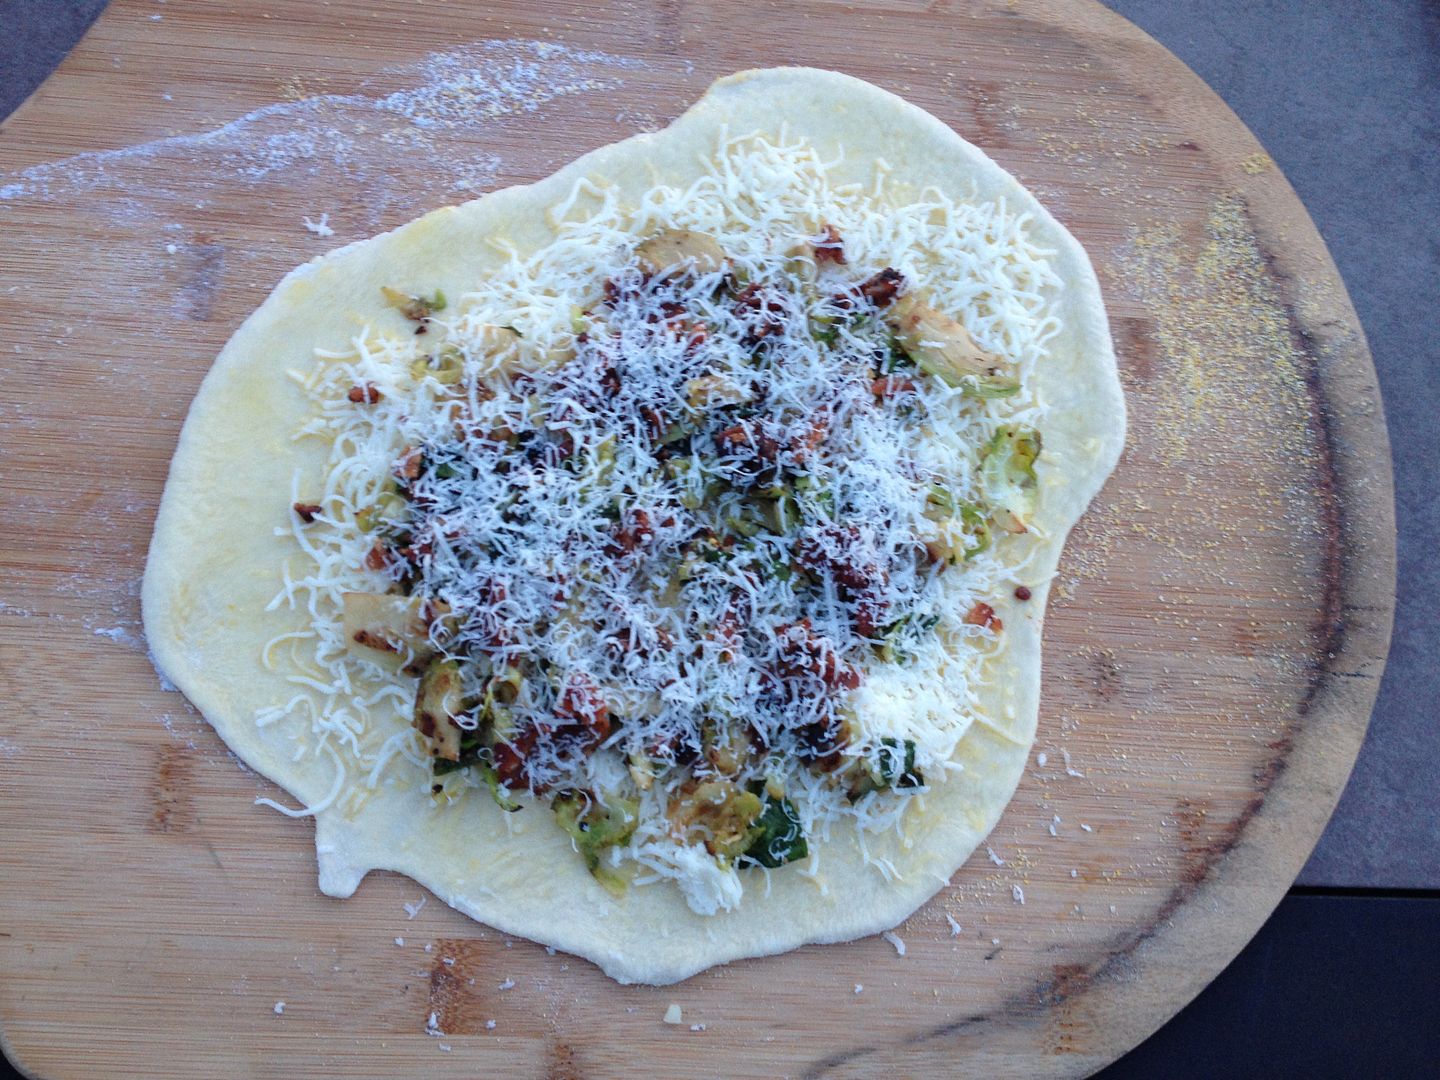
After frying some bacon just past limp but not quite crisp, I assembled my pizza. First you brush your stretched out dough with some olive oil, add your mozzarella, sprouts, and bacon, then top with the grated pecorino.

I slid my pie onto the grill and turned about half way through a total cook time of about four minutes.

How was it? Better than I could have imagined. The spouts caramelized even more. The bacon added flavor that only bacon can add. My friends were even more surprised at how good this pizza was. I even had to make one to go for a late night snack.
Then, we broke into the more traditional pies with the tomato sauce and our other toppings. This pizza was sauce, mozzarella, mushroom, onion, and bacon.

I cooked this pizza following the instructions above.

One of the better pizzas I have had in a while. Usually our homemade sauce is filled with Italian herbs and spices. But, this simple sauce does well on its own. It reminded me of pizzas I have had while visiting Italy on business. Simple, but full of flavor.
If you have ever wanted to try grilling pizza, but were not confident of your skills, this is the cookbook for you. With the detailed methods, step by step pictures, and multitude of recipes, I am confident that even a beginner grill master could produce a pizza much better than any your could buy. The recipes in this book sound so good, you could even make them in your oven in the dead of winter. Stay tuned for more recipes from this cookbook as spring turns to summer.
Thanks for stopping by,
Bill

The book is broken down into nine sections, covering everything from the basics of dough and sauce, classic style pizzas, seafood, veggie, dessert, and flatbreads. There is even a section titled "The Masqueraders" where John recreates sandwiches in pizza form. Two examples are the Thanksgiving Pizza and The Reuben Pizza. In addition, there are some great recipes in the book for various sauces. More on the sauces later.
I was instantly drawn to the Shaved Brussels Sprouts, Bacon, Pecorino, and Mozzarella Pizza. At the same time, I made batch of the Basic Tomato Sauce to make some traditional pies for the less adventurous. But, lets go to the beginning and start with the dough.
Now, I hate working with dough. But, the recipe is simple. Dissolve yeast in warm water with some sugar, let sit five minutes, add your dry ingredients, knead in a mixer with a dough hook, then bam, you have some dough. I went outside the box and tried the recipe in our bread maker. Dissolved the yeast and sugar in the warm water, added my dry ingredients, and pressed start. I let the dough go through one knead and raise cycle, then I removed and let the dough sit in a bowl covered with a towel until I was ready to make pizzas.
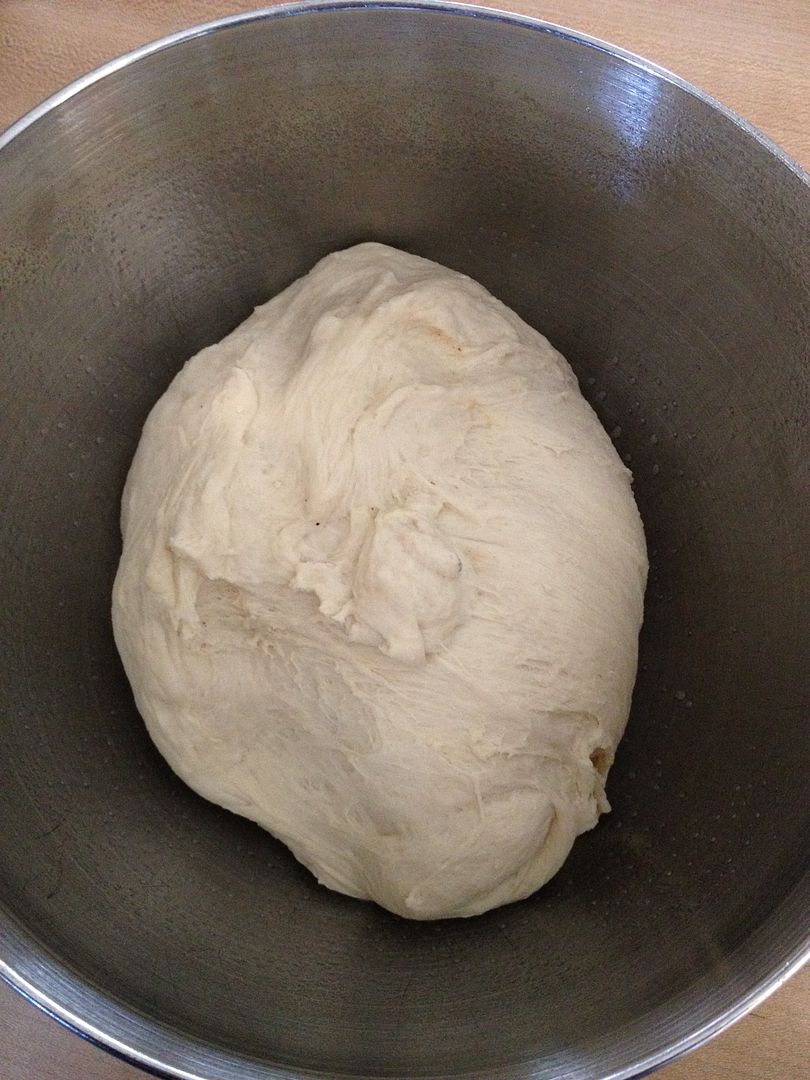
Guess what? It works and it works well. I actually like this dough better than my go to recipe. This dough made a nice, easy to handle, thin and crisp crust.
Next I made the Basic Tomato sauce. When reading the recipe, it took me back to conversations that I have had with my Italian colleagues concerning the correct way to make sauce. How is that? Garlic, olive oil, salt, and peeled tomatoes. Period.

Good stuff. Add some basil and you have a quick sauce to put over some pasta as well.
For the Brussels sprout pizza, I followed the directions exactly:
Clean and thinly slice your spouts:
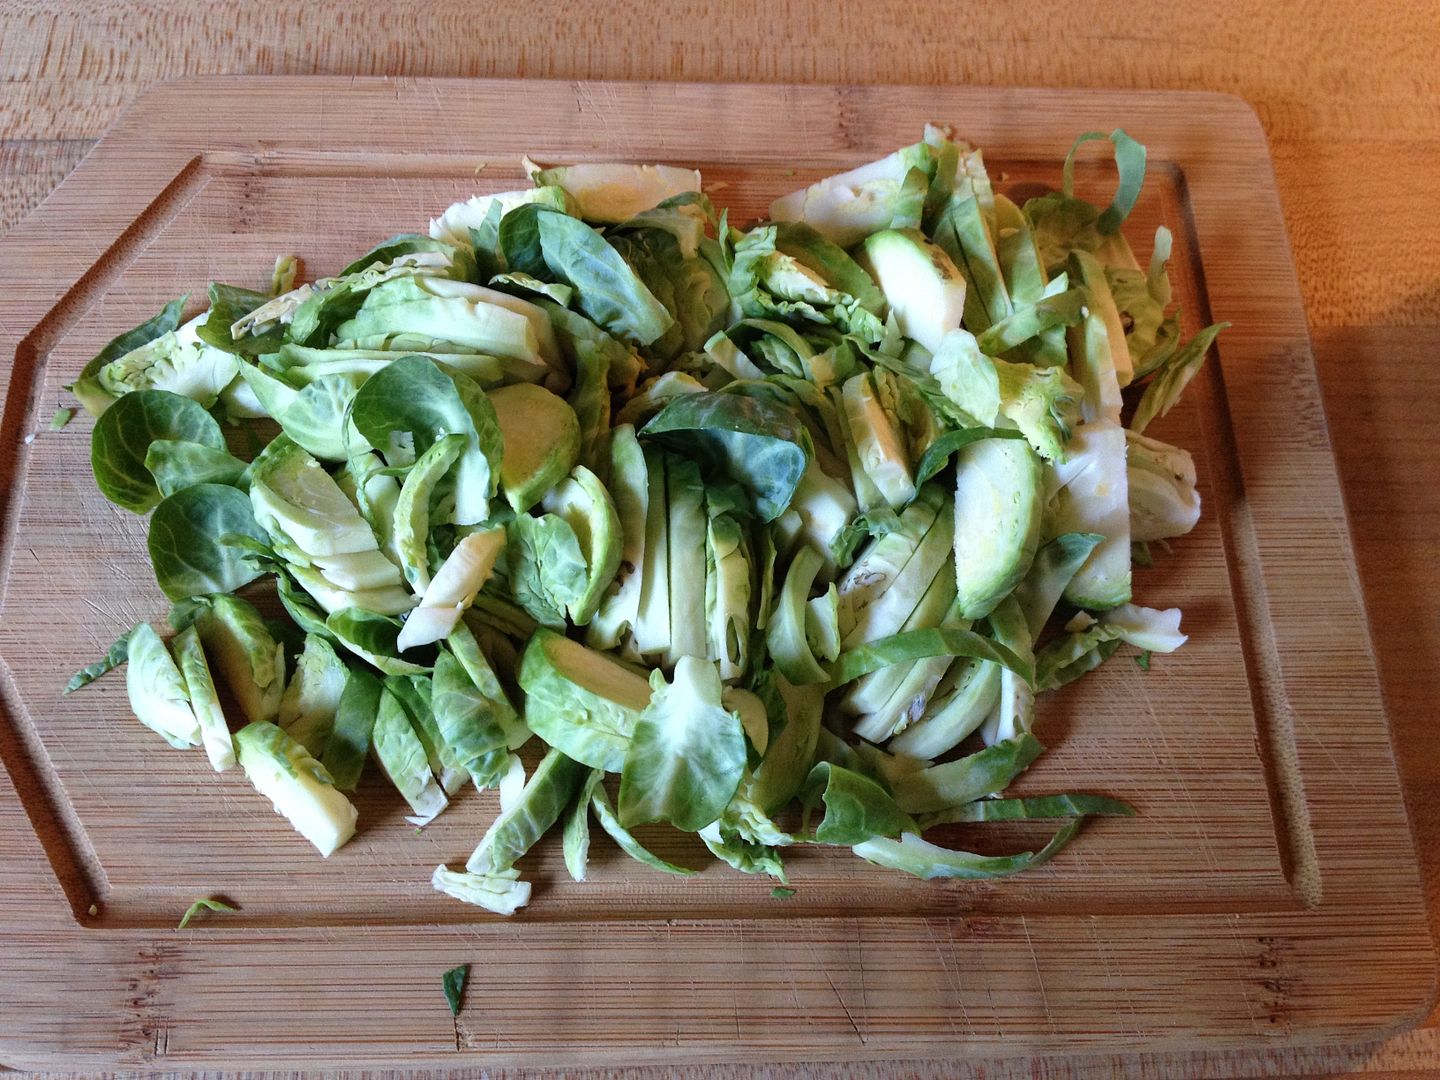
Saute in olive oil at high heat until the smaller pieces get crispy and the larger pieces start the caramelize, about three minutes.
After frying some bacon just past limp but not quite crisp, I assembled my pizza. First you brush your stretched out dough with some olive oil, add your mozzarella, sprouts, and bacon, then top with the grated pecorino.
I slid my pie onto the grill and turned about half way through a total cook time of about four minutes.

How was it? Better than I could have imagined. The spouts caramelized even more. The bacon added flavor that only bacon can add. My friends were even more surprised at how good this pizza was. I even had to make one to go for a late night snack.
Then, we broke into the more traditional pies with the tomato sauce and our other toppings. This pizza was sauce, mozzarella, mushroom, onion, and bacon.
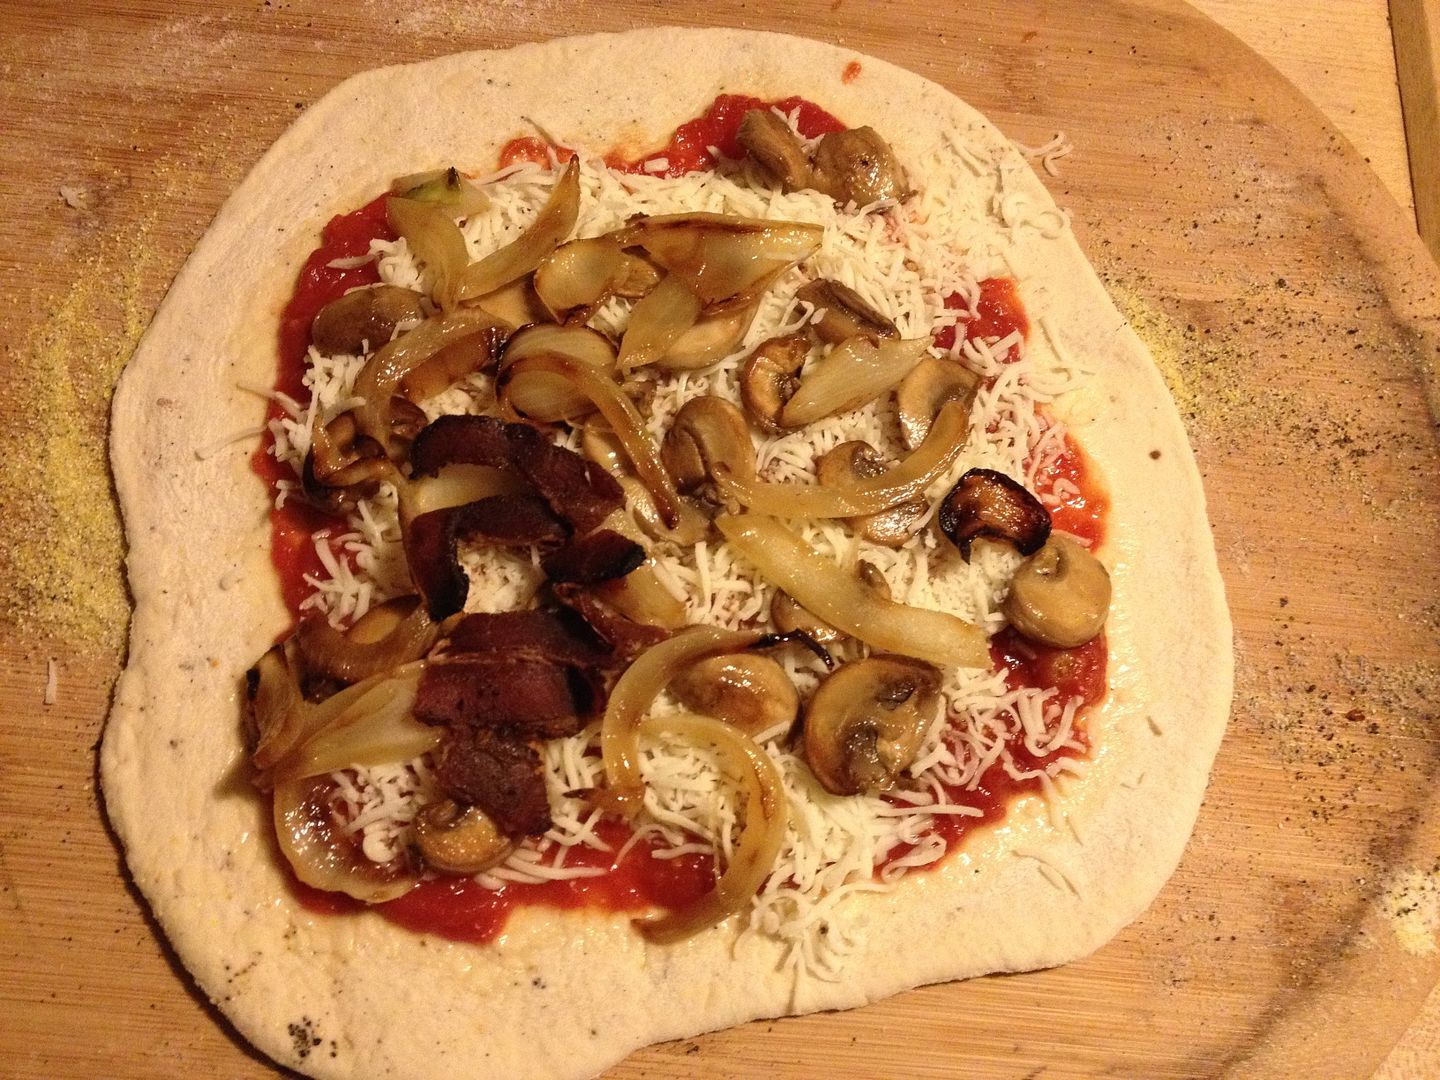
I cooked this pizza following the instructions above.
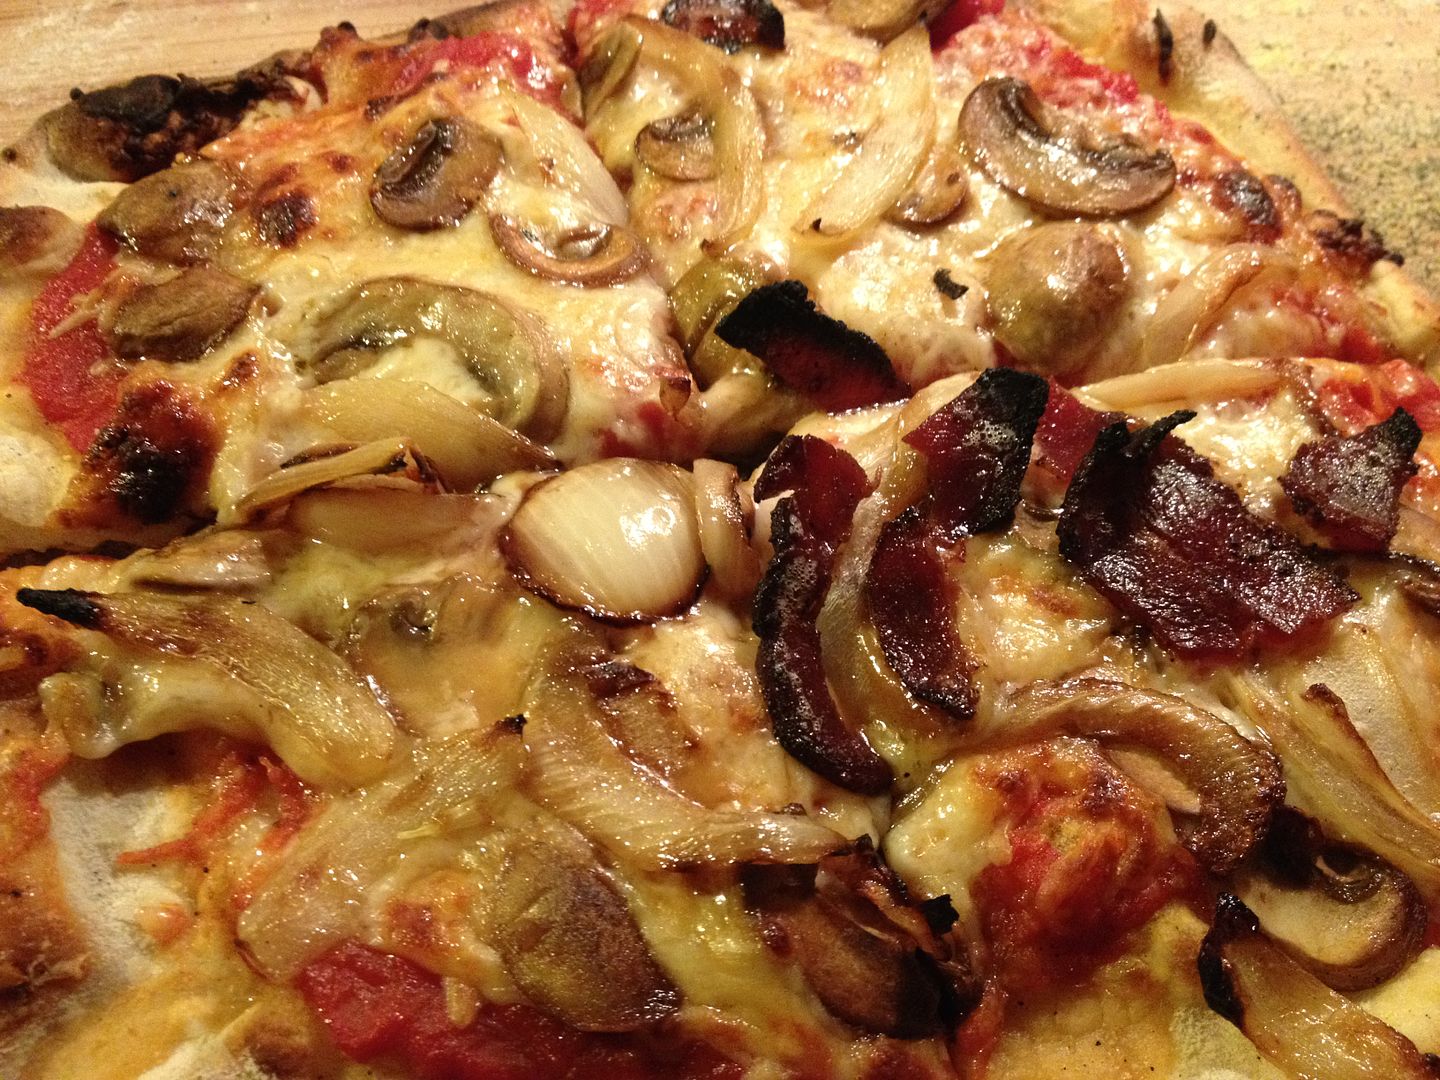
One of the better pizzas I have had in a while. Usually our homemade sauce is filled with Italian herbs and spices. But, this simple sauce does well on its own. It reminded me of pizzas I have had while visiting Italy on business. Simple, but full of flavor.
If you have ever wanted to try grilling pizza, but were not confident of your skills, this is the cookbook for you. With the detailed methods, step by step pictures, and multitude of recipes, I am confident that even a beginner grill master could produce a pizza much better than any your could buy. The recipes in this book sound so good, you could even make them in your oven in the dead of winter. Stay tuned for more recipes from this cookbook as spring turns to summer.
Thanks for stopping by,
Bill