Search This Blog

Saturday, December 28, 2013

Pork Rib Roast and my New Favorite Toy

With New Years right around the corner, I thought it would be helpful to repost my recipe for Pork Rib Roast.  I hope you find it helpful...

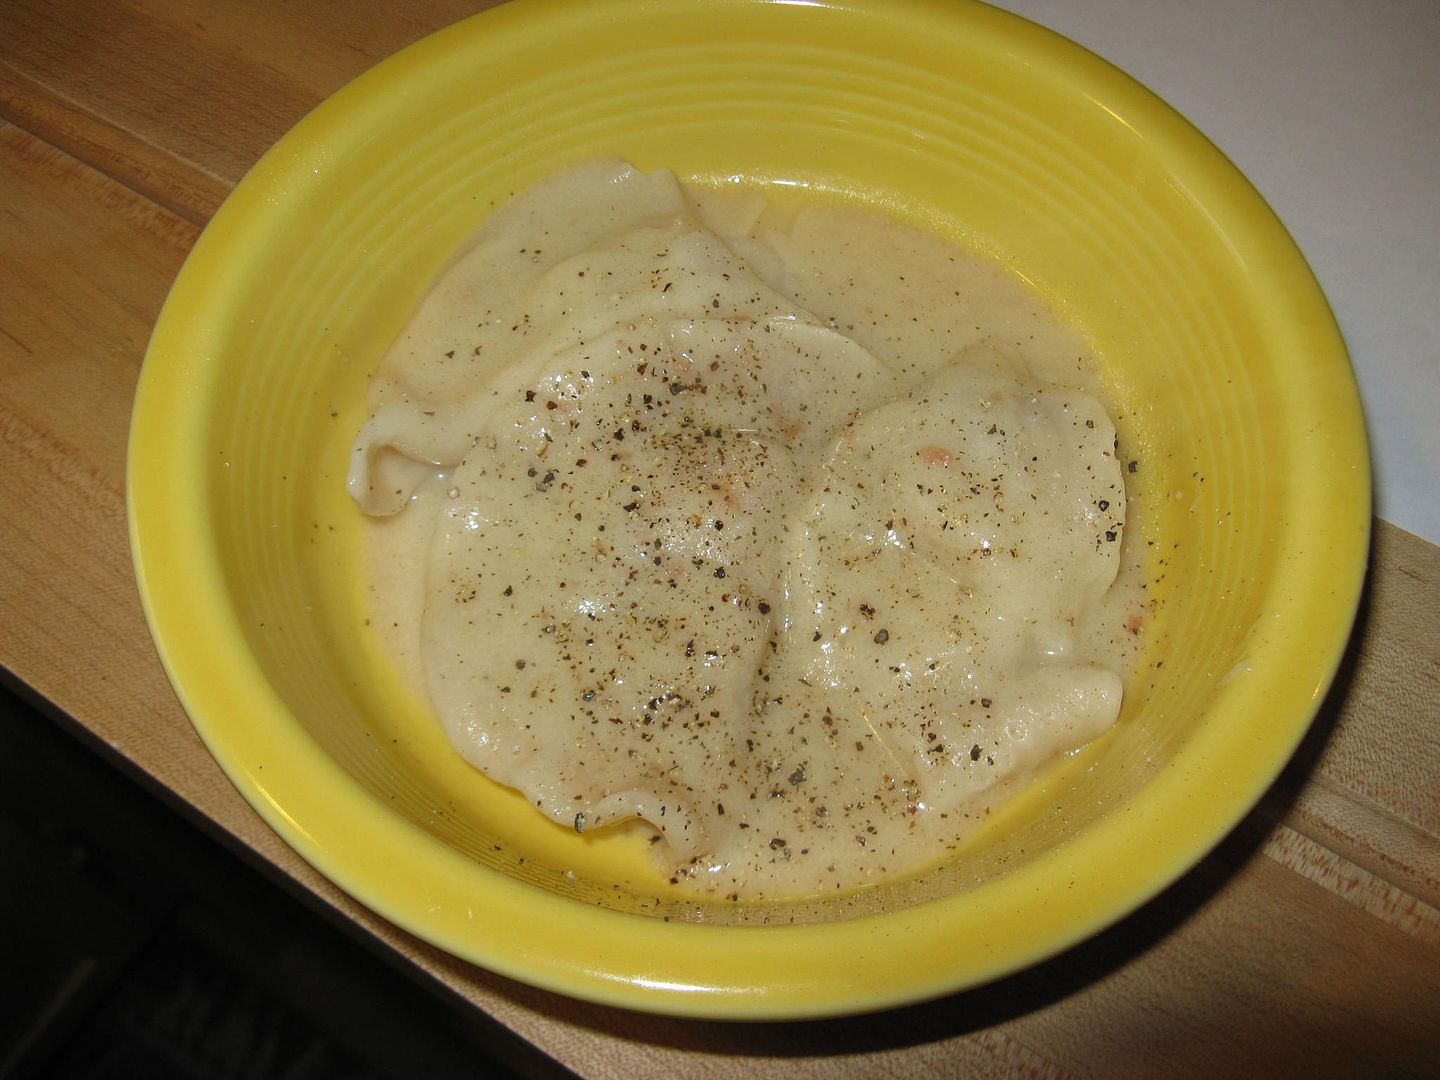
One of our family traditions around here is Pork and Sauerkraut on New Years Day.  It is supposed to bring good luck and money in the New Year.  Being a person with a scientific mind, I should not be influenced by superstitions, but I am a superstitious sort.  So, why tempt fate.  ;)  Plus, I love pork roast and sauerkraut.

This year, instead of using my roaster, I decided to use my 9 quart dutch oven for roasting duties.  Why?  It is big enough, it is well seasoned, and it makes clean up a snap.  My dutch oven is a Lodge Logic 9 quart that I picked up on sale at Amazon for $79.  I don't know how they do it for that price, but I am not one to complain when I find a good deal.


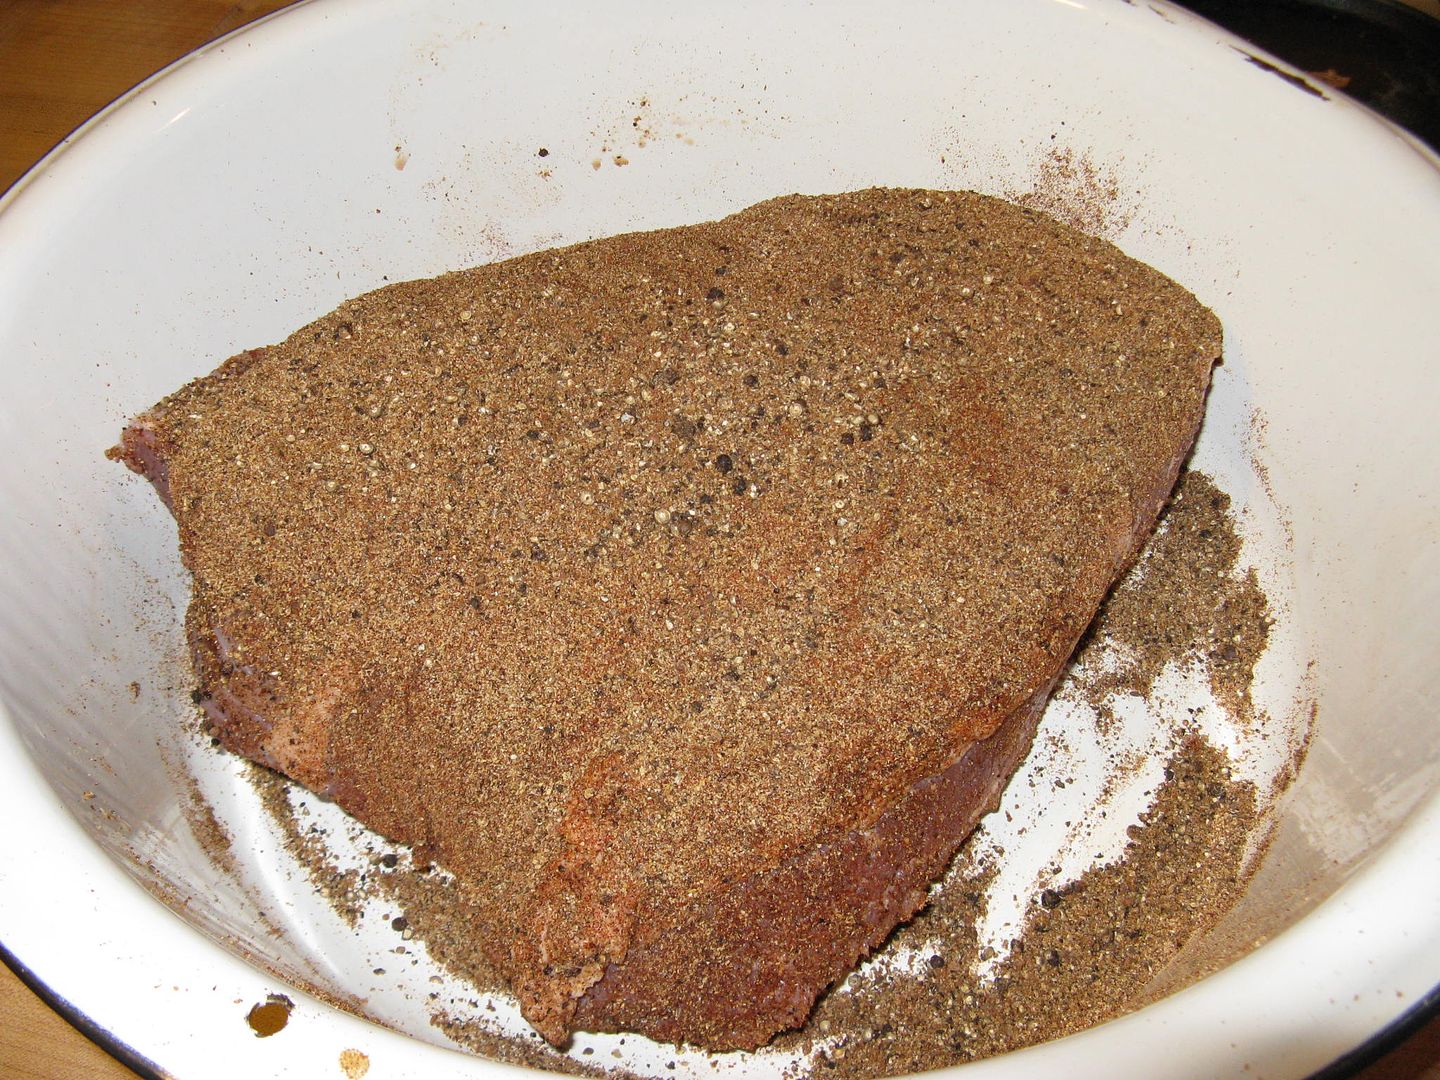
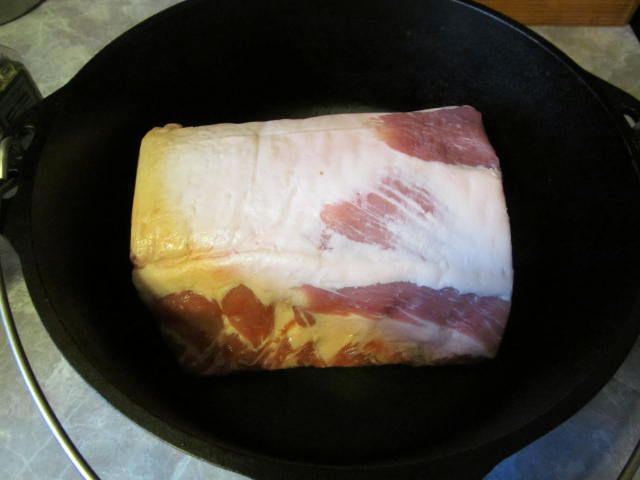
Here is the quest of honor.  It is a 5.5 lb pork rib roast, ribs still in place...


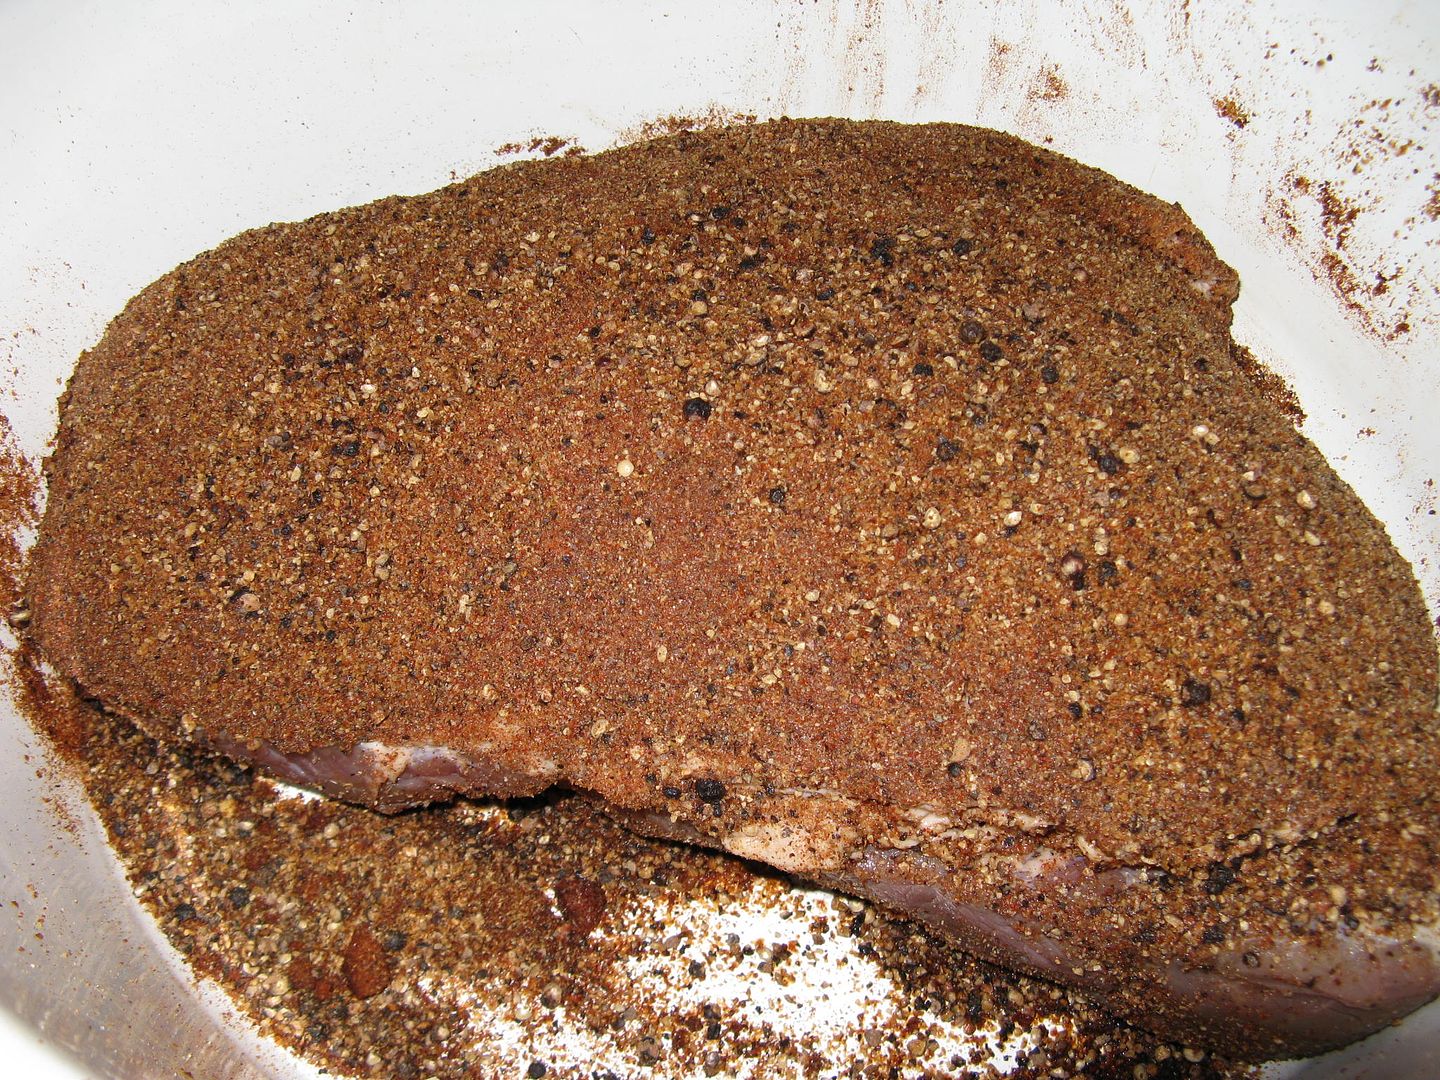
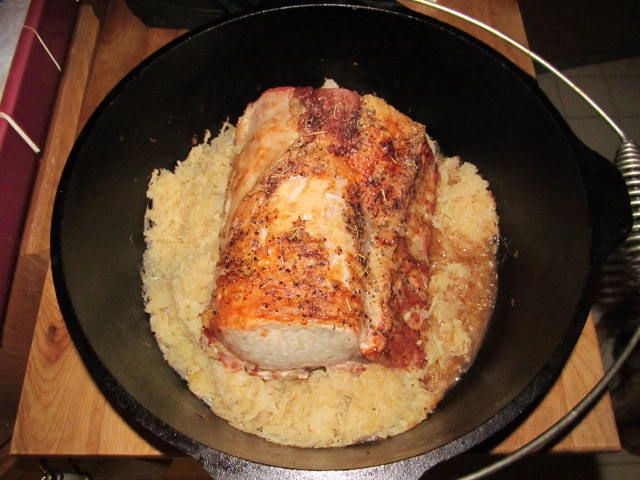
To cook this beautiful piece of meat, it is not hard at all.  First, I placed the roast in the dutch oven, bones down.  Then, I rubbed the ends, and only the ends, with olive oil.  Then, on the top, I seasoned with sea salt, cracked pepper, rosemary, thyme, and sage...


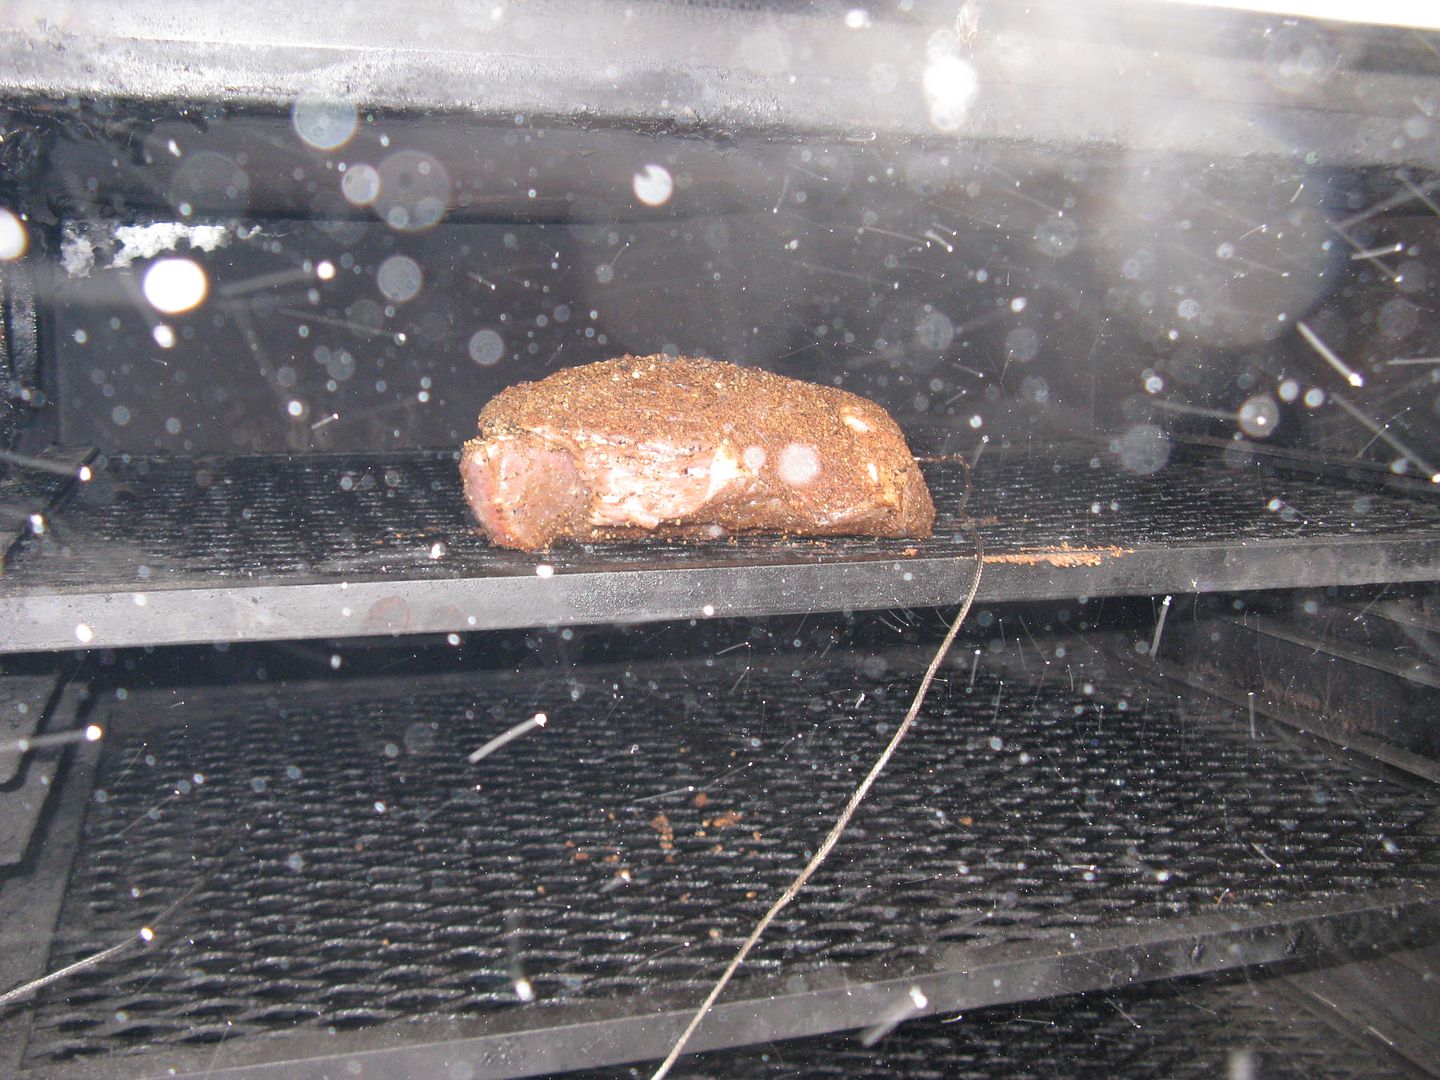
I heated the oven to 425 F, then placed the roast in the oven on the middle rack.  After 20 minutes, I lowered the heat to 325 F for the rest of the roasting time.  I roasted until the internal temp was 150 F.  Then, we drained our sauerkraut, placed around the outside of the roast, and put back in the oven until the roast reached 155 F internal temp, about 20 more minutes.  Total cooking time was about 2 and a quarter hours...


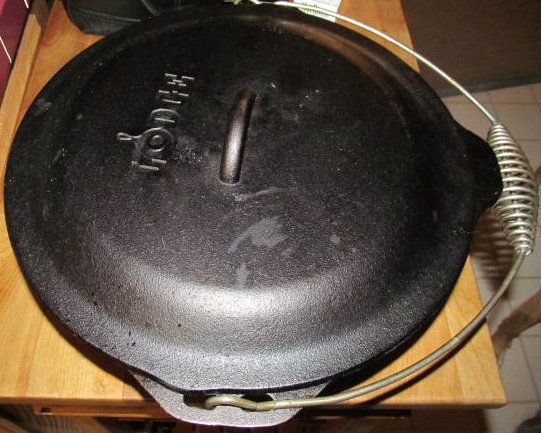
Once the roast was done, resting is a snap.  Just put the lid on the top of the dutch oven and sit on a counter out of your way...


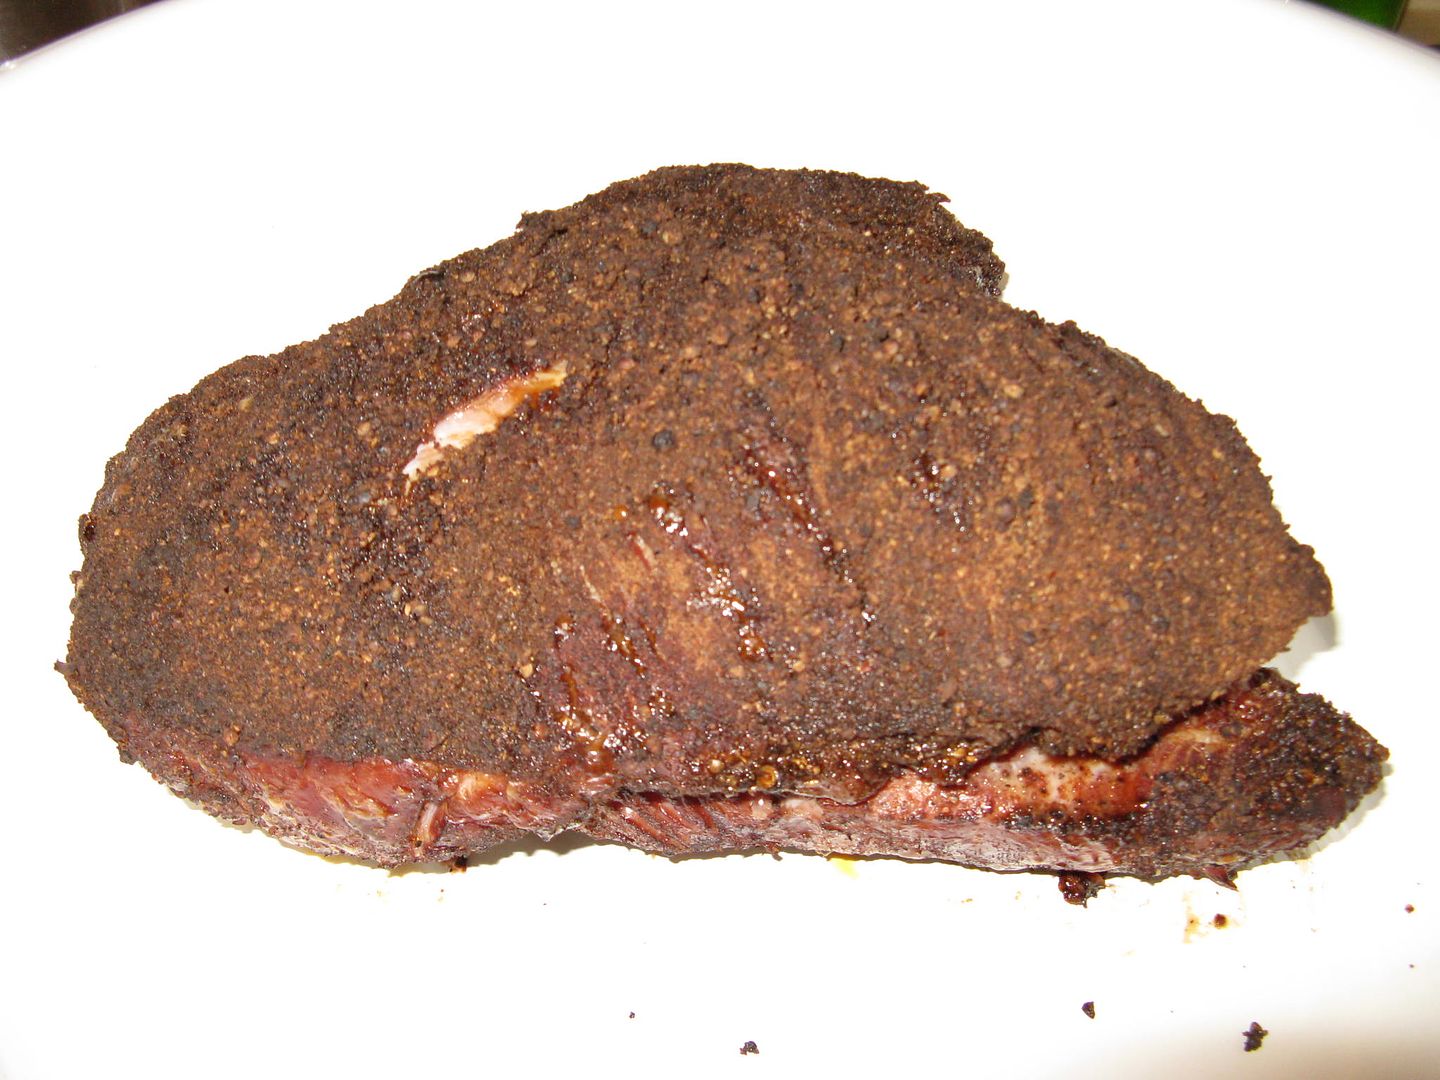
After about 15 minutes of resting time, I cut the bones off the back of the roast and sliced for serving...


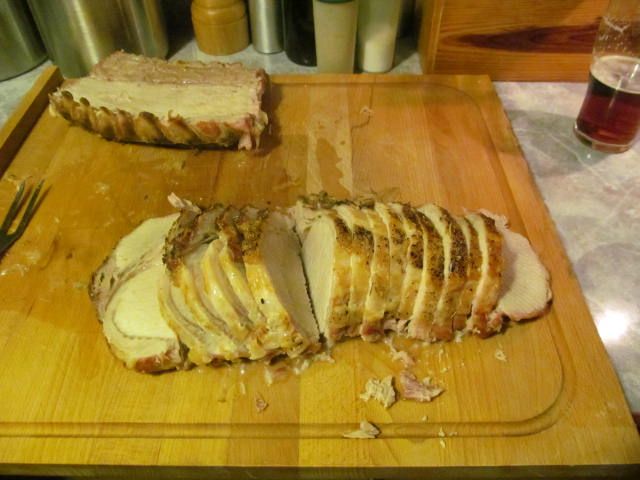
I also cut the bones down into little tasty, hand held treats.  The roast itself had a nice flavor with hints of sage and rosemary.  Cleaning up the cast iron was a snap.  Just scrape off the browned bits, rinse with hot water, dry, and put away until you need your dutch oven the next time.

Thanks for stopping by...

Bill

Friday, December 27, 2013

Using up your Leftover Prime Rib

Left over prime rib?  It does happen.  But, you always have those bones.  Some people slow roast them the next day with BBQ sauce for a tasty treat.  The only problem with that is they can be riddled with fat and chewy.  I like to turn the ribs from my rib roast into stock for soups.  That way I can enjoy this flavorful stock months later.  How do you make this stock?  It is easy.  Off to the kitchen.

First, into my 12 quart stock pot with the strainer insert, I put in the ribs from my roast.  I also add the over cooked end slices of meat and any scraps from the carving process.


Next, I add the following:

1 medium sweet onion, quartered
4 carrots, broken in half
2 ribs of celery, broken in half
3 garlic cloves, paper removed
About 1/8 cup of dried parsley
Enough water to cover everything


Bring to a rolling boil, then simmer lightly on low heat over night.  This batch went about 12 hours.

After the simmer, remove the strainer and discard the veggies and bones.  Then, when cool enough, place in your fridge to cool and to allow the fat to come to the top and solidify.  Conveniently, Mother Nature provided us with three inches of refrigeration material yesterday.  So, I did not have to use refrigerator space.


After about nine hours outside, the fat had come to the top and solidified nicely.  I brought the stock pot inside and removed the fat with a slotted spoon.


There you have it.  99% fat free stock that is just bursting with beef flavor.  I will use half of this to make some soup this weekend and the other half I will portion, vacuum seal, and freeze for later in the year.  Tune back in next week for the outcome of the soup.

Thanks for stopping by,

Bill

Wednesday, December 25, 2013

Merry Christmas from Three Dogs BBQ

Hope and I, plus the kids, would like to wish everyone a very Merry Christmas.


The best scene from the best Christmas comedy ever...


Here is to hoping that Santa was good to you this year.

Thanks for stopping by,

Bill

Tuesday, December 24, 2013

Quench your Holiday Thirst. A Beer for the Season. Part Two.

Our next holiday brew is my holiday favorite.  Today we will review St. Nikolaus Bock from Penn Brewery.

Penn Brewery is a local award winning brewery in the Pittsburgh area.  They make a very good pilsner and their dark has won numerous gold medals at the World Beer Cup in Munich.  They have branched out into some seasonal brews over the years.  Nut Roll Ale and Pumpkin Roll Ale come to mind.  They have been less than stellar offerings that are what you would expect: sweet, one and done  type beers.  But, Penn Brewery has been making St. Nikolaus for years.  I look forward to its release every year.


This beer pours with a nice, strong head with a deep amber color.  You can smell the malty goodness that is associated with a good bock.  This beer starts crisp and has a nice malty finish, with a slight hint of the chocolate malt used in the brewing process.  This beer pairs well with holiday appetizers and meals and won't bog you down.

Unfortunately, it is hard to find this brew outside the Pittsburgh area.  Also, they make a limited amount.  So, if you see it on the shelf, buy a case for now and one for later.

Thanks for stopping by,

Bill

Monday, December 23, 2013

Quench your Holiday Thirst. A Beer for the Season. Part One.

With the holiday season comes a plethora of holiday brews from brewmasters everywhere.  Some are good.  Some are not so good.  Our first review of the season is Harpoon Winter Warmer.


This Harpoon was given to me by a friend who had bought a mixed holiday pack.  I love Harpoon IPA as I like a hoppier brew.  But, when it comes to seasonal holiday brews, they can be to sweet for my palette.  This is not the case with Harpoon Winter Warmer.  As you can see, this beer has a nice, strong head and a deep copper color.  Upon pouring, cinnamon and nutmeg are the dominant aromas.  I was a bit worried.  I was wrong.  While the cinnamon and nutmeg spice are evident, they are balanced by the addition of bittering hops.  This brew starts crisp and finishes smooth and a malty finish that is not cloyingly sweet.  This beer would go well at a party where meats and cheeses are being served.  Unlike other holiday beers, this one can be a session beer, and not an over sweet, one and done palette wrecker.  I would recommend the addition of this beer to your holiday parties.

Thanks for stopping by,

Bill

Saturday, December 21, 2013

Spicy and Nutty Pig Candy

For those of you in the BBQ world, Pig Candy is a nice treat.  It is something you throw on your smoker while your ribs or brisket is cooking as an appetizer to keep the hungry masses at bay.  Basically, you just take 1/2 cup of brown sugar with 1-2 Tbsp of your favorite BBQ rub, and throw it in a bag with a pound of bacon.  Then, you kneed the bag until it becomes a big sticky mess.  Then, you place the bacon on your smoker until cooked.  I have seen certified health nuts devour a half of a plate at one time.  It is that addictive.


So, imagine what I thought when I saw this recipe for Bacon Bark on Pinterest.  Off to the R&D smoker we go...

I have heavily modified this recipe to fit the tastes of a BBQ addict and to fit being cooked in a smoker.  But, the essence is there.

First, I took the six strips of bacon and cut into one inch pieces.  To that I added 1/4 cup of brown sugar, 2 tsp of Oakridge BBQ Secret Weapon Pork and Chicken Rub, and a pinch of cayenne pepper.  I put it in a bowl, mixed it up, and set it aside to get gooey.  Once gooey, I spread into a single layer on a foil lined cookie sheet.


I placed my cookie sheet in my smoker at 350 F for 15 minutes with hickory wood in the ash pan for smoke flavor.  While this was cooking, I made the nut mixture.

I placed 1 cup of gently chopped pecan halves and 1 cup of slivered almonds into a bowl and mixed with:

2 Tbsp maple syrup
3 tsp of Oakridge BBQ Secret Weapon Pork and Chicken Rub
1 heavy pinch of cayenne pepper

I then thoroughly mixed until uniform.

Then, I brought my bacon from the smoker inside and mixed with the nuts.  Here is what the bacon looked like after 15 minutes on the smoker.


Then I spread the bacon nut mix back onto the cookie sheet and back into the smoker for 20 minutes at 350 F with more hickory wood in the ash pan.


Then, I brought it inside and let cool.  Hope was gracious enough (and patient enough), to separate the candied mix from the foil.


What we ended up with was a beautiful tasty treat.  Savory, sweet, and salty mixed perfectly with nutty bacon goodness.  This is a great snack for the holidays.

Thanks for stopping by,

Bill

Monday, December 16, 2013

Adventures in Chili: White Bean Chicken Chili

A few weeks ago I was sautéing some onions, garlic, and poblano peppers for some spanish rice that I was making for dinner.  The smell was so intoxicating, I decided that I needed to work this mix into a dish.  So, last weekend, I made some White Bean Chicken Chili.

First, I poached a chicken, adding some oregano and cumin into the poaching liquid for some Mexican flavor.


Once the chicken cooled down, I pulled the meat from the bone and saved six cups of the broth for my chili.


White Bean Chicken Chili

1 medium sweet onion, diced
2 poblano peppers, roughly diced
4 garlic cloves, minced
2 tsp cumin
1 tsp granulated garlic
1 tsp chili powder
1 tsp oregano
1/2 tsp parsley
Pinch of thyme
2 cups of cooked, shredded chicken
2 cans of Great Northern Beans, with the liquid
6 cups of chicken broth
Olive Oil for sautéing
Salt to taste

Heat up about 1-2 tbsp of olive oil in your pan on low heat.  Add onion, garlic, poblano pepper and a grinding of sea salt.  Sauté on low heat until the veggies are tender and starting to caramelize.


Add spices and allow to sauté for two more minutes.


Add the broth and beans and bring to a boil.  Allow the mixture to simmer with the lid cracked for two hours.


After the two hour simmer, turn off your heat, add your shredded chicken, and stir to incorporate.  After about 10 minutes, your chicken has warmed up.  So, ladle into a bowl and serve.


This is good stuff.  I like the creamy texture of the Great Northern Beans.  The poblano adds a nice kick.  All of the spices mingle to provide a taste treat.  This is a nice change of pace from your basic red chili.  Give it a shot.  You won't be disappointed.

Thanks for stopping by,

Bill

Saturday, December 14, 2013

Chicken Enchiladas

So, you have poached the chicken.  Now, what to do with the meat and broth.  Well, you make chicken enchiladas of course.

First, I made a batch of enchilada sauce with this recipe.

Then, I preheated the oven to 350 F.  While the oven is heating, you start building.

Take a tortilla (I used corn tortillas) and add a dollop of sauce.


Add chicken, roll up, and stack neatly in a 9 x 13 baking dish.


Cover with sauce and the shredded Mexican cheese of your choice.


Put in the oven and back until brown and bubbly on top.


I served with a side of spanish rice and refried beans.  This was a nice stick to your ribs kind of meal.

Thanks for stopping by,

Bill

Wednesday, December 11, 2013

How to Poach a Chicken

Poaching a chicken is a great way to obtain moist and tender chicken for many uses.  You even get some nice stock for all types of cooking uses.  The process is simple.  So, lets have a look.

I use Amish raised fryers that I get from my butcher for my poached chicken.  They average 2-3 pounds.  Just right for my needs.

I rinse the bird well with cold water.  Then, I place in my 12 quart stock pot with the following:

Two ribs of celery, broken in half
Four carrots, broken in half
One sweet onion, quartered
3 cloves of garlic, skin removed, left whole
1 tbsp of dried parsley
Enough water to cover the bird

Note:  You can also add other flavors depending upon the end use for your meat.  In this instance, I added 1 tsp each of cumin and oregano as this meat was headed for some chicken enchiladas later in the week.


Next, bring to a boil, then simmer at low heat for 80 minutes.  After 80 minutes of simmer, remove the bird from the broth and let cool.


Once cooled, pull the meat from the bone and shred.


I like to add the meat to homemade chicken soup, or add to other dishes such as the aforementioned enchiladas.  This meat also makes a great deli style chicken salad.

Finally, save the broth for soups or recipes that call for chicken broth.  I cool overnight and skim off the fat.  Then, the broth that I do not immediately use, I freeze for later use.

Stay tuned for the recipes where this bird was used.

Thanks for stopping by,

Bill

Sunday, December 8, 2013

Pastrami Anyone? How to Turn a Corned Beef into a Deli Favorite

I love pastrami.  What I don't like is deli pricing for pastrami.  Around here, good deli style pastrami goes for $14.99 lb or higher.  So, I did a little research on the net and found the recipe over at Amazing Ribs:


Read the whole article.  It is educational and funny.  A good primer for Manhattan Yiddish slang.

I have never been to Katz's in Manhattan.  I have only walked by on my way somewhere else.  You may not have been there either.  But, most of us have seen the inside if you have seen one of my favorite movies:


Ironically, as I am typing this, CBS Sunday Morning was airing a piece on Katz's 125th Anniversery. Good viewing if you choose:


Katz's Deli is the gold standard for pastrami in New York.  That is why this recipe is so good.  Here is how you make it at home.

First, I took a good sized store bought corned beef brisket (3.5 pounds in this instance), removed from the packaged, rinsed numerous times with cold water, then soaked overnight in cold water to remove as much brine as possible.  Then, the next day, I made a batch of the rub and placed in the refrigerator to get happy for three days.

Ingredients:
4 Tbsp Fresh Coarsely Ground Black Pepper
2 Tbsp Coriander Powder
1 tsp Mustard Powder
1 Tbsp Brown Sugar
1 Tbsp Paprika
2 tsp Garlic Powder
2 tsp Onion Powder

Attribution: Amazing Ribs.com


After three days, I pulled it out of the refrigerator and placed in a 225 F smoker with oak wood and cooked until the internal temperature was 195 F.


Those specks are snow flakes...

When at 195 F, I brought the pastrami inside, let rest for 30 minutes.  Then placed in the refrigerator over night to cool for slicing.


We have a nice light duty deli slicer just for the occasion.  We sliced thinly and vacuum packed into one pound packages.


Some of these packages were frozen for later in the year.  One made it to the Pitt tailgate that weekend for grilled rye, swiss, and pastrami sandwiches.  Some (OK, a bit more than some) made it to sandwiches that week on crusty rye bread and spicy brown mustard.  Much better than spending $14.99 a pound.

You can start with a uncured brisket and make your own corned beef.  I did that one time and was not 100% happy with the recipe.  I am still looking for a good recipe for making corned beef if anyone has one to share.

Thanks for stopping by,

Bill


Friday, December 6, 2013

Christmas Gift Idea: Smoked Nuts

Since my friend Mark showed me his smoked pecan posting, I have been experimenting with different types of smoked nuts.  I have found that smoking a nut is very simple and really makes your garden variety mixed nut something special.  We like making these and giving them out as Christmas gifts.  Everyone always loves receiving one.

For this day of experimenting, I used:

Raw Pumpkin Seeds
Raw Macadamia Nuts
Already roasted Kirkland Mixed Nuts from Costco

First, the nuts get a light coating of olive oil, thoroughly mixed, then placed into a single layer inside an aluminum foil pan...


Macadamia Nuts, ready for the smoker...

Then, I fire up the smoker and bring to a temperature of 250 F and place hickory wood in the ash pan.
The nuts then go into the smoker on the top rack...


Every 20 minutes I go out and mix the nuts in the pan to make sure they roast evenly and so they can get the maximum amount of smoke.

After one hour, I lightly salt to taste with sea salt and place hot into canning jars, then seal.  As the nuts cool, the jars will seal, keeping that smoky goodness locked into the nut...


Left to right: Macadamia Nuts, Pumpkin Seeds, and Mixed Nuts.

Quick, simple, and much cheaper than if you by a can of smoked nuts at the store.  Give them a try.  Your friends, family, and co-workers will love you for it...

Thanks for stopping by...

Bill

Tuesday, December 3, 2013

Turkey, Stuffing, and Mashed Potato Pierogies: An Idea for your Thanksgiving Leftovers

Here is a great idea for your Thanksgiving leftovers.  We made homemade pierogies and froze them so we could have a taste of Thanksgiving later in the year.

Mixed 1 cup of taters, 1 cup of diced turkey, and 1 cup of stuffing:


Made pierogi dough:

3 cups of flour
1 egg
1 tsp salt
3/4 cup lukewarm water
2 tbsp softened butter

Mix, kneed for 5 minutes, let rest 30 minutes:


Ran through the pasta machine. Took from a 7 to a 5 through the roller.


Cut out rounds with a pint glass, added a scoop of filling, then pinched shut.


10 minutes in boiling water, topped with hot turkey gravy.


First, I was surprised that they held together. But, they were exactly what I was looking for: a taste of Thanksgiving in a dough package.  These will be great in May.

We froze individually on a cookie sheet lined with wax paper sprayed with cooking spray. Then, we vacuum packed when frozen.


We hope this gives you an idea of something to do with your leftovers that you just might be sick of by now.

Just one hint.  When cooking frozen, place in boiling water until floating.  The pierogi will be done at that point.

Somewhere, a bunch of Polish grandmothers in Heaven are applauding or rolling their eyes...

Thanks for stopping by,

Bill