Search This Blog

Showing posts with label Pizza. Show all posts

Sunday, September 18, 2016

Chicken Shawarma Pizza

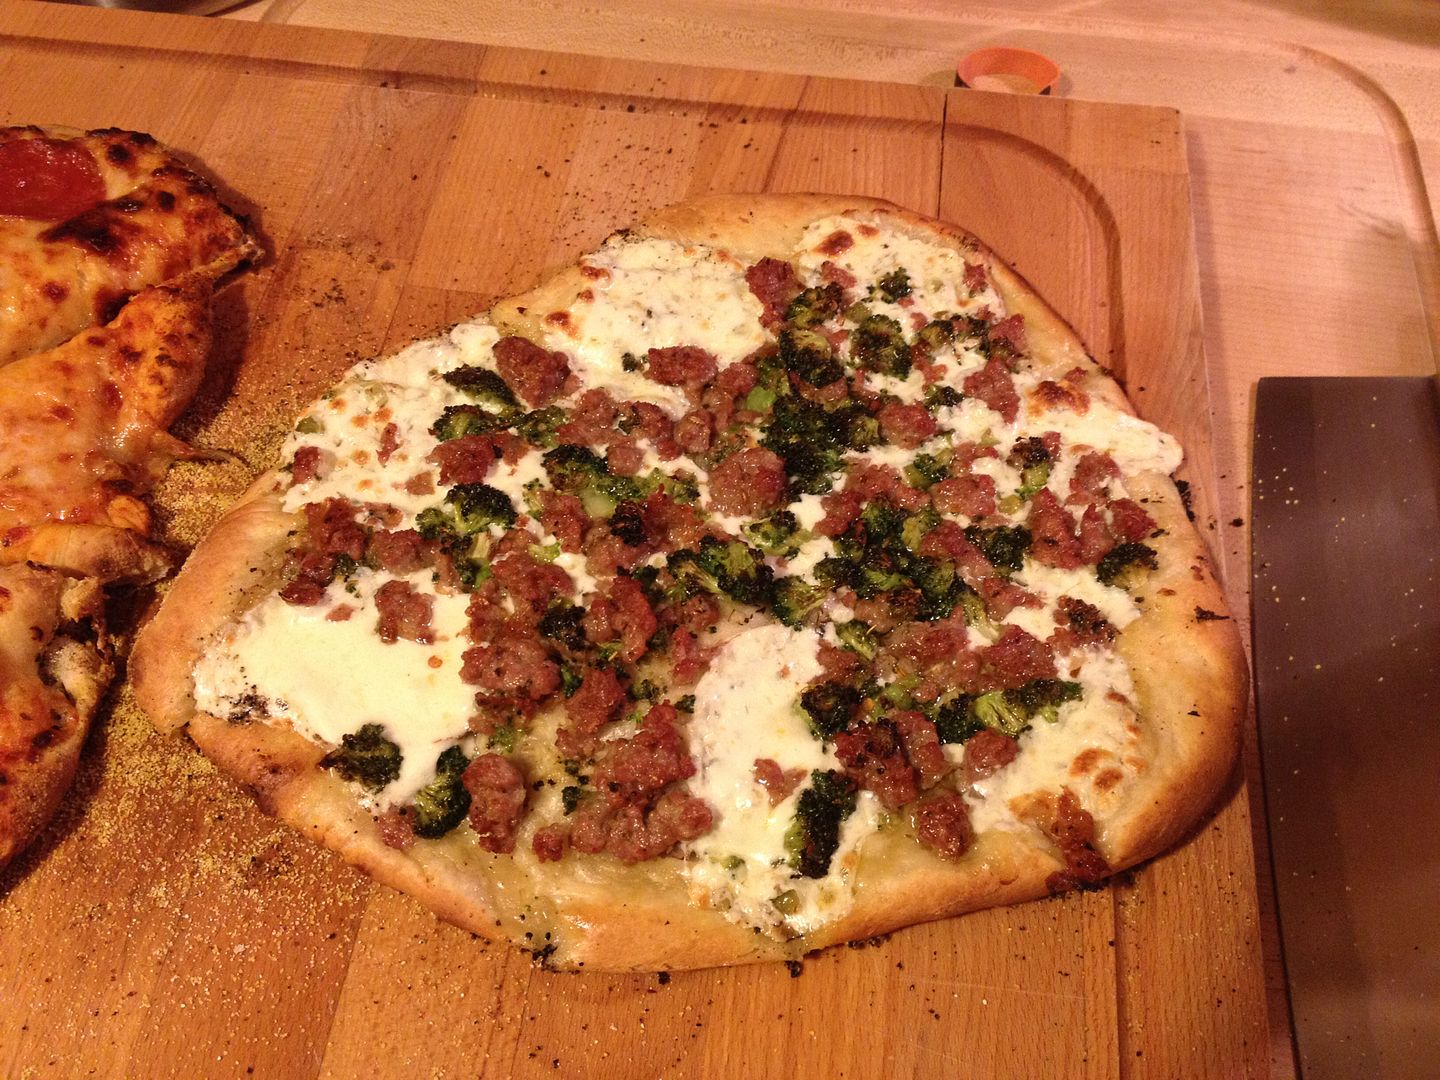
I'm not the type to go out to lunch too often.  I usually brown bag leftovers from the night before.  If I went out to lunch all the time, I would be broke and weigh 350 pounds.  But from time to time, the guys in the office go out for lunch when we need some time away from the rat race.  Occasionally, we head to this great Lebanese place close to work by the name of Aladdin's Eatery.  They serve a healthy, diverse menu that doesn't break the bank.  One of my favorites is the Chicken Shawarma Pita Wrap.  Marinaded grilled chicken, wrapped up in a pillowy fresh pita with tomatoes and greens.  I also add black olives, crumbled feta, onions, and a dab of their outstanding hummus.  It really is good stuff.

One night earlier this summer, I was in the mood for hummus, but we were having pizza for dinner.  I decided to get creative and see if I could turn this pita wrap into pizza form.

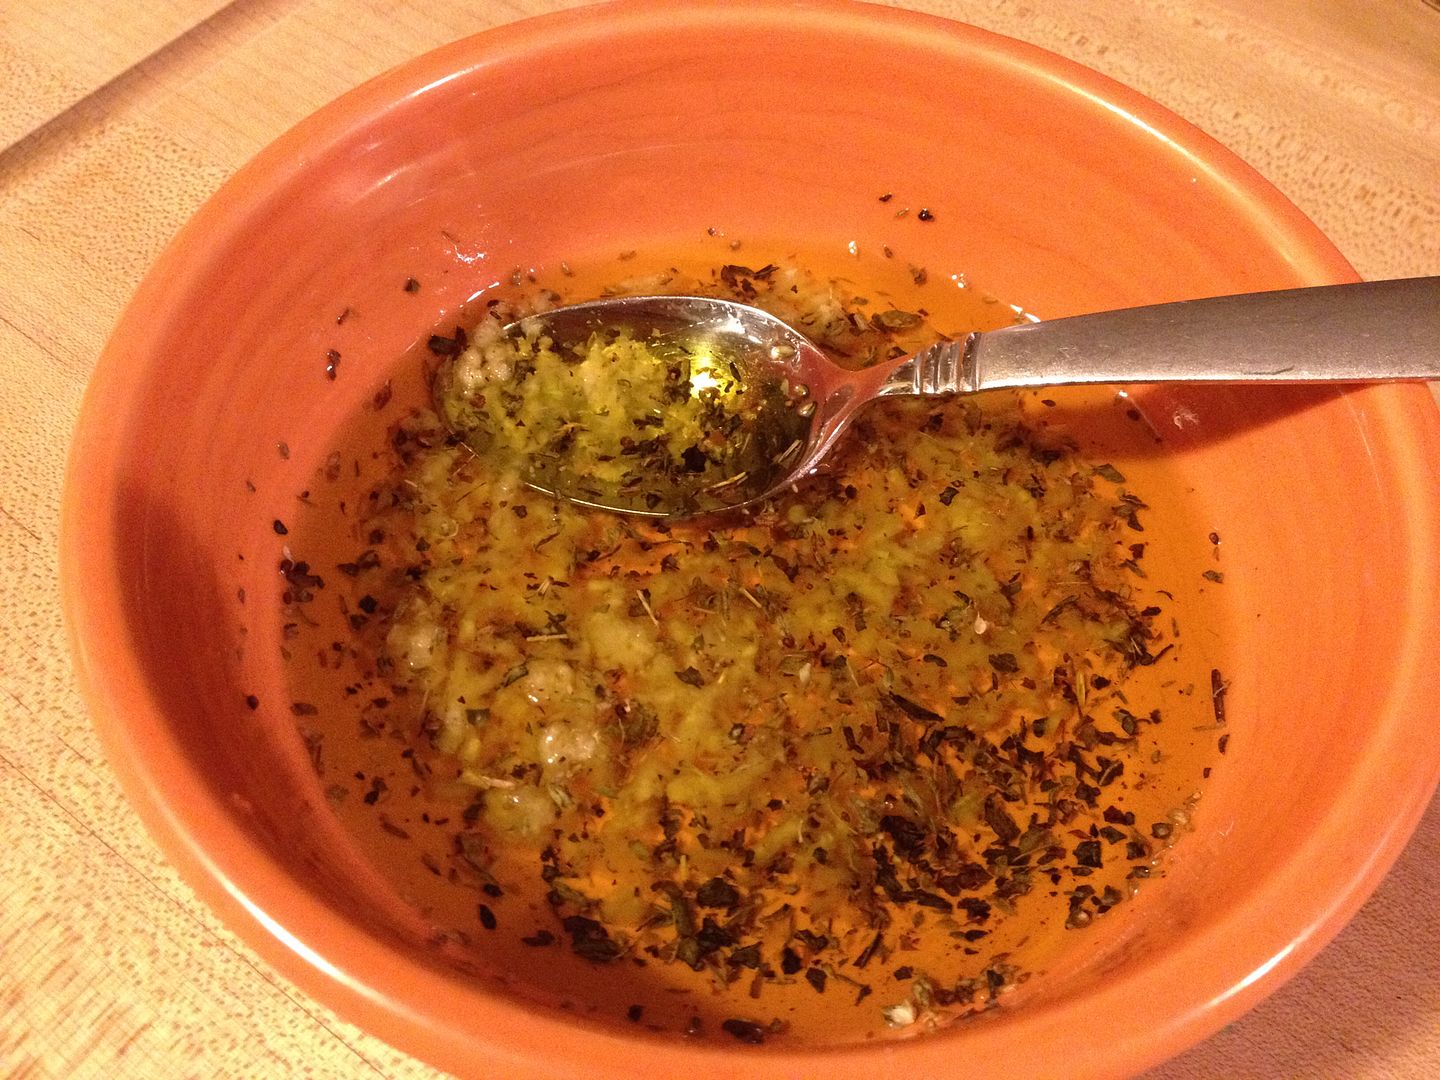
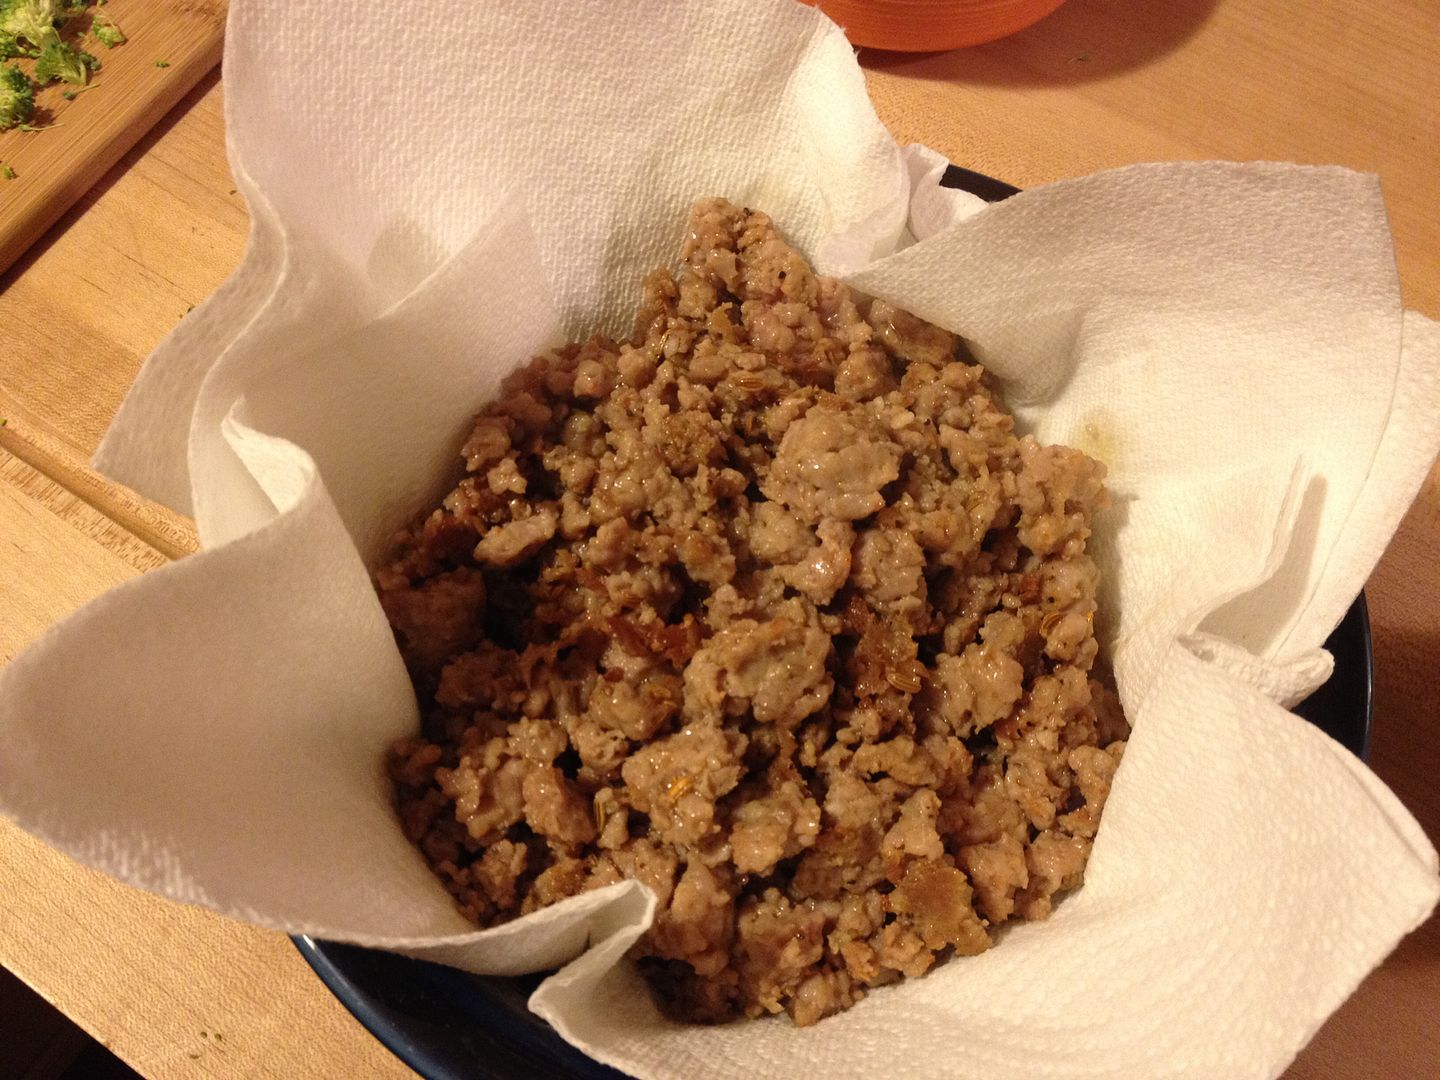
First, I took a boneless, skinless chicken breast and marinaded in a mixture of olive oil, the juice of a lemon, some kosher salt, and a teaspoon of Balti seasoning.


My mom turned me on to this seasoning with some spectacular pork tenderloins.  It is a mild curry type blend.  Not too hot and definitely not lacking in flavor.  After marinading the chicken for about an hour, I grilled the breasts until done.  After cooling, I cubed into bite sized chunks.

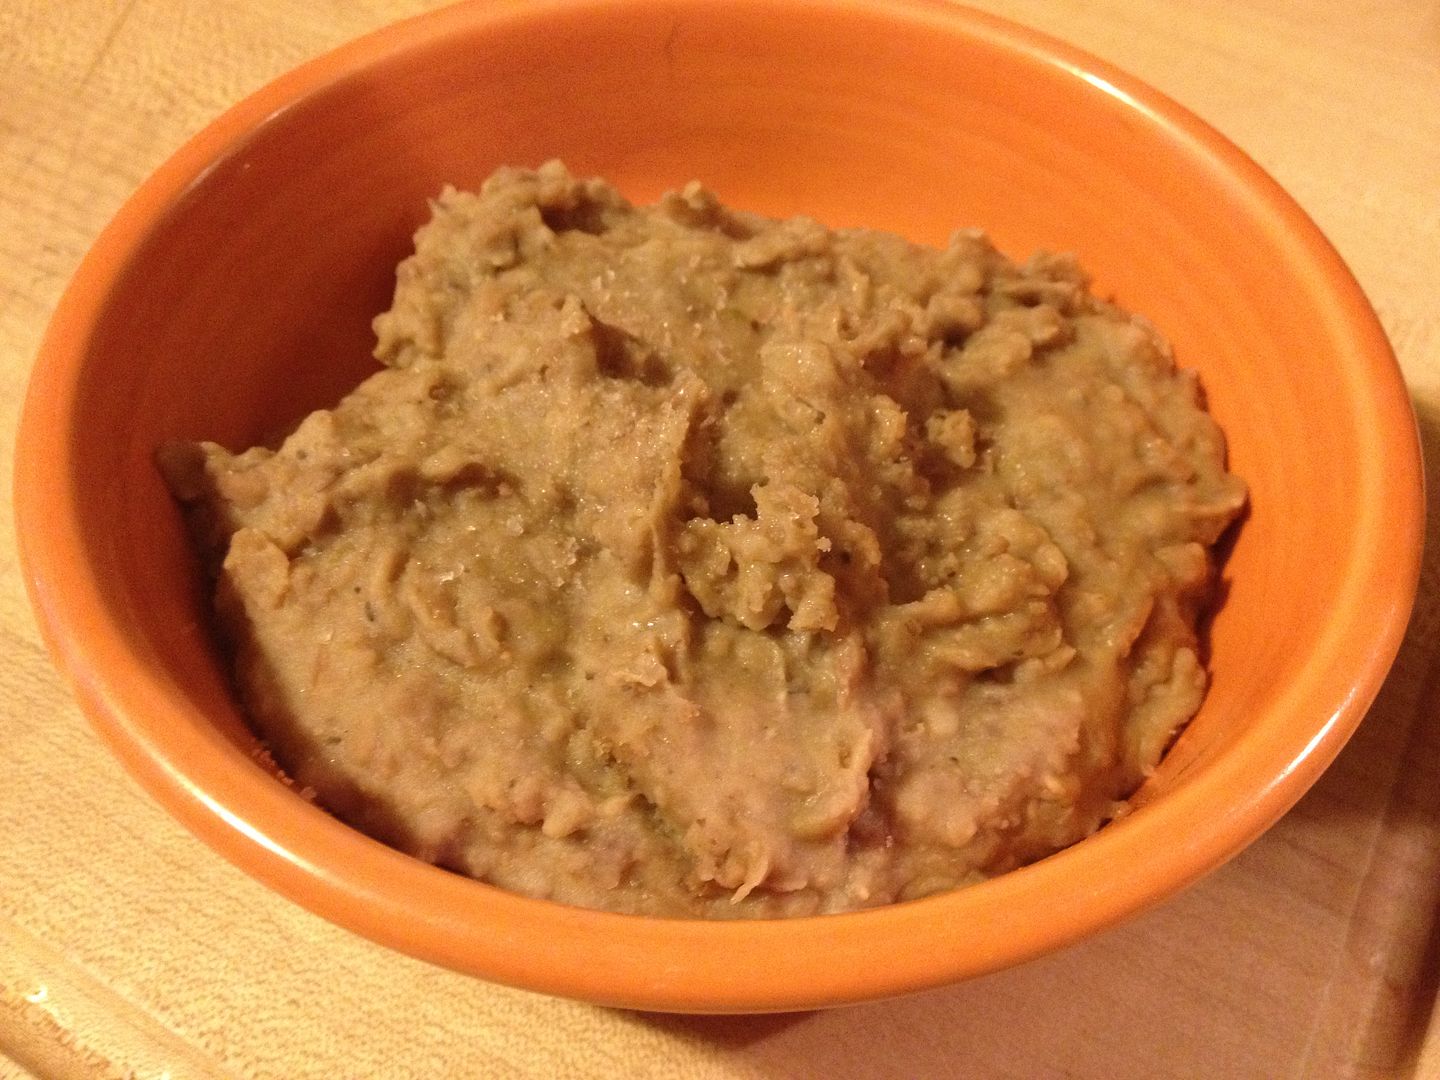
While the chicken was marinading, I whipped up a batch of hummus.  My hummus recipe is also from my mom.  I do not know where she came up with this recipe, but I would definitely put it up against any hummus served at a restaurant.  Here is the recipe:

Three Dogs BBQ Homemade Hummus

2, 16 oz cans of chickpeas
Juice of 2 lemons
1/4 cup of tahini (ground sesame paste)
3 garlic cloves, minced fine
1 Tbsp of Olive Oil, plus more for when serving
1/2 tsp Kosher Salt
Dried Parsley for garnish
Fine diced red onion for garnish

Drain the water from the chickpeas and reserve.

Process the above ingredients along with enough of the reserved chickpea water to obtain a soft, creamy consistency.  Add salt as needed to taste.  Serve with a drizzle of olive oil along with pita or tortilla chips.  I also add some dried parsley and diced red onion as well.

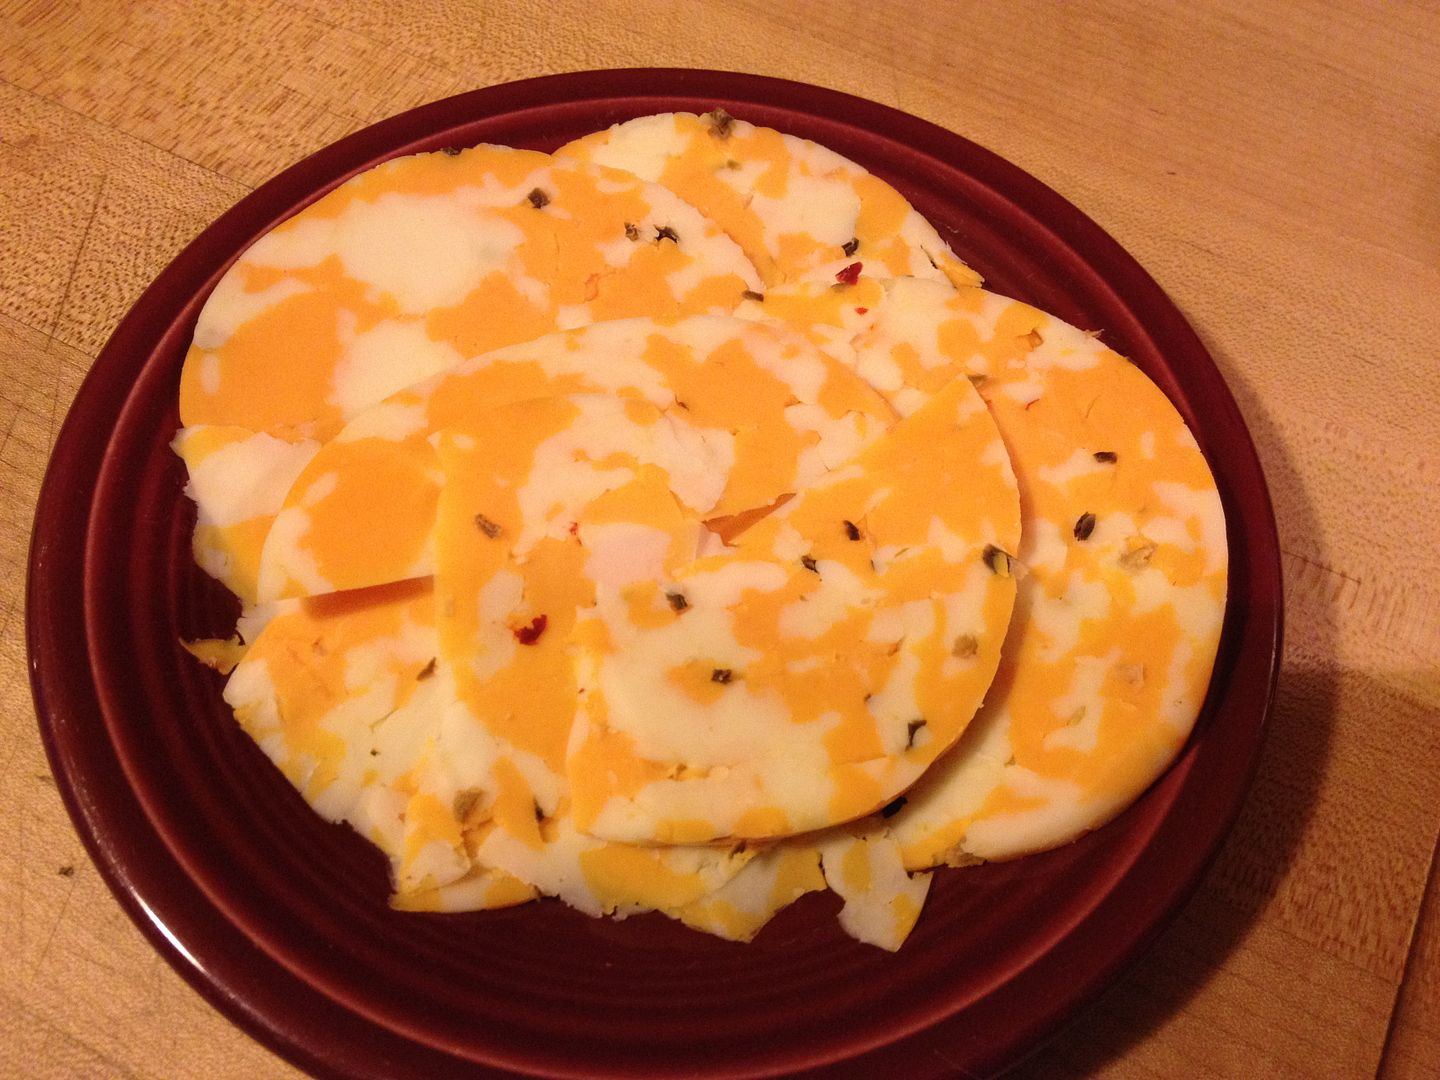
I couldn't pass up a little snack while I was waiting on the pizza dough to rise...


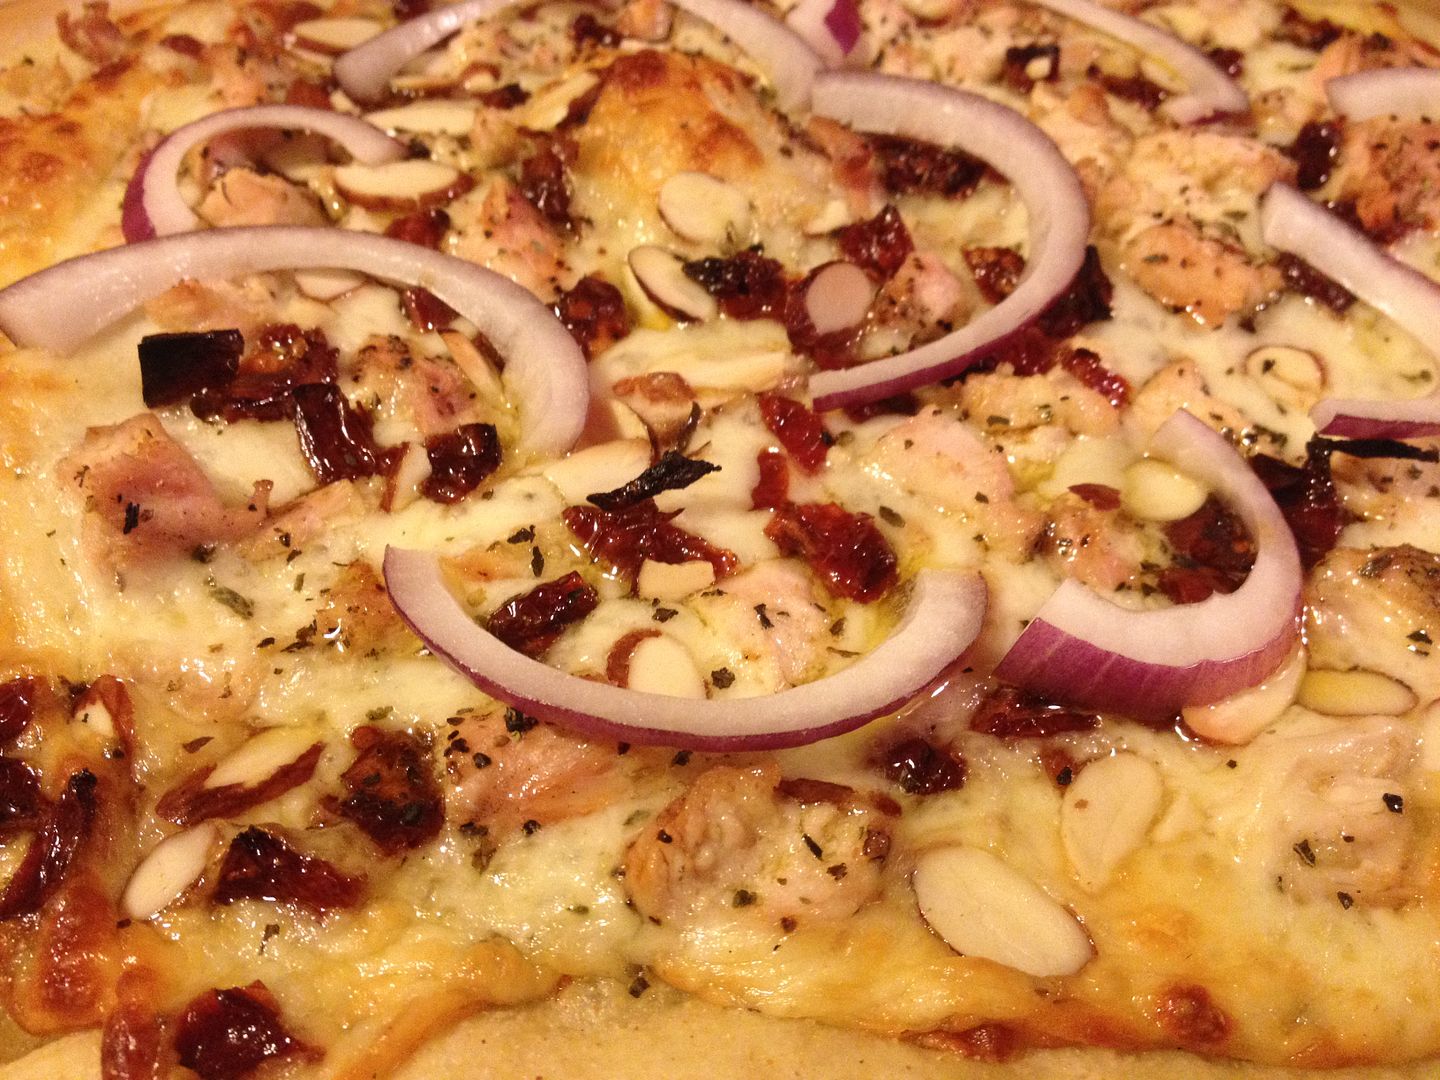
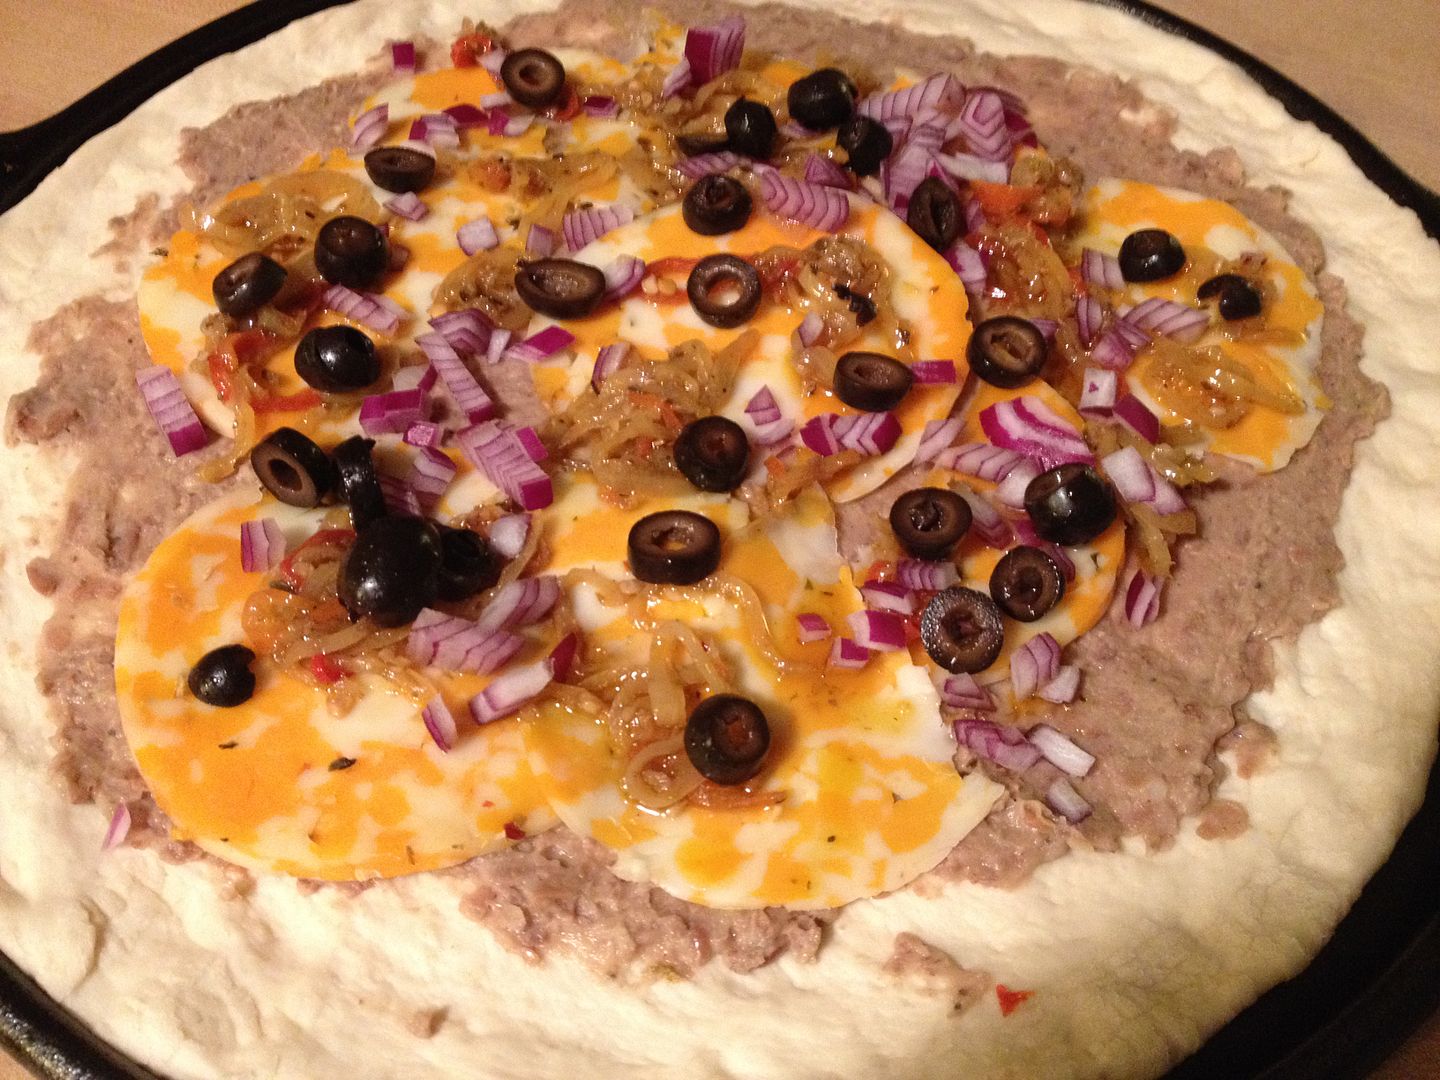
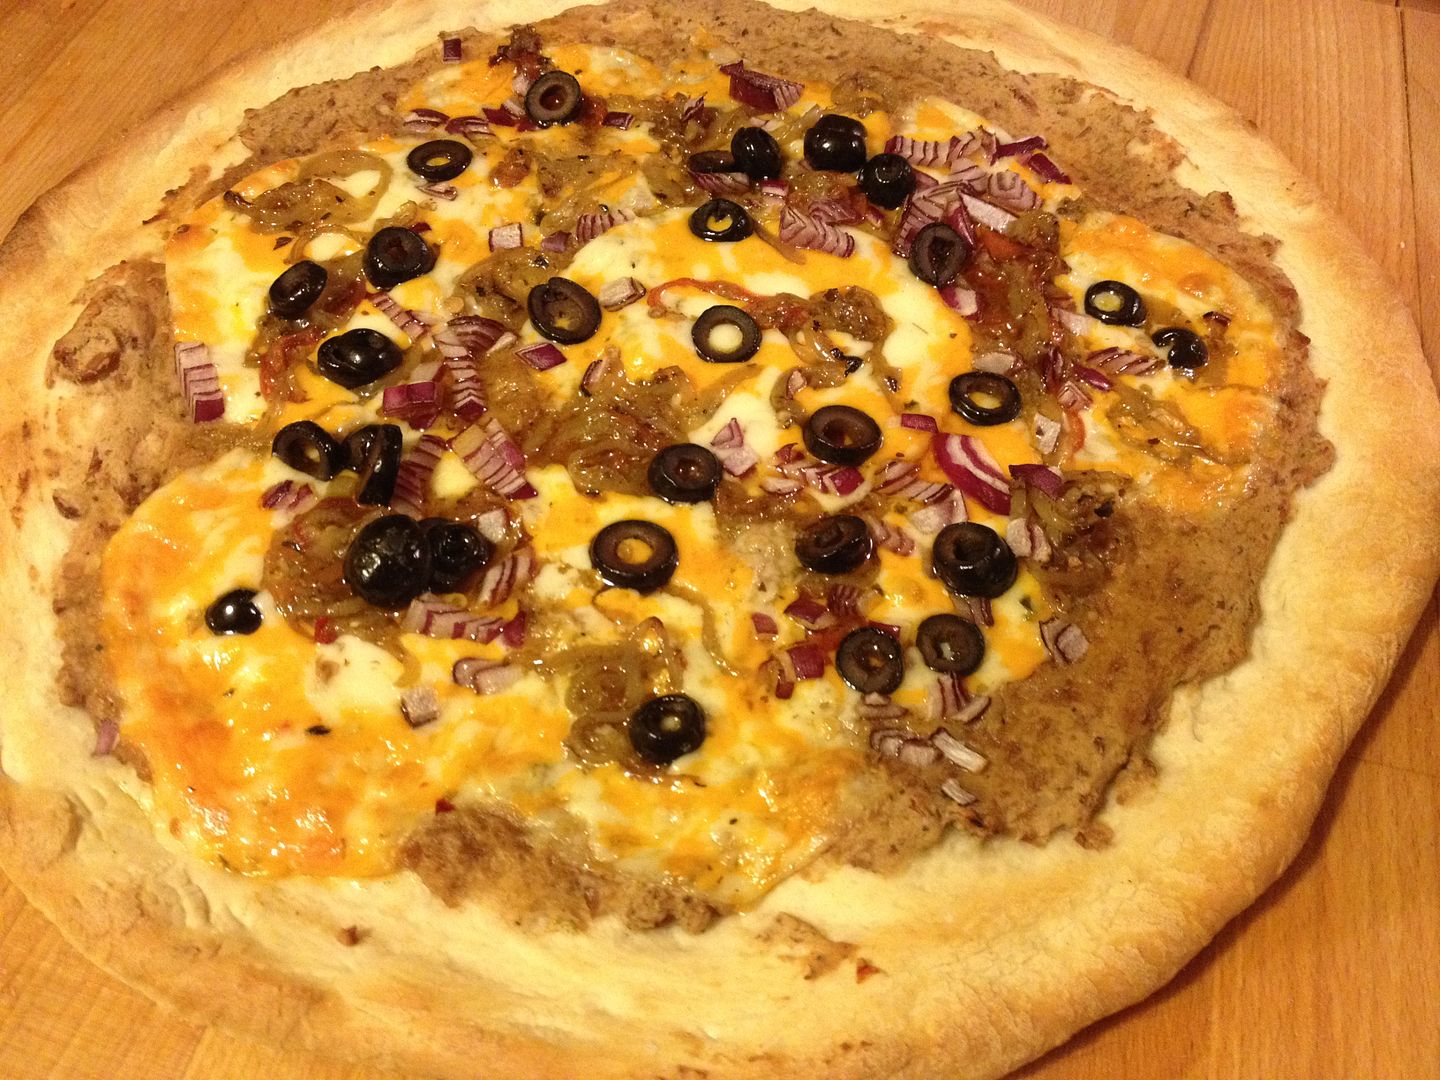
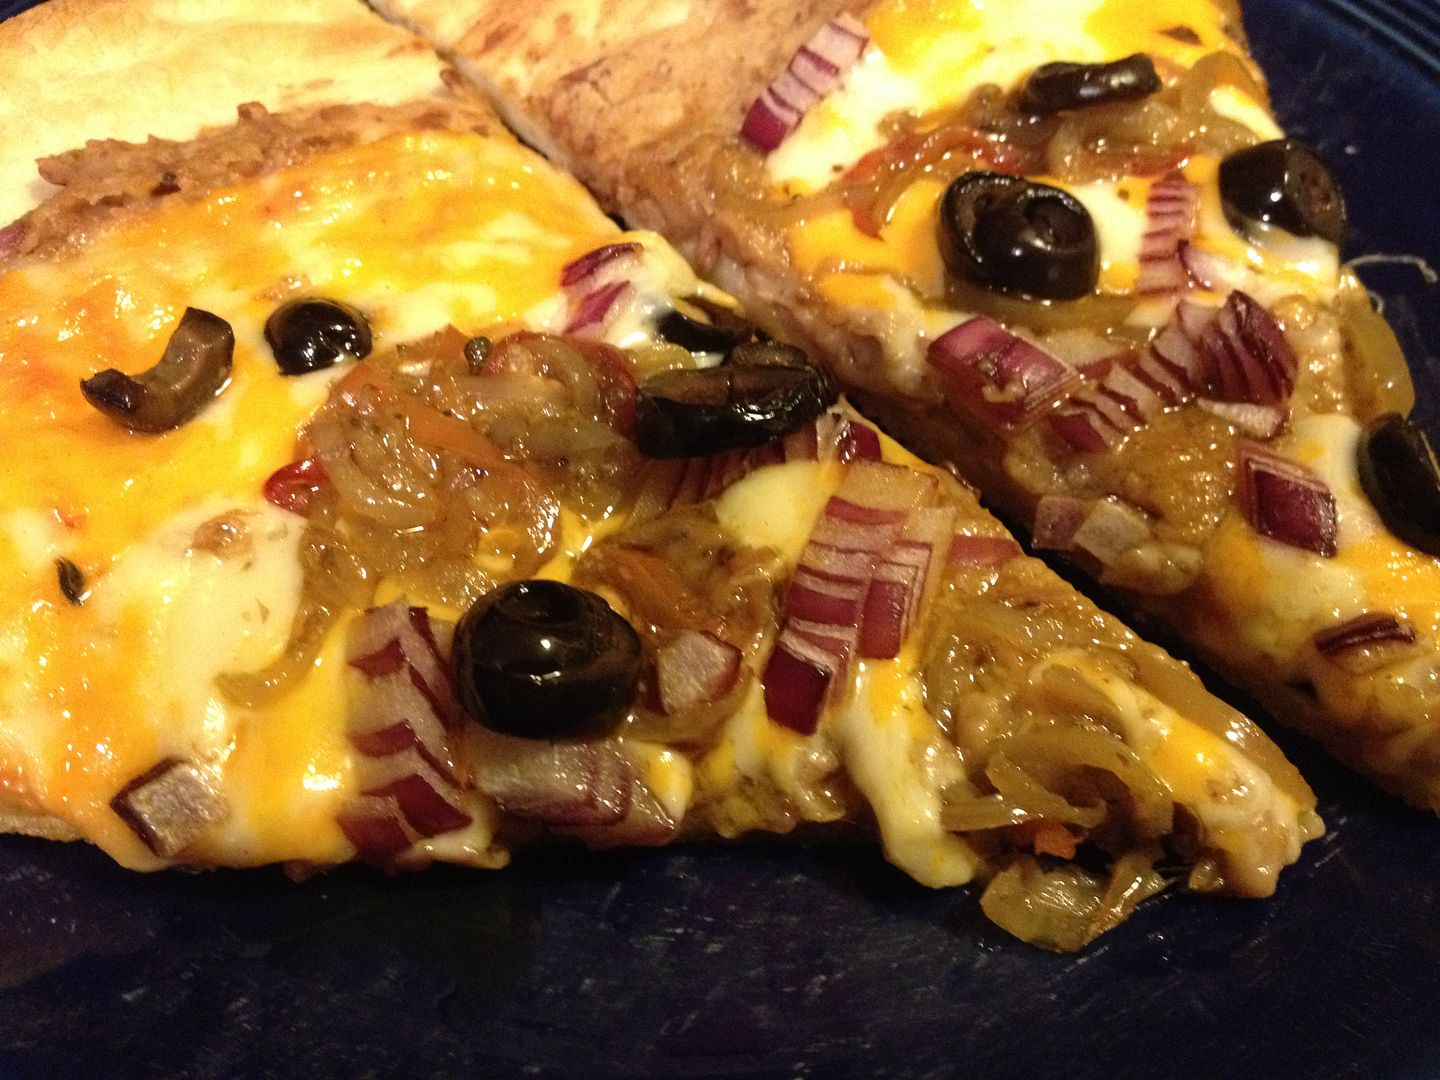
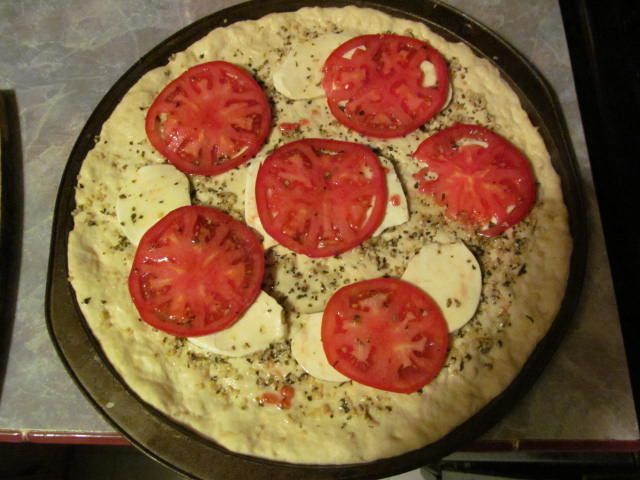
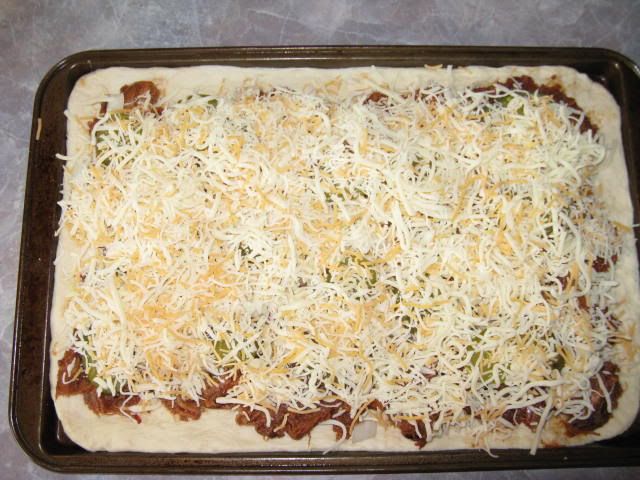
So, after Hope stretched out the pizza dough, I assembled the pizza.  I took the hummus that I had made and thinned it out a bit with some olive oil so that it could be spread across the dough.  Then I added in no particular order:

The grilled chicken breast
Thinly sliced Roma tomatoes
Thinly sliced red onion
Black olives
Crumbled feta cheese

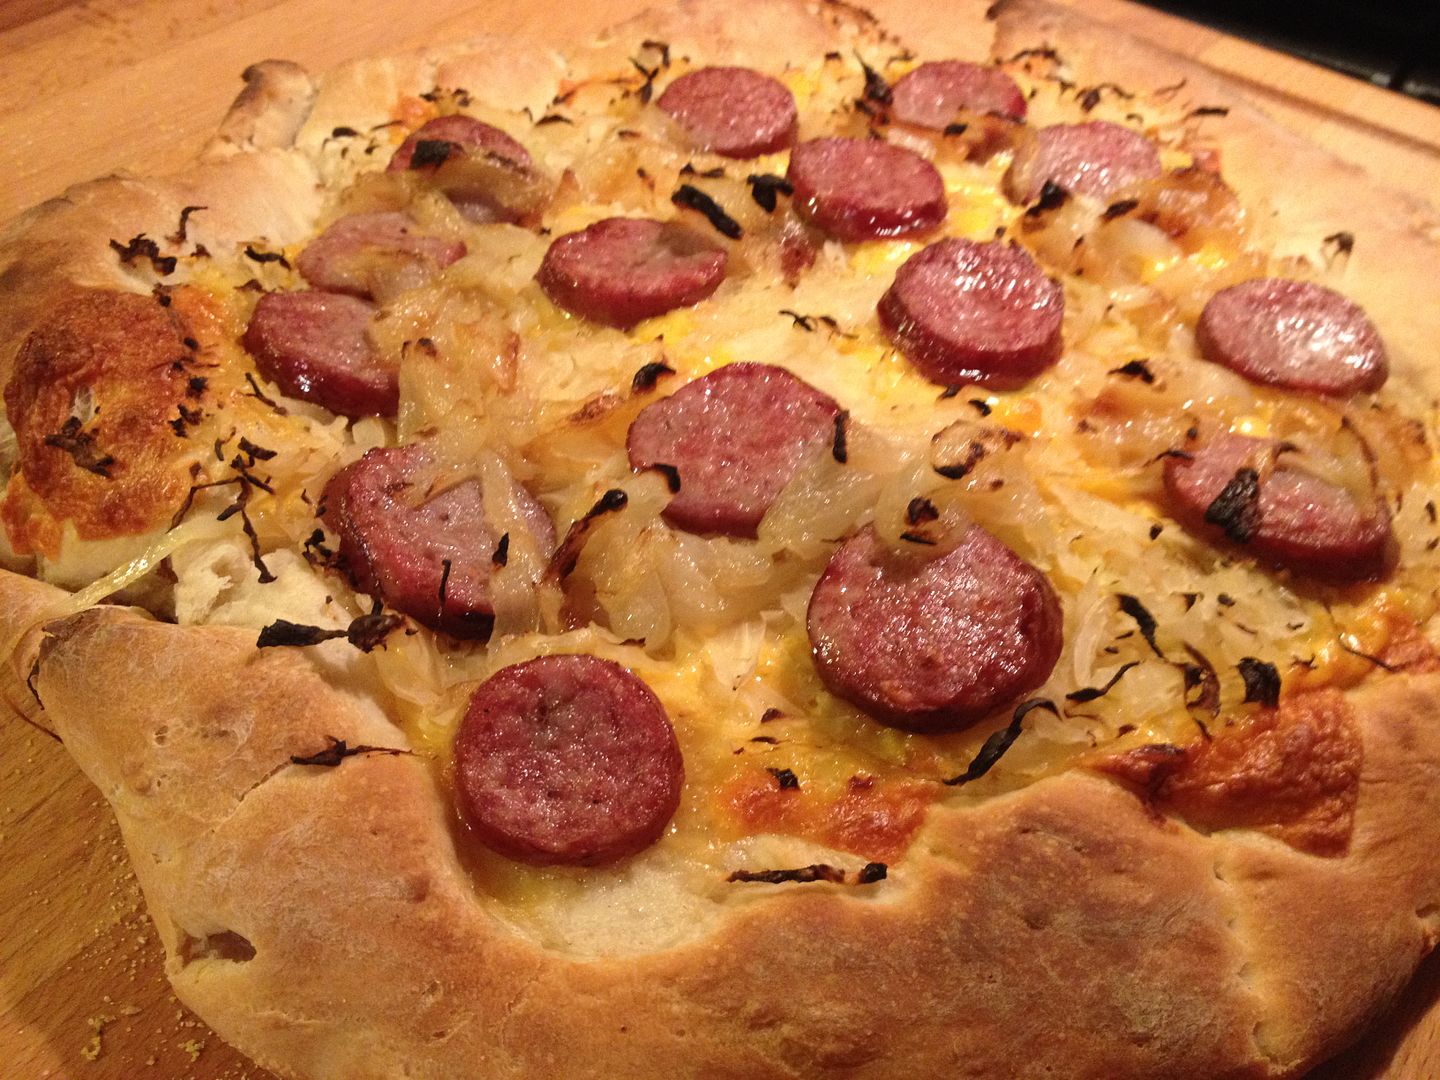
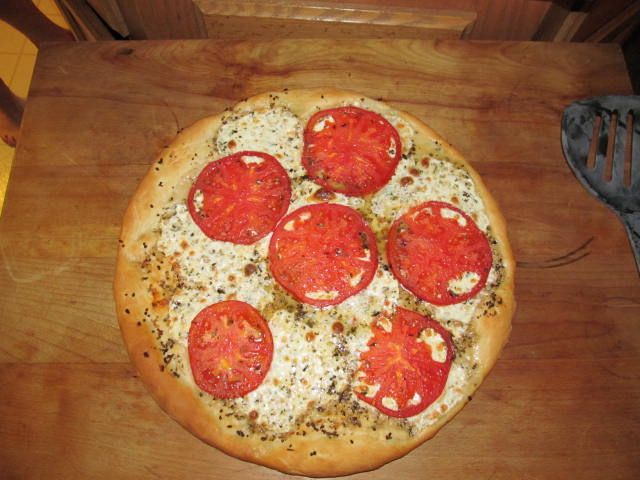
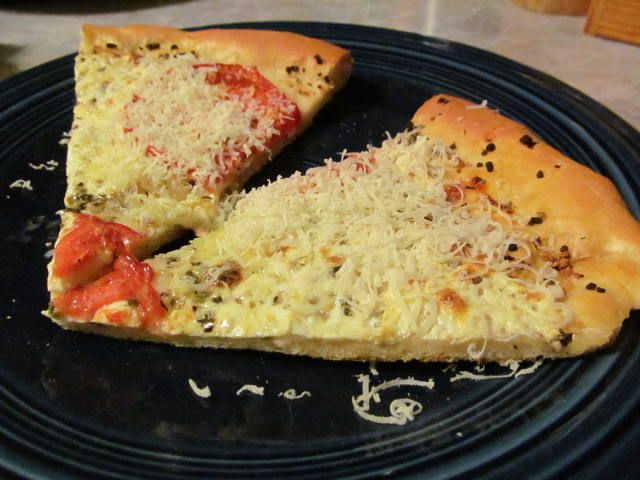
Then, the pizza went into the hot pizza oven.  Since there was not a lot of cheese to look for the "brown and bubbly" mark of being ready, I kept an eye on the crust.  When it looked brown and crispy, I pulled the pie from the pizza oven.


I declare this experiment wildly successful.  I was worried about how the hummus would turn out after being exposed to high heat.  But, it did not separate and had a nice roasted flavor.  The next time I am craving some Middle Eastern flavor, I am making this pizza again.

Thanks for stopping by,

Bill

Thursday, November 19, 2015

Grilled Chicken and Sun Dried Tomato Pizza

We been going to the Church Brew Works in Pittsburgh for many years.  Since 1996 in fact.  It is an old, restored Catholic church in the Lawrenceville section of town.  Some might say that the opening of this brew pub was the catalyst for the revitalization of this section of town.  The beer is outstanding and so is the food.  While they have a diverse menu to choose from, I have two "go to" choices for dining: their French Onion Soup (made with the Pious Monk Dunkel) and their Chicken and Sun Dried Tomato pizza.  I have been meaning to recreate this pizza at home.  Finally, after almost 20 years, I got around to giving it a whirl at home.  So, here is my shot at recreating this masterpiece at home.

The base is a classic white sauce.  So, while the dough was rising, I took about 1/4 cup of olive oil and added thyme, minced garlic, oregano, basil, salt, and pepper to steep for awhile.  Al of the ingredients were added to personal taste.

Then, coated a chicken breast with olive oil and seasoned with thyme, granulated garlic, basil, and oregano.  The breast was grilled to an internal temperature of 160 F, brought inside to rest for about 10 minutes, then diced into bite sized pieces.  Now time to build the pie.

Hope stretched out the dough, then I spread the white sauce all over the skin, including the crust.  Next up was a layer of shredded mozzarella, followed by the chicken, sun dried tomatoes that had been packed in oil, sliced almonds, thinly sliced red onion, and a light sprinkling of dried parsley.


The pizza was slid into my hot pizza oven, lets say about 700 F, to cook for about eight minutes with a 180 degree flip halfway into the bake time.


Next, bring the pie inside and devour.


Good stuff and a fair recreation of one of my favorite pizza pies in town.  Now, if I get a craving for this pie, no need to drive 40 miles to get a fix.  Now, I just have to work on that French Onion Soup...

Thanks for stopping by,

Bill

Sunday, August 9, 2015

Roasted Eggplant Sweet Sausage Pizza

Summer is chugging along and we have started to actually get some weather that is enjoyable.  We have moved past our spring like June and July with 11 inches of rain in six weeks and temperatures in the 70's during the day and the 40's at night.  Mowing the lawn was twice weekly act of desperation rather than a weekly chore.  But, as the weather has changed a bit and the lawn mowing duties are now in a more manageable schedule, the farm markets are starting to sell their summer bounty.  Yesterday at my local market, one of my favorites was siting on the shelf: purple eggplant.


Yes, all eggplant is purple of varying shades.  The eggplant that most people associate with is the dark purple, almost black variety.  Our farm market also offers an eggplant that is a lighter shade of purple and an all white variety as well.  I like the higher shades better.  The skin is thinner, there are less seeds, and the taste is milder than their darker cousins.  For dinner, I was thinking pizza.  Roasted eggplant pizza to be exact.

First, I trimmed the stalk from the top of the eggplant, then cut lengthwise.  Half went back into the refrigerator and the other half I diced.


I tossed the diced eggplant with about one tablespoon of salt and placed in a small colander for an hour to remove the excess water.


After sitting for an hour, I rinsed the excess salt from the diced eggplant, then squeezed dry in some paper towel.  Next, I tossed with about one tablespoon of olive oil, placed into a cast iron skillet, and roasted in my oven at 350 F for about 45 minutes.


Yes George, there was shrinkage.  In hindsight, I should have used the whole eggplant.  Lesson learned.  By the way, I tried a piece of the eggplant at this stage.  Crispy, caramelized, sweetness.  I could have stopped here.  But, no, there was pizza to be made.

While the eggplant was roasting, I browned about 1/3 of a pound of sweet sausage, caramelized 1/3 of a medium sweet onion, sliced some fresh mozzarella, and created a white sauce with olive oil, 3 cloves of minced garlic, crushed red pepper, oregano, basil, and thyme (about 1/2 tsp each).  Time to build the pie.

I brushed my dough with the white sauce, then layered the cheese, eggplant, sausage, and onion.  My creation was now ready for the pizza oven.


Ten minutes later, I had a pretty sweet looking pizza pie!


Good stuff.  In hindsight, I wish I had used the whole eggplant.  The roasted bits added a nice crunchy sweetness to this pizza.  There is some work to be done in the future with this pizza.  I have some ideas.  Fortunately summer is not quite over and there is plenty of eggplant to be had, for now.

Thanks for stopping by,

Bill

Saturday, July 18, 2015

Southwestern Roasted Corn and Grilled Chicken Pizza

Last weekend is one of the weekends of the year that I look forward to with unbridled anticipation.  Yes, it was the weekend that our favorite farm market, Ambrose Farm Market, was open for business.    They offer various types of greens, peppers, cucumbers, melons, and squash.  But, what they are known for is their butter and sugar corn.  This corn is the best corn in Butler County, period.  Never starchy, always sweet.  It is worth the hour round trip drive.  Last weekend, my bounty also included some beautiful Early Girl tomatoes and jalapeño peppers.  Life is good.

Last night was pizza night.  I wanted something different.  We had three ears of corn left in the refrigerator.  Not enough for a meal, but enough to experiment with a nice little spicy pizza pie.  I had been concocting this recipe in my head all day long.  If you are a Chilihead, you will not be disappointed.

First, I thawed some chicken thighs and threw them on a hot grill.  While the thighs were grilling, I whipped up a spice blend:

1 tsp Chili Powder
1 tsp Cumin
1 tsp Dried Parsley (you can substitute Cilantro here, but I am in the class of people that think Cilantro tastes like a bar of soap)
1 tsp kosher salt
1/2 tsp Cayenne Pepper
1/2 tsp oregano

After Hope removed the kernels from three small ears of corn and I thinly sliced half of a sweet onion.  The corn, onion, and two large cloves of minced garlic went into a bowl with three tsp of the spice blend and two tbsp of olive oil.  After mixing well, I placed this mixture into a cast iron skillet, then roasted on my grill when the chicken was done.  With the remaining spice blend, I added two cloves of minced garlic and enough olive oil to make the mixture mobile.  I placed this off to the side while I was roasting the corn.


The grill was around 400 F, so I closed the lid to help with the roasting process.  Every five minutes or so I gave the mixture a good mix.  After about 20 minutes the corn was starting the brown and caramelize.  So I removed the skillet from the grill and let cool while I prepared the final pieces of this pie.


While Hope sliced a jalapeño into rings, I removed the chicken from two thighs and diced an Early girl tomato.  Normally I would use a roma tomato, but, if you quarter an Early Girl and remove the pulpy interior, you can dice the flesh and substitute for a meatier roma.

The final piece was thinly sliced smoked chipotle cheddar cheese.  Time to build this pie.


On my dough, I brushed on a thin coat of the olive oil spice mix.  Next up I layered the cheese, followed by the roasted corn, onion, and garlic.  This was followed by the chicken, tomatoes, and jalapeño slices.  This pizza was ready to bake.


After 15 minutes in a 450 degree oven, my creation was ready.


I waited five minutes for the cheese to set up a bit, then I sliced this pie, grabbed a cold beer, and sat down to try this creation.


The first flavor that came though was the sweetness from the roasted corn, onions, and fresh tomato.  Where was the heat?  Well, that kicked in about five seconds later.  Lightly roasted jalapeño pepper, followed by the chili powder and cayenne, all tied together with the cumin.  This was one balanced pie.  Not that grab your tonsils, Atomic wing hotness.  But, rather that satisfying dull burn that deepens with each satisfying bite.  The chicken was a nice touch, but not needed.  If you wanted a protein on this pizza, you could even substitute shrimp instead of chicken.  Black beans maybe?  Why not.

I was more than happy with how this pizza turned out.  This recipe requires a bit of preparation, but it was well worth the work.

Thanks for stopping by,

Bill

Friday, June 5, 2015

Beer and Bratwurst Pizza

With the new grilled pizza cookbook we received as well as our grill gadget pizza oven, we have been experimenting with different types of pizza.  We do run into a few pizza competitions each summer and perhaps a new creation will turn out to be a winning entry sometime in the future.  After leafing though the pizza cookbook, I was inspired by a ballpark style hot dog pizza.  Hot dogs are good.  Bratwurst is even better.  Chedarwurst, brats peppered with little bits of cheddar goodness, are my favorite.  I felt a pizza experimentation coming on fast.  Here is what we came up with one warm Friday evening.

Hope made a batch of dough.  While the dough was rising, I simmered two fresh brat links that I had picked up from my butcher earlier that day in some Penn Dark.  I always simmer on low heat for about 15 minutes, or just until the casing on the link starts to expand.  At the same time, I caramelized  half of a medium sweet onion.  Finally, I took a quart of homemade sauerkraut that a friend of The Oldest makes every year and dumped into a colander to drain.  (One note should you decide to try this recipe.  Do not use canned sauerkraut.  Buy the fresh stuff that you find in the plastic bag in the meat case, or make your own.  The fresh kraut is crispy in texture and at the same time tart, but not sour like canned kraut.)  Once the dough was ready, I layered the pizza skin with a very thin coat of olive oil, thinly sliced sharp cheddar, sauerkraut, my caramelized onions, and then finally my bratwurst, sliced into quarter inch rounds.


Eight minutes in the pizza oven later, and here was the final product.


After slicing, I served with a little drizzle of spicy brown mustard on top.


Good, but not quite there.  I needed more onion, cheese, and perhaps a tough of garlic.  But, the flavors are there.  The bratwurst crisped up nicely and retained a bit of that beer infusion.  The sauerkraut started to brown and caramelize in places as well.  Perhaps some caraway seeds are in order.  This experiment was a good start.  I will be making this pie again with some modifications in the future for sure.

Thanks for stopping by,

Bill  

Wednesday, February 11, 2015

Quesadilla Style Pizza

It was early in the day Super Bowl Sunday.  We had yet to be excited by the best catch in the history of the game to be followed by the worst play call in the history of organized football.  On our minds was the topic of eats.  What to make?  After looking through the refrigerator, we decided upon a traditional go to meal for the big game.  Pizza.  Hope and The Youngest wanted a traditional pie with sausage, pepperoni, and cheese.  I was looking for something different.

I set forth to rummaging through the refrigerator for some ideas.  Perhaps Greek yogurt and spinach? Nah.  Olives, broccoli, and processed cheese product?  Nope.  My eyes fell upon the batch of pinto beans I had made the day before.  It had been awhile since I had indulged in some Mexican fare.  I had just bought a chunk of Thunderjack cheese the other day.  Hmmm, a plan was developing.  Lets to go back to the pinto beans and start from the beginning.

My mom has made pinto beans for years.  Beans are not every ones cup of tea, but I grew to like them.  No, actually love them.  Beans of all types prepared in many ways.  But, my go to dish is Mom's good old pinto bean recipe.  Quick, simple, and great with some stovetop Mac and Cheese and a wedge of corn bread.  Here is the recipe:

Homemade Pinto Beans:

1 lb dried Pinto Beans.  Rinsed and stones removed.
1 small sweet onion, roughly diced.
1 bell pepper, roughly diced.
4 cloves of garlic, minced.
1 Tbsp of freshly ground pepper.
2 tsp ground cumin
Salt to taste.

I soak my beans over night.  You don't have to do this, but I think that it provides a smoother bean after cooking.  After soaking overnight, drain your beans and rinse with cold water.  Place the beans and all of your ingredients, except the salt into a pot with enough water to cover and an inch more.  if you cook with the salt at the beginning, you will end up with a tough bean that is no fun to eat.  Bring your pot to a boil, then simmer your beans for three hours.  I crack the lid on my pot so that I reduce the amount of liquid a bit while cooking.  Why?  I like a thicker bean.  After cooking, remove the beans from the heat and add salt to taste.  You could add a hamhock or some bacon while cooking, but I like the pintos just like this.  Here was my last batch.


How was I going to incorporate beans into a pizza?  Refried beans of course.  This recipe is quick and simple and way better than any refried bean you will get at a Mexican restaurant.

Homemade Refried Beans:

One cup of your Pinto Beans, plus the liquid.
1/4 cup shredded four cheese Mexican blend.
Olive Oil for your pan.

First, get a small skillet and add just enough olive oil to prevent your beans from sticking.  Turn your burner to medium heat.  Once the oil is starting to shimmer, twirl your pan to coat all surfaces and add your beans.  Then, start mashing your beans with a potato masher.


Once you get your beans to the consistency you want, add the cheese and mix until melted and combined.


I do not mash my beans until they look like something that comes out of a baby food jar.  I like some texture to my refried beans.  I would say the biggest chunks are about 1/4"


Now, for the pizza.  First, Hope made a batch of pizza dough.  Here is the recipe.  It is Jeff Smith's The Frugal Gourmet Cooks Italian Recipe...

Pizza Dough

3 1/4 cups AP flour
1 tbsp yeast
1/4 tsp sugar
1 tsp salt
2 tbsp olive oil
1 1/4 cups warm water

Put all of the ingredients into a bread machine, yeast on the bottom.  Hit start and let your machine go through one knead and raise cycle.  Then remove your dough from the bread maker and cover with a clean towel for 15 minutes to raise.  When handling the dough, spray your hands with cooking spray.  You'll thank me later...

Quesadilla Style Pizza:

1/2 of our Pizza Dough recipe
1 cup of Refried Beans
Enough sliced Thunder Jack Cheese to cover your pie
1/2 small Red Onion, diced
2 oz Black Olives
Hot Peppers, sautéed in oil, to taste.  You could use sweet if you like

Lets run through the ingredients.

Thunder Jack Cheese is the best Co Jack I have found at our local grocery store.  It can be found in the specialty case of your local Big Bird.  It is better than any pepper jack cheese I have ever found.  It has that great Co Jack flavor with big hunks of real pepper.  I could eat the whole block myself.


Next up, the hot peppers in oil.  I have found a great product from Suhey's Peppers.  Suhey, sound familiar?  Yes, these peppers are made by the same Matt Suhey that rumbled through the Penn State backfield back in the day.  It is tough for a Pitt guy to like this product, but I have put my college rivalry aside.  These peppers are perfectly spiced and prepared with whole cloves of garlic.  These peppers top out on the top of the heat scale.  Blazing hot, but not in an obnoxious way.  They add lots of flavor to any dish.  I have even started adding them to my tossed salads.  Warning though, they are not for the capsicum challenged.  Suhey's does make a sweet variety that is just as good.  I recommend either.


So, I built my pizza.  I spread my refried beans on my crust, then topped with the cheese, onion, olives, and peppers.


I fired up our new toy, the Pizzakettle, then cooked this pie in no time. Seven minutes to be exact, with one 180 degree turn halfway through the cook.


Seriously, this pizza was everything I had hoped for and more.  Was this a quesadilla or an open faced bean burrito?  The inner part of the pie was like a bean burrito that had been grilled due to the crispy crust on the bottom.  The outer edges were more like a crispy happy hour quesadilla.  This pizza had it all.  The beans crisped up on the outer edges and so did the cheese.  The oil from the peppers slightly caramelized the red onion.  Everything just came together.  There are even options for future versions of this pie.  Why not add some grilled shrimp or chicken breast?  I just might try the shrimp the next time.  One thing I will change the next time I make this is to use more refried beans.  Perhaps a double recipe the next time.  The outer edges could have used a little more bean coverage.

Thanks for stopping by,

Bill

Saturday, December 6, 2014

Wood Fired Sweet Sausage and Broccoli Pizza

We have a local pizza joint around here that has a specialty pizza made with broccoli rabe and sweet sausage.  The sauce is a white base: olive oil, garlic, thyme, oregano, and a hint a basil.  I love that pie.  Ever since I had my first piece, I have wanted to make one at home.

Unfortunately, I cannot find broccoli rabe, otherwise known as rapini, in my local grocery.  What is broccoli rabe you ask?  Think the love child of broccoli and spinach.  Looks kinda like spinach with a hint of broccoli, tastes kinda like broccoli with a hint of spinach.  It is a nice bitter Italian green that sauteés well.  A perfect balance to the fattiness of some browned sweet sausage.  Since I cannot find rabe in the store, I substituted regular broccoli.  Lets head to the kitchen.

First, I took enough olive oil to cover the bottom of a small bowl and added 1/2 tsp each oregano and thyme, then 1/4 tsp of basil.  I also added one large minced garlic clove and a grinding of sea salt and pepper.  Since this pizza was for me and not Hope, I also added 1/2 tsp of crushed red pepper for some heat.  I allowed this to sit while I moved on to my other preparations.


Next, I browned some sweet Italian sausage.  I did not cook the whole way through.  Probably about 80% cooked so that it would finish the rest of the way while the pizza was cooking.  When done, I placed in a paper towel lined bowl to soak up the fat.


Next, I took half of a head of broccoli and removed the florets.  Then, with a pairing knife, I broke the florets down into smaller pieces.  For some texture, I took some of the stalks, quarter them, then sliced thinly.  In a saute pan, I heated some olive oil and sautéed the broccoli until it was starting to get soft, but still retained its crispiness.


I also added a little more crushed red pepper for a little more kick.


When the broccoli was done, I mixed it with a half cup of the browned sausage and mixed thoroughly.


While I was firing up our new toy, the PizzaKettle, Hope offered to build my pie.  She brushed the dough with the olive oil mixture, then layered sliced fresh mozzarella, then added the broccoli and sausage mixture.


After four minutes in the PizzaKettle with a 180 rotation two minutes into the cook I had a perfect pizza pie.  You can also bake this pizza in your oven at 450 F for 20 minutes if you choose.


I liked how my first attempt at this pie turned out.  I am missing the bitterness of the broccoli rabe, but the broccoli itself was a nice substitute.  If I cannot find rabe in the future, I might substitute half of the broccoli for some spinach.  The next time you are looking for something different in a pizza, give this one a try.

Thanks for stopping by,

Bill

Friday, January 25, 2013

The Many Faces of Pizza

To think that how we make pizza here in the US is like how the rest of the world makes it would be like sticking your head in the sand.  They are many other regional recipes, even within small countries, that demand to be tried.  I am blessed with being able to travel overseas for my job.  I thought I would take you on a quick world tour of pizza and how it is made outside of the U.S. of A...

First stop is Mannheim, Germany.  First pizza up is a traditional Alsace Flammkuchen.  Alsace is a region in Southwest Germany.  This area includes Strassburg and Frieburg.  Over the years it has been in German and French hands so many times that the older people speak both languages fluently.  An Alsace Flammkuchen consists of a sauce made out of a sour cream base.  No cheese is added.  Just thinly diced and sauteed ham, onion and parsley on a thin crust...


The crust is crispy, the ham is perfect, and the onions help to bring it all together into a great taste treat.  Served with a dry Riesling, it is the perfect light dinner or summertime treat.

As cultures mingle, so do flavors.  A second Flammkuchen that I sampled was one of a Spanish variety...


Again, a thin crust with a sour cream base.  The toppings were thinly sliced chorizo and finely diced pepperoncini.  Spicy and tart, the sour cream helped to cool the hot spice of the chorizo.  I washed this masterpiece down with a dark wheat beer...

Last stop is Italy for a piece of traditional pie...


When this slice was delivered to my table, I thought a second slice would be in order.  I was so wrong. A nice dense and chewy, yet crispy crust was covered with delectable toppings and more than enough to satisfy my hunger.  No sauce here.  The traditional way at this pizzeria is to drain fresh crushed tomatoes and lightly season with garlic, salt, and pepper.  On top of the tomatoes was placed fresh mozzarella and fontina cheese.  This was finally topped with thinly sliced, locally sourced salami.

This culinary delight was washed down with a local Italian beer.  It might look like your standard American Crudweiser, but foreign lagers are all modeled after German recipes.  Full boded, crisp, and full of taste, it is the perfect thirst quencher for a heavy, spicy meal.


Just writing this post I can taste these three great meals.  I can't wait for the next time I get to try another pizza in another far away place.

Thanks for stopping by...

Bill

Monday, September 24, 2012

Take Advantage of those Last Tomatoes of the Year

I don't know how the tomatoes were in your neck of the woods this year, but in Western Pennsylvania, they were excellent.  Juicy and full of flavor, we took full advantage of this years crop.

So, the neighbor dropped off some nice slicing tomatoes, so we decided to make what has become one of our favorite pizzas:  Fresh Mozzarella and Tomato Pizza.

First, we made some homemade dough in the bread maker and stretched over a pizza pan.  While the dough was rising, we took some fresh garlic, diced fine, and put in a bowl with olive oil, salt, pepper, oregano, basil, and thyme.  This probably sat in the oil for about 30 minutes.  After the dough was stretched, we brushed the dough with the olive oil mixture, then layered on top some thin sliced fresh mozzarella cheese and thinly sliced tomatoes.  The tomatoes got a light brush with some olive oil as well...


We preheated the oven to 425 F, then put the pizza in for 20 minutes, or until the crust was brown and the cheese was bubbly and brown.  Here is the finished product...


Sliced it up and had a great dinner.  Quick, simple, delicious...


I like mine with some fresh grated Parmesan cheese and hot pepper flakes for some kick.

Time is short, so give this a try before your tomatoes are gone for the year.

Thanks for stopping by...

Bill

Wednesday, July 25, 2012

Pulled Pork Pizza on the Baby

One of the best non-traditional pizzas you can make is Pulled Pork Pizza.  There was a pizzeria around here that used to make it.  But, unfortunately, they are not around anymore.  So, I made it myself.

First, smoke yourself a pork butt.  Nothing fancy, just my usual rub...


Pull, add BBQ sauce, and mix...


Take some hamburger dill chips, drain and pat dry with a paper towel.  Spread the pork over a pizza crust, then top with the dill chips and diced sweet onion...


Cover with cheese.  I use Four Cheese Mexican Blend...


About 40 minutes in a 350 F smoker and you have something great!


Good stuff.  Tangy, sweet, and full of pork goodness.  Everyone should give this a try!

Thanks for stopping by...

Bill