Search This Blog

Monday, December 28, 2015

How do you say Moink in Italian?

Monik Balls have been a competition BBQ staple for as long as I can remember.  There really is not a right or a wrong way to make them.  Generally, they are a meatball made with pork and beef (hence the "monk"), seasoned with BBQ rub, then wrapped in bacon and cooked in a smoker until the meatball is cooked and the bacon is cooked.  I have seen them served with a BBQ sauce glaze or with dipping sauce on the side.  Creativity is encouraged and the sky is the limit.

A few weeks ago, I was in the mood for some Moink Balls, but not in the mood for something with a BBQ taste.  So, after digging through the ice cave, I found some ground meat and sweet Italian sausage.  Italian Moink Balls?  Why not.

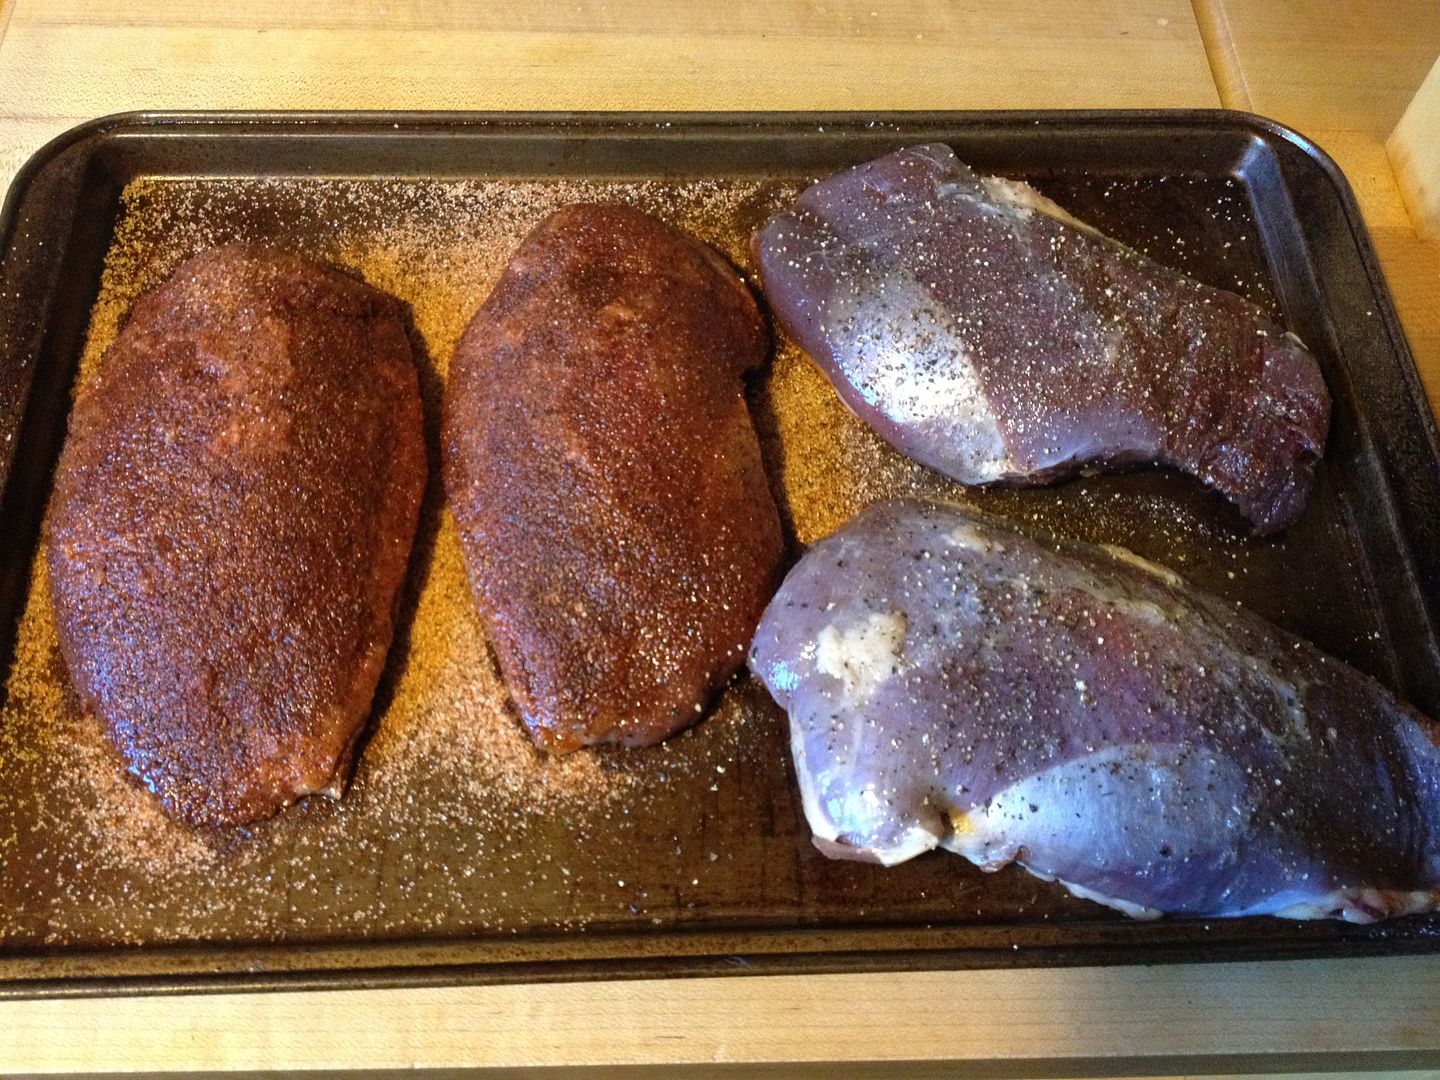
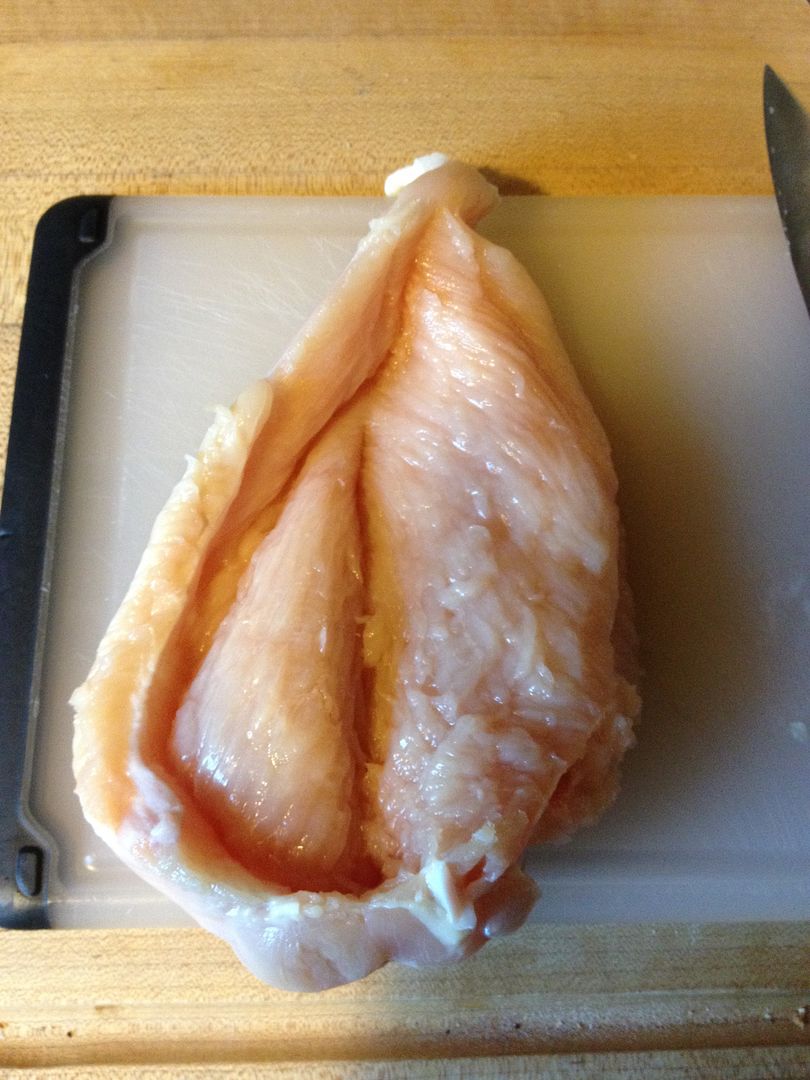
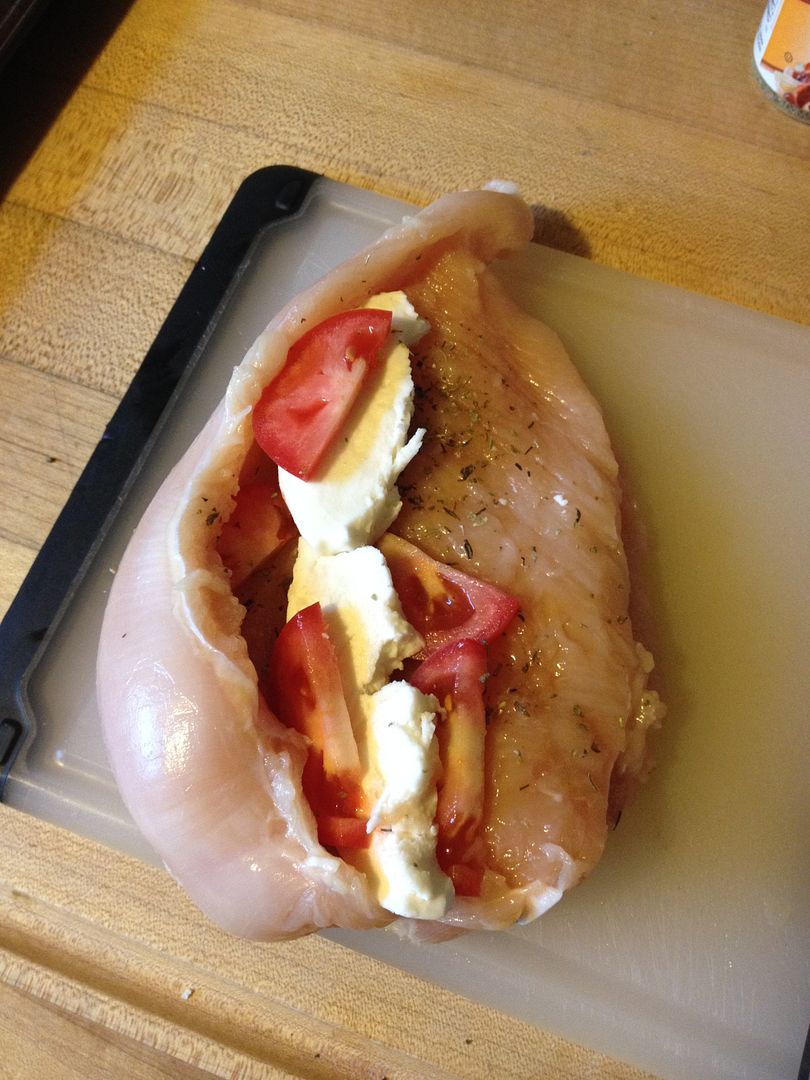
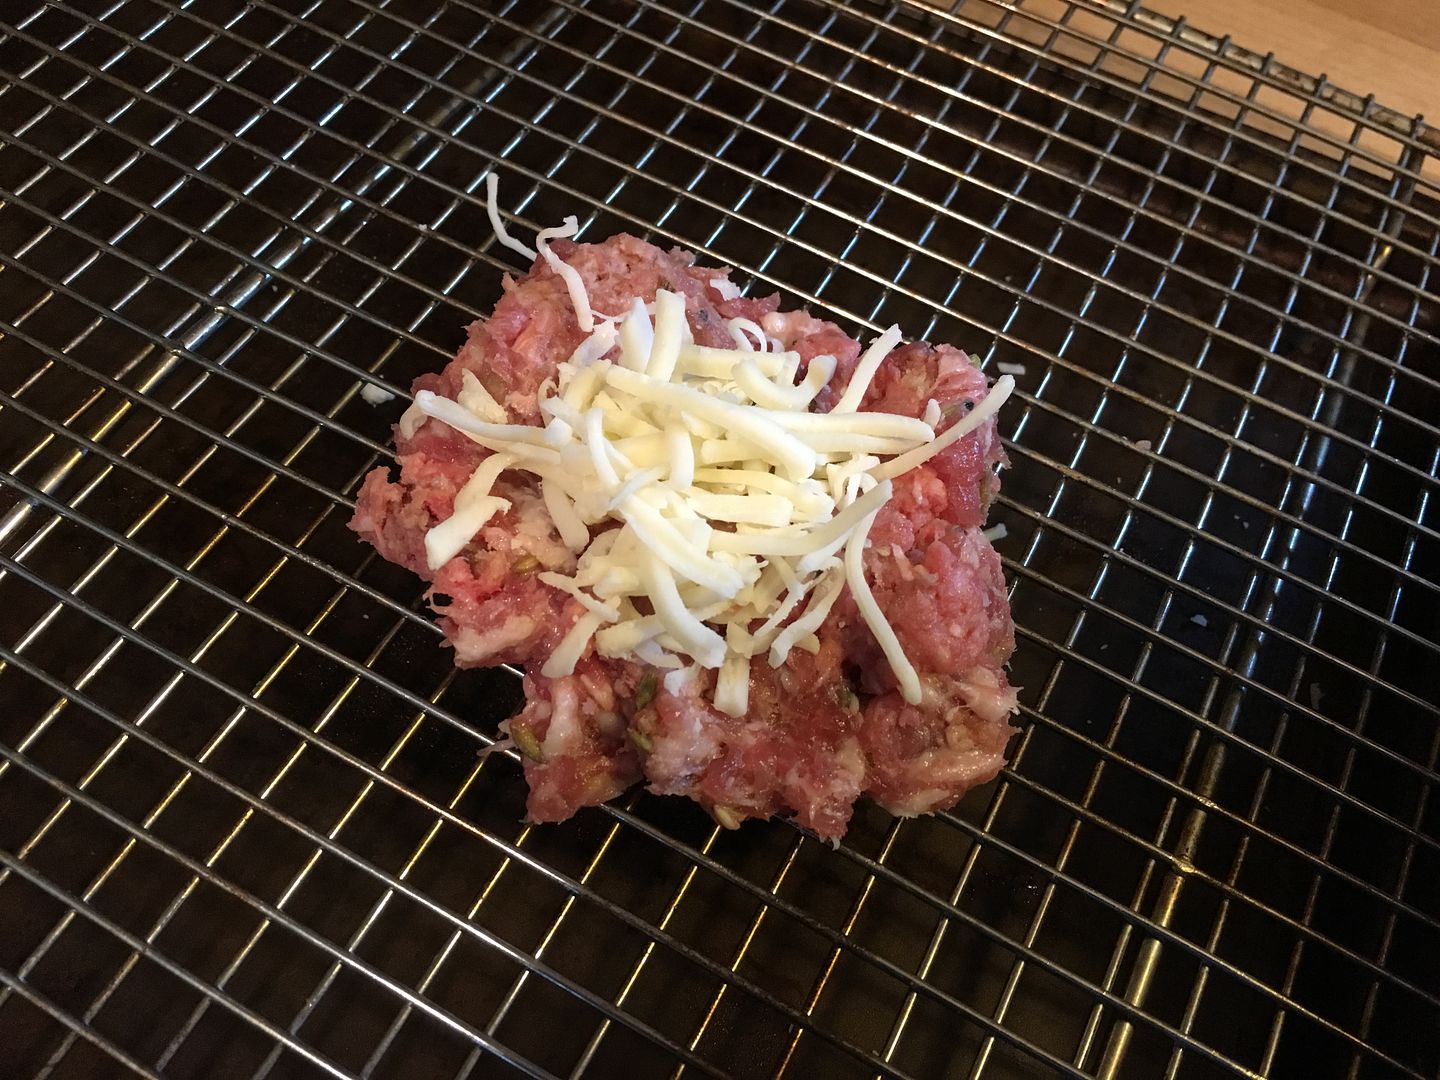
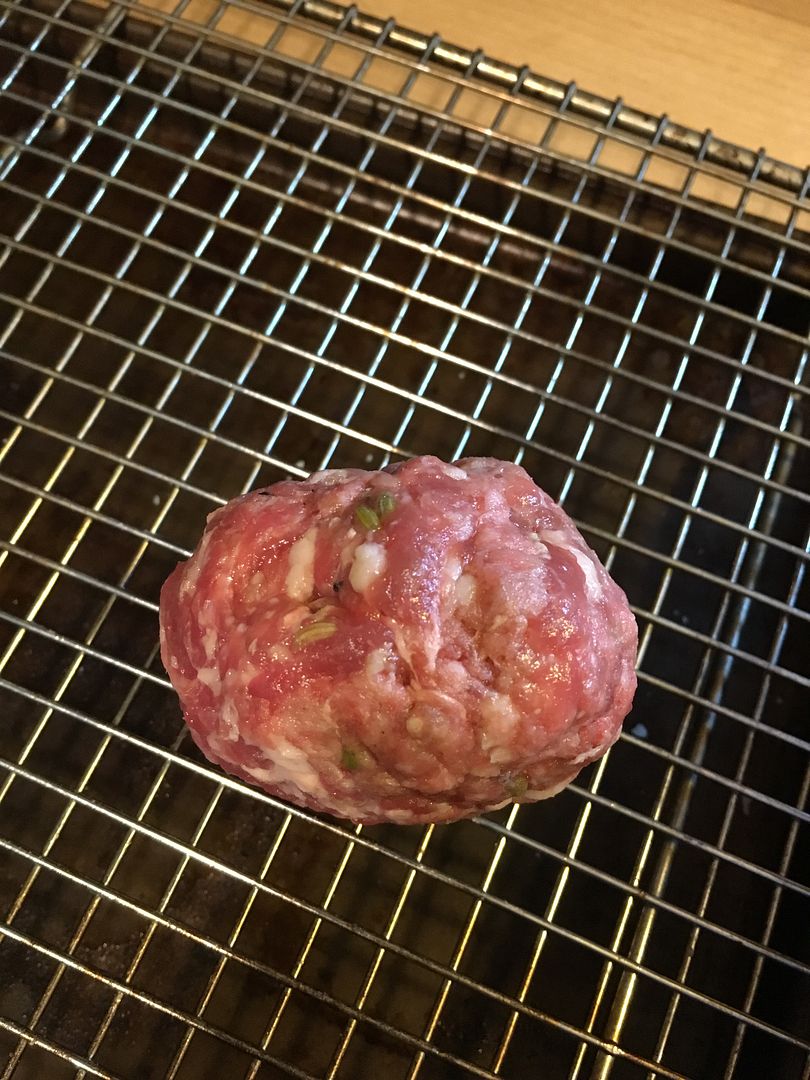
After thawing the ground meat and sausage, I mixed one pound of each in a bowl with two cloves of minced garlic and salt and pepper to taste.  If your Italian sausage lacks pizzaz, you could also add oregano, thyme, and basil to your liking.  But, the Italian sausage we have is made by authentic Italian Grandfathers from an Italian Club around Windber, PA.  No added seasoning needed.  Once the meat was mixed thoroughly, I pulled out about 1/4 cup pieces and rolled into flat rounds.  Then, I added some shredded mozzarella cheese, closed the ball, and rolled until sealed to keep the cheese from oozing during cooking.


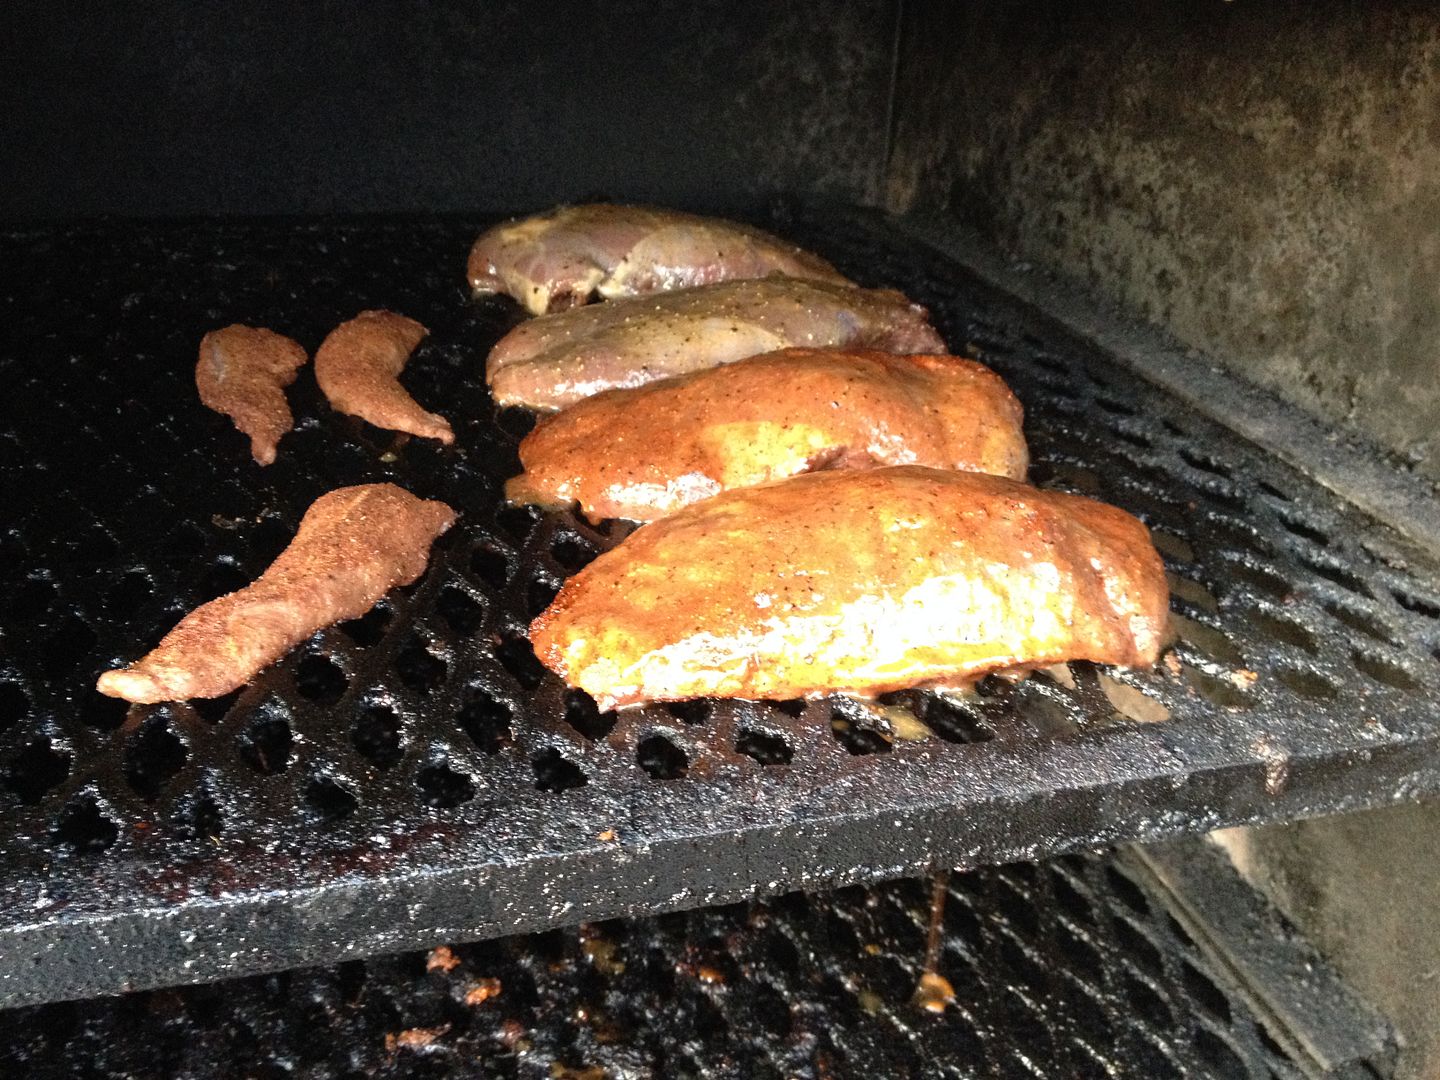
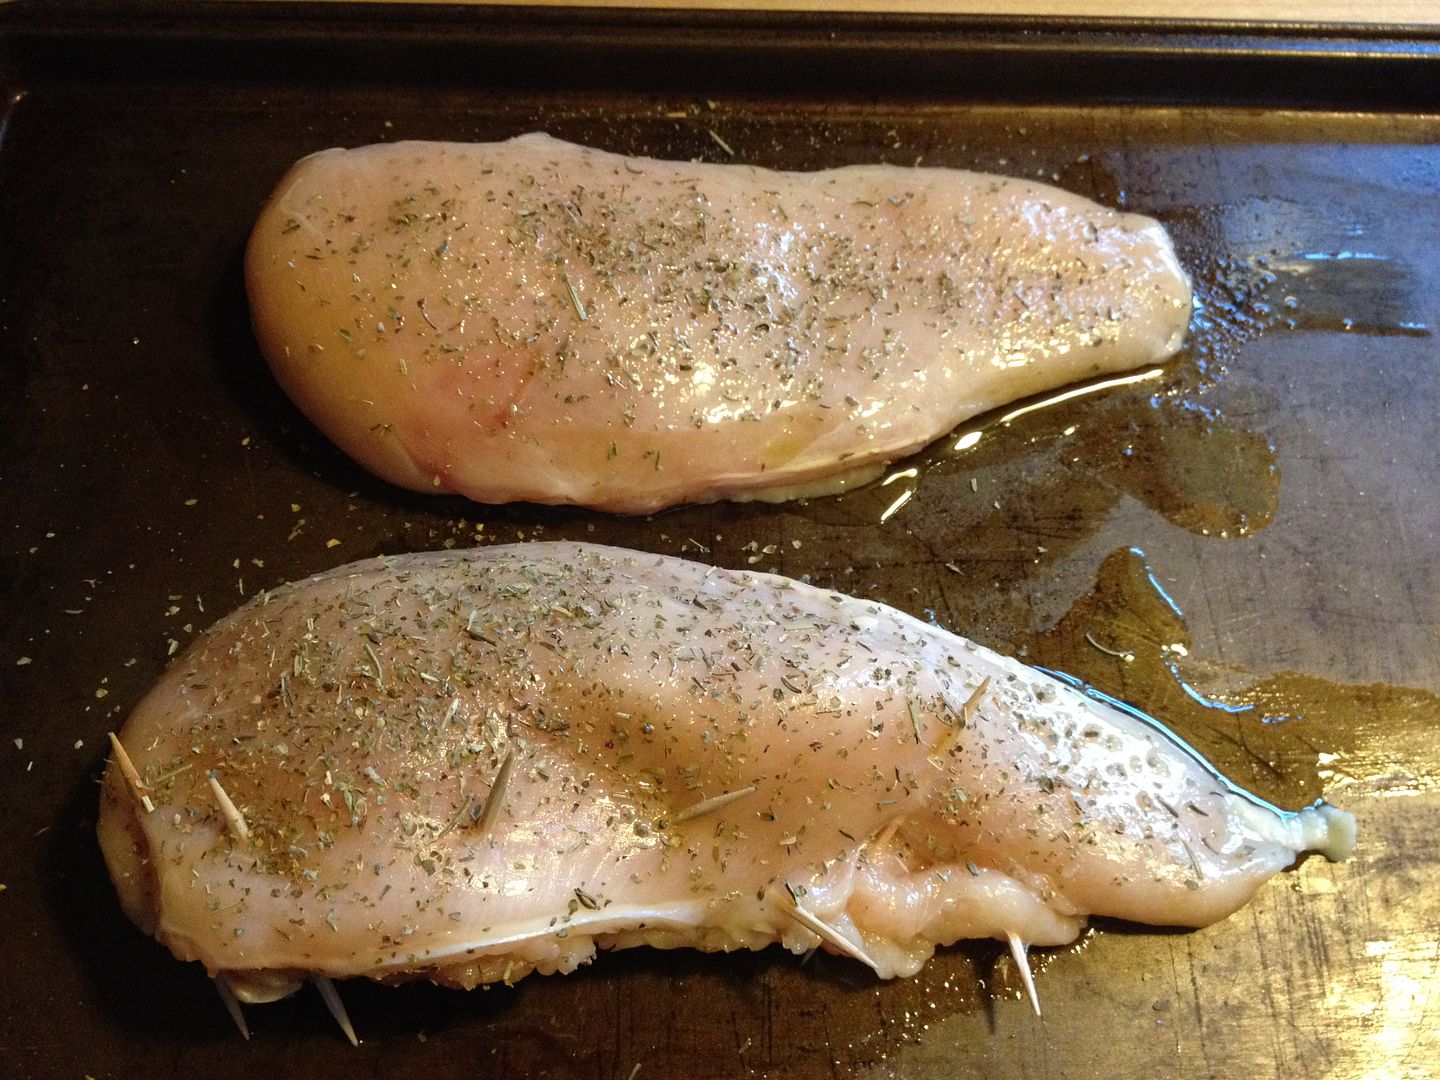
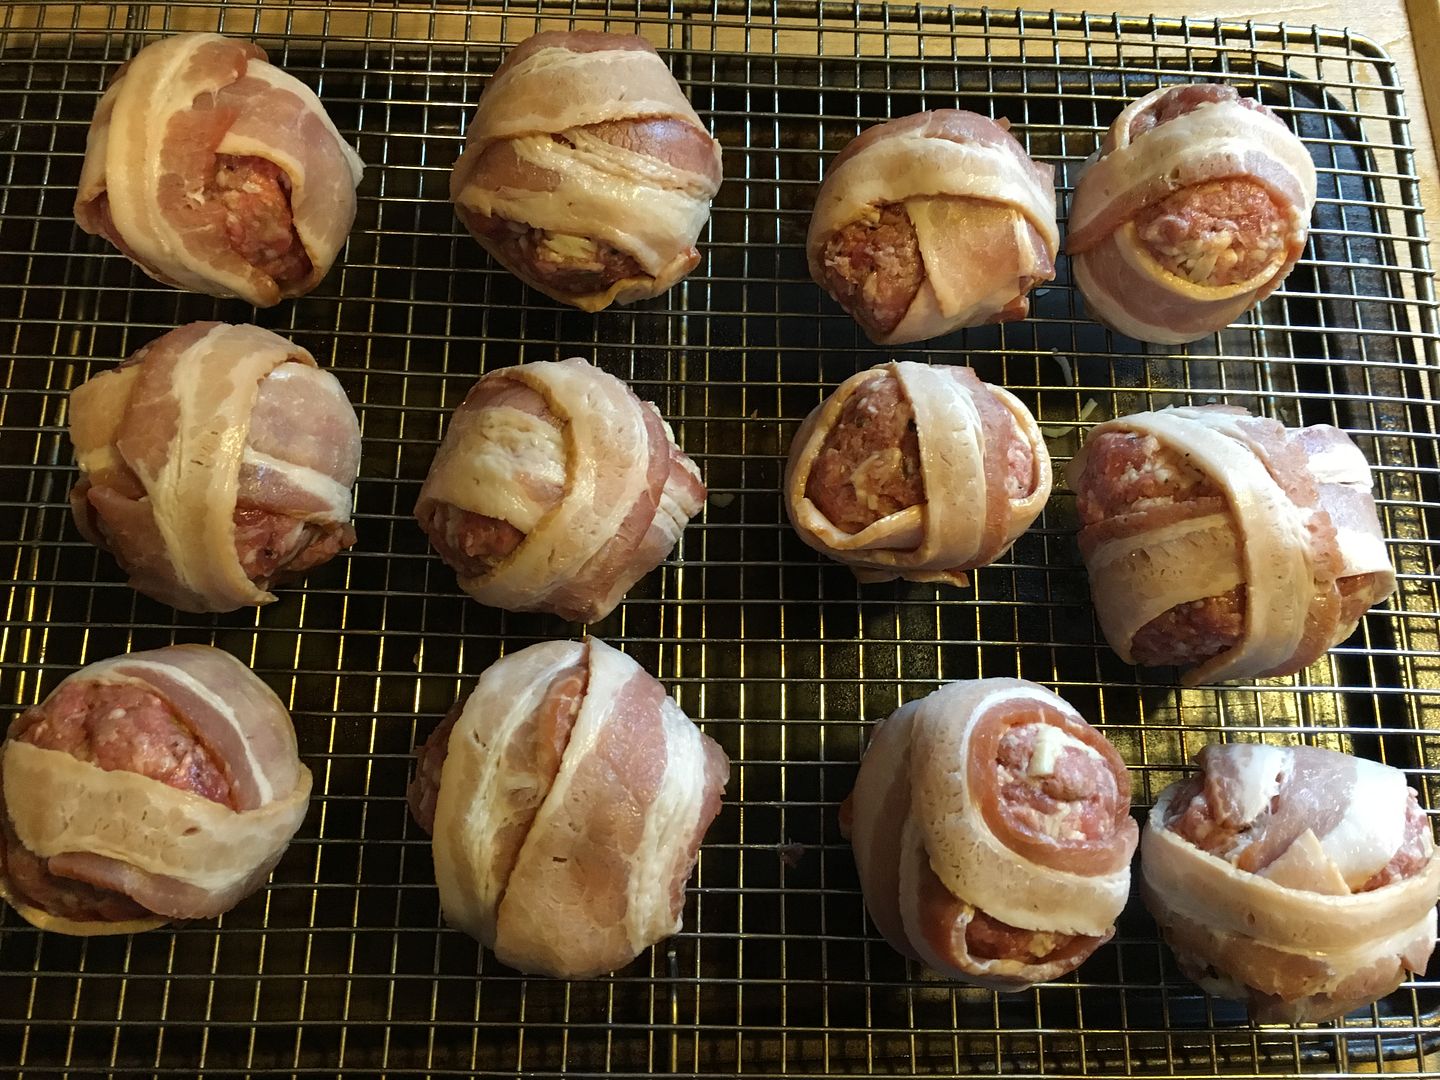
Next, I wrapped each meatball in one slice of thin sliced bacon.  Then, I let the bacon wrapped meatballs sit on the counter to come to room temperature while I brought my smoker up to 350 F.  Once the smoker reached temperature, I placed one piece of hickory in the ash pan for flavor and placed the Moink Balls with the rack onto the top shelf of the smoker.  After 30 minutes of cook time I rotated the rack 180 degrees to promote even cooking.


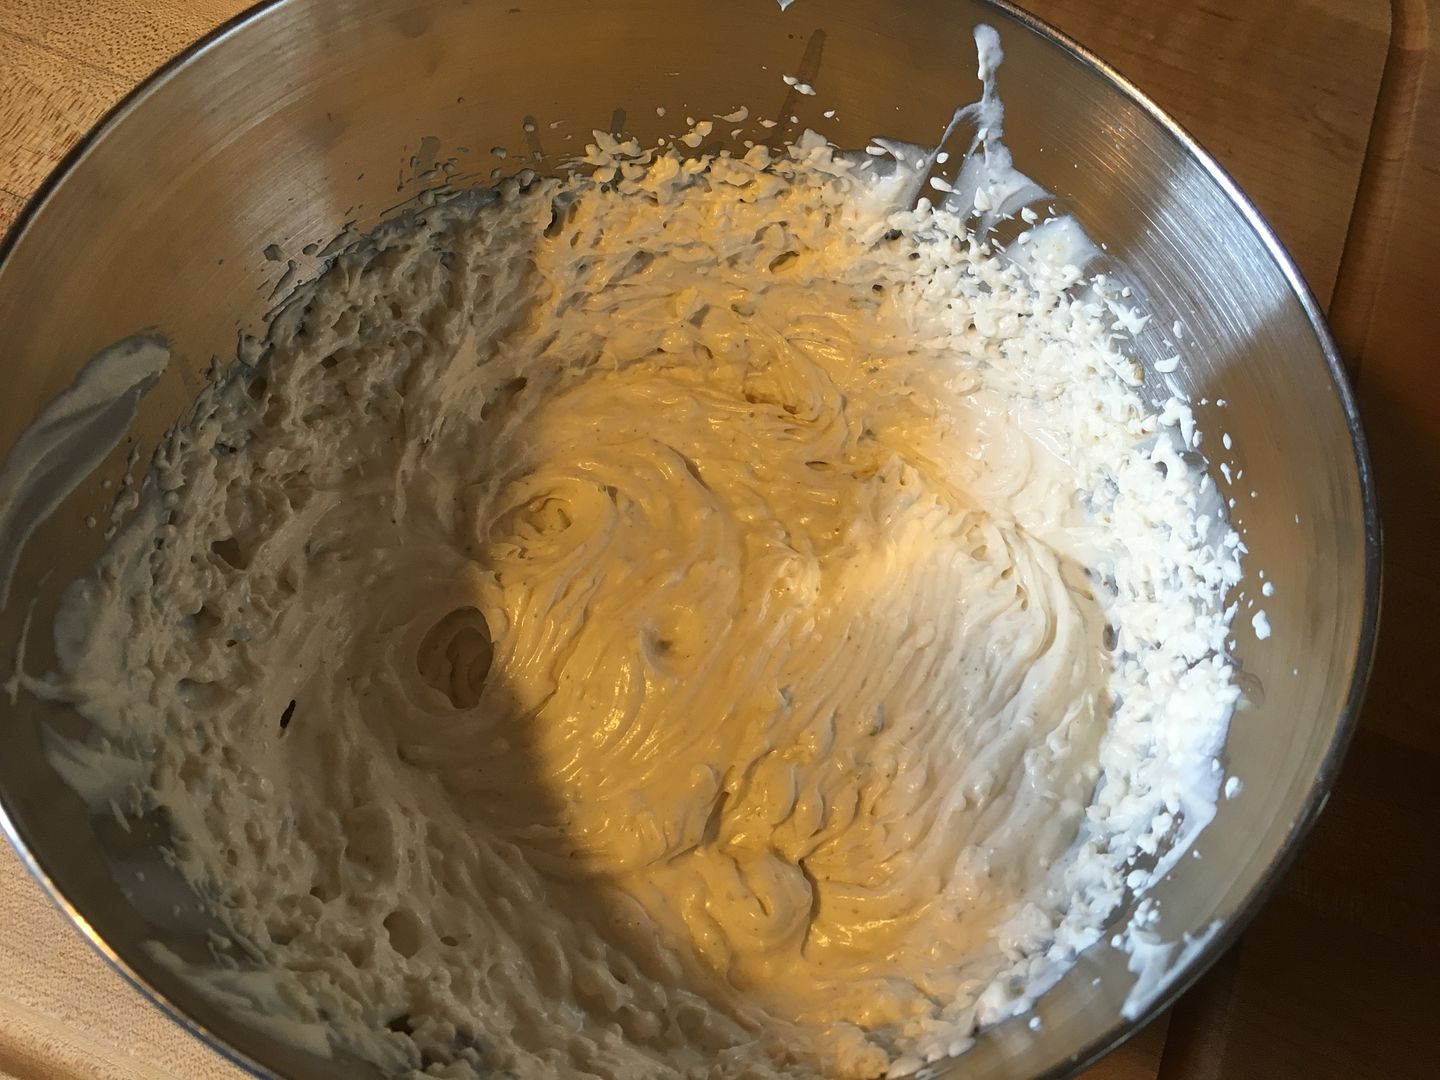
I was thinking of painting the meatballs with a spicy tomato sauce to form a glaze.  But, I remembered this great sauce is inspired by a friend of ours from the BBQ competition world.  I whipped up a Garlic Parmesan Aioli for dipping.  I took one cup of mayonnaise, 2 minced garlic cloves, the juice from one lemon, 1/4 cup of grated Parmesan cheese, salt and pepper to taste, and enough olive oil to get the mixture somewhat mobile.  This sauce was good, but wasn't anywhere near what she makes.  But, this was good for a first pass.  I will have to experiment with this sauce further.

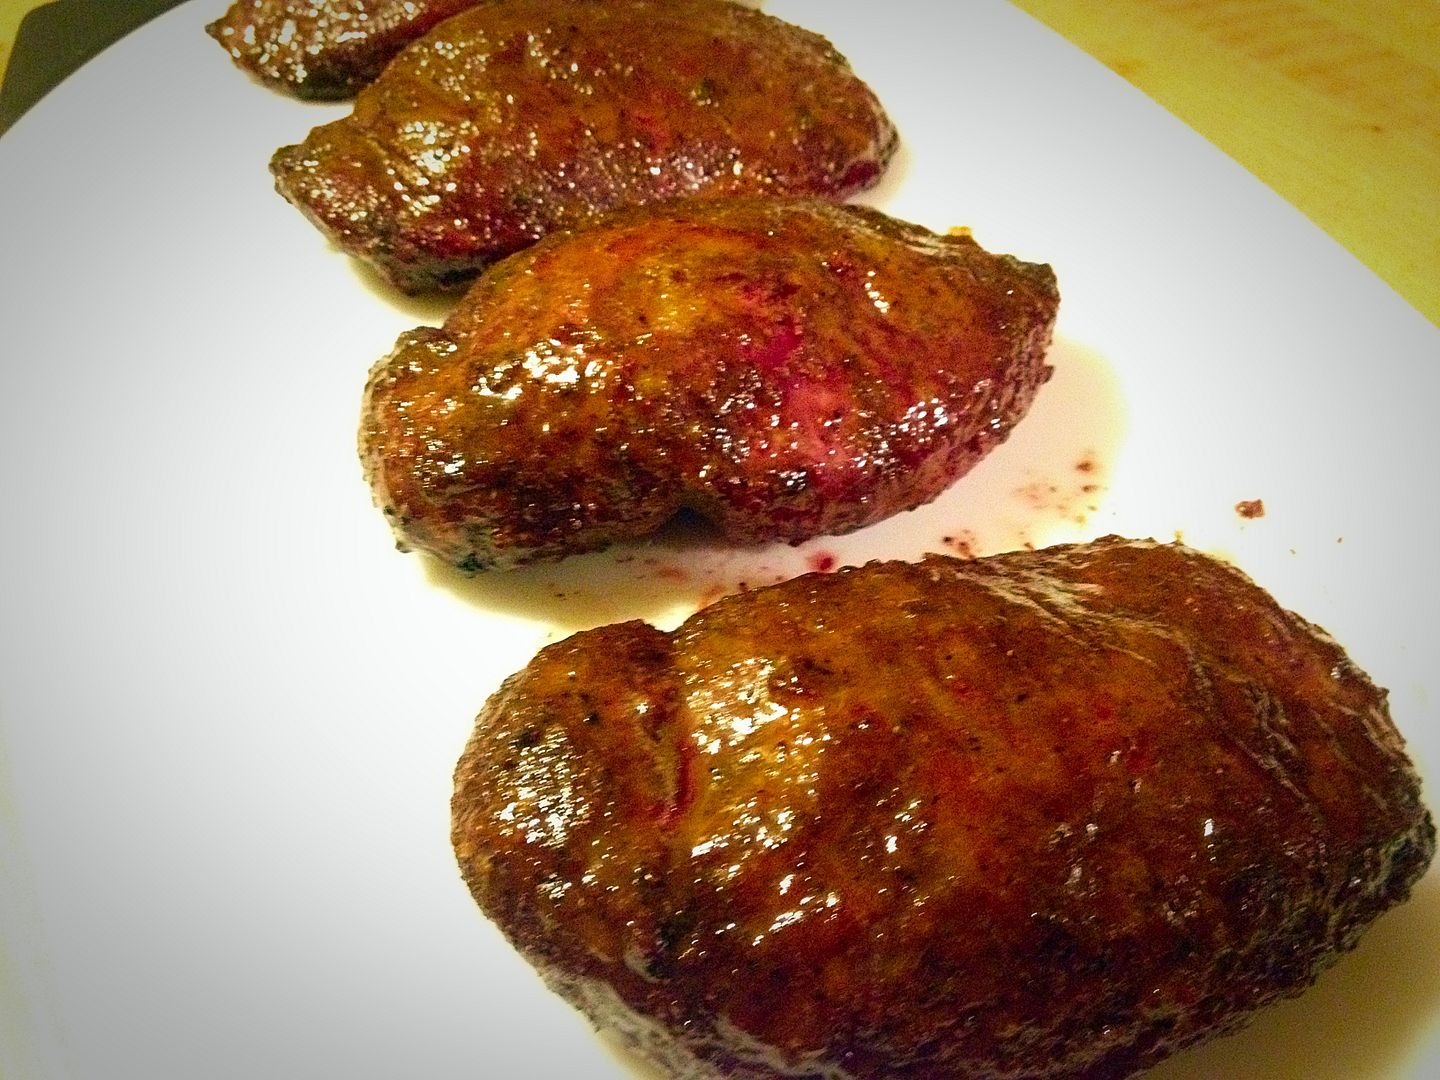
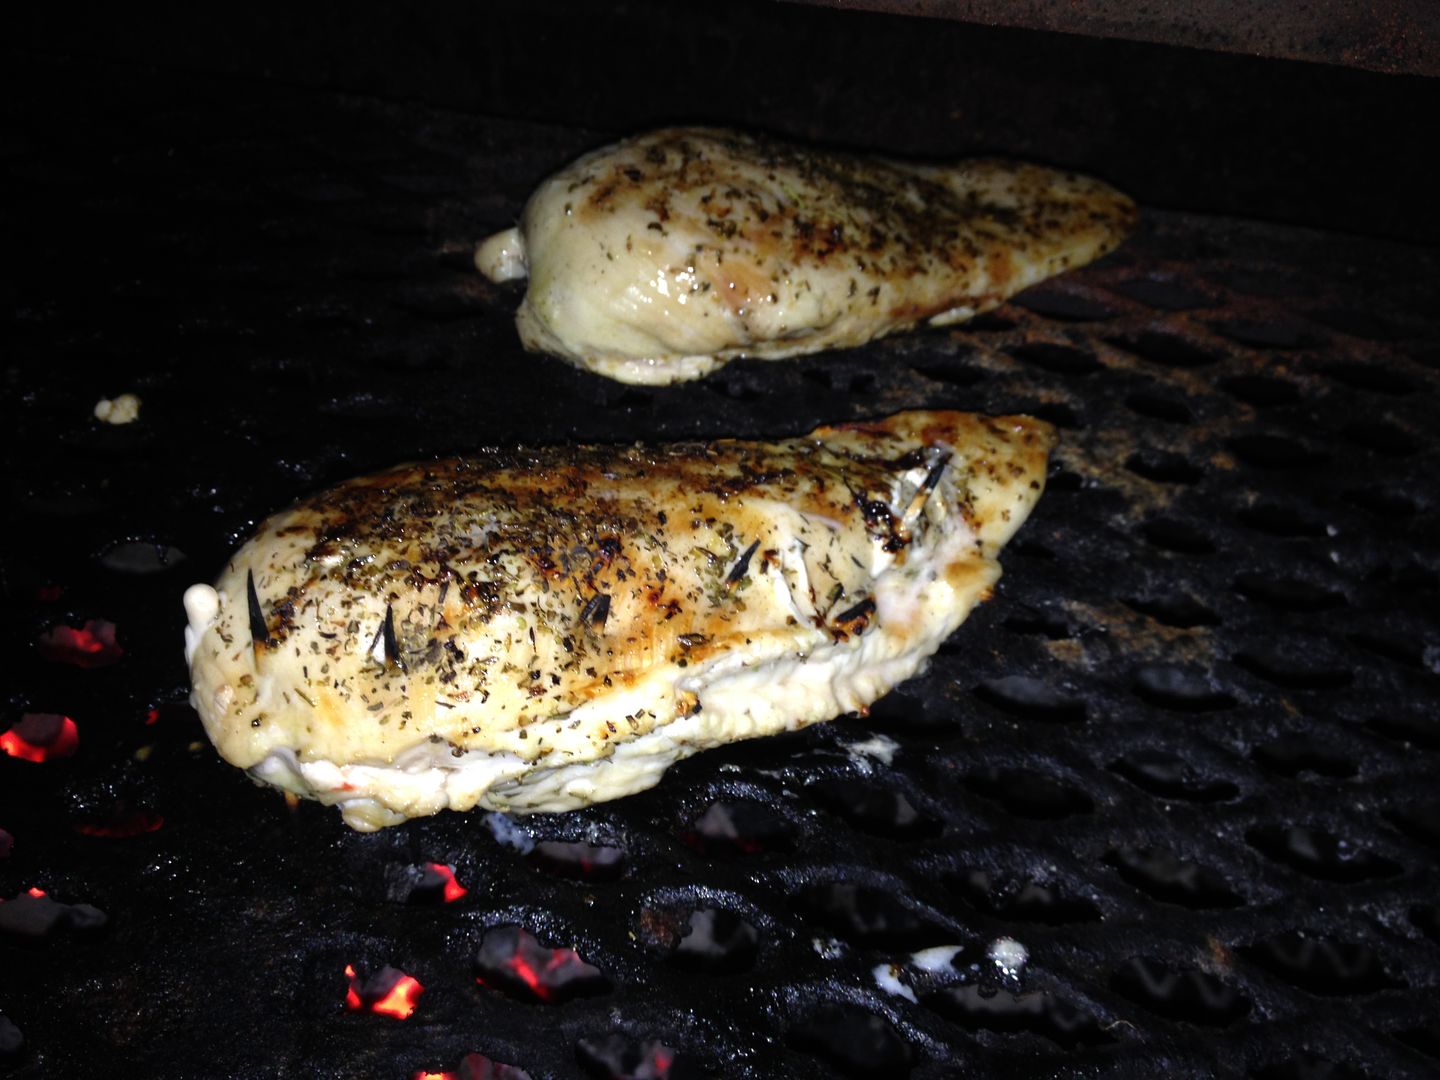
After one hour of cook time in the smoker, the meatballs were cooked and the bacon was crispy.  Ready to serve.


Not bad for an Italian style Moink Ball.  I was thinking of wrapping in prosciutto instead of bacon.  Next time I will.  I just didn't have any in the refrigerator.  Maybe that is something you can try.

Thanks for stopping by,

Bill

Sunday, December 20, 2015

Jed

This past week another member of the Three Dogs family, Jed, took that journey across the Rainbow Bridge.  So, sit for a spell and let me tell you about a dog named Jed...


Jed was the impulse buy at PetSmart almost one year after we adapted Jethro and Ellie Mae.  I was golfing and called Hope to tell her that I was on the way home.  I asked what she did during the afternoon and she proceeded to tell me that she picked up dog food, crickets for Henry, and a puppy.  "A what?"  I said?  A puppy she confirmed.  It was adoption day again at PetSmart, and he was so cute, and he whined when I walked away after petting him, etc...  All of you dog adopters know the drill.  So, now we had a 10 week old puppy named Scrappy.  But, with a Jethro and an Ellie Mae in the fold, the obvious choices were Jed and Mr. Drysdale.  Obviously, the better choice won.


Jed was born in the kennel after his mother was rescued off the street.  So, technically he was a rescue himself, but he never acted like one.  He was never centered on where the next meal was coming from, never begged for food, and while he was a loving dog, he only pushed you for ear scratching and was just as happy to nap in the sun.

Jed was a chocolate lab/weimaraner mix.  When he was younger he had those blue gray eyes and the smoky tint to his coat.  But, as he left puppy hood behind the eyes turned to brown and the smoky tint turned into a full chocolate tint.  The only weimar traits he kept were the long legs, the skinny chest, and the attitude.

While Ellie Mae was my dog, Jed was 100% Hope's.  Jed loved car rides, so if we went anywhere, he expected to sit in the front seat with Hope.  I kicked him to the back seat, but The Oldest two legged kid sat in the back seat more than once after loosing that battle with Jed.

Jed was also the inspiration for our team name.  People have asked where we came up with the name.  The obvious answer is that we have three dogs.  But, this picture was the spark for the name.


I looked out the back window one day and there was Jed.  A built in security system for the smoker.  Nobody was getting into the smoker for some smoky treats unless he let you.  Period.  At that point, the name was settled.

As I mentioned, Jed liked getting his ears scratched,


and laying in the sun.


But, he absolutely loved to play in the snow.


He would go outside and run around like a fool, chasing snowflakes until he was tired.  Then he would lay down in the snow and we would have to go drag him inside so he didn't freeze to the ground.

Unfortunately, the one lab trait that Jed developed over time was arthritis.  His hips were stiff and the act of walking, sitting, and getting up became harder and harder.  But, we got him some pills and he started moving around better.  Unfortunately, when Ellie Mae passed three months ago, Jed started to give up.  You see, Jed and Ellie Mae were thick as thieves.  They did everything together.  Jed knew that Ellie Mae was sick and laid with her until the end.  He never did accept her passing.  He ate less and less and moped around the house.  Fortunately, we had some warm weather these past few weeks and Jed was able to lay in the warm sun a few more times.

In hindsight, Hope and I truly believe that Jed died of a broken heart.  I know it sounds cliche, but it is unfortunately true.  So, now Ellie Mae and Jed are together again.  They get to lay in the sun and run together without any pain.  Someday, I will get to see them again and Jed will kick me to the backseat.  I will gladly sit in the back, scratch his ears, and smile...


Thanks for stopping by,

Bill

Sunday, December 13, 2015

Beer Brined Cornish Hens with a White Sauce Glaze and Bacon Cornbread Stuffing

Stuffing is one of those coking topics that can be very personal.  Most people remember how Mom made their stuffing at the holidays and there can be no better.  Period, end of story.  The debate rages on in our house.  My stuffing, which is a hybrid of my Mother's recipe and Hope's stuffing, 100% her mothers method.  Where is this leading?  Well, I picked up a few cornish hens last weekend and wanted to experiment with the stuffing.  Hope wanted none of that.  She wanted her Mother's stuffing, end of story.  The good thing about cornish hens is that there are two birds, so everyone can be happy.  Once that was decided, I happily set to experimenting in the kitchen.  These hens would take a long, lazy spa treatment via a six hour beer brine.  Then, with some leftover homemade cornbread, I prepared some stuffing.  Once the birds were seasoned and in the smoker, I finished mine with a Alabama White Sauce glaze.  Off to the kitchen we go.

For the brine, I used my standard recipe, with a twist.  For the liquid, I removed 48 oz of water and substituted four bottles of beer.  You could use any type of suds.  I used Yeungling lager.  After preparing the brine and allowing it to chill overnight, the hens hung out at the spa for about six hours.


Next, I whipped up a batch of Alabama White BBQ sauce from myrecipes.com.  My only changes to this recipe are:

1.  Add a pinch of cayenne pepper.
2.  Remove the sugar and substitute half of the water with apple juice for the sweet component.

For the stuffing, I decided on a bacon, mushroom, cornbread concoction.

1 day old wedge of cornbread, crumbled
1/2 rib of celery, diced
2 tbsp of sweet onion, diced
2 strips of bacon, diced
1/4 cup of mushroom, diced
1 clove of garlic, minced
1/4-1/2 tsp sage, depending upon your taste
Salt and pepper to taste

I started to brown the bacon, then added the celery, onion, garlic, and mushroom to sauté.  Once the mushroom had started to caramelize, I removed from the stove, placed in the bowl with my crumbled cornbread, added my sage, salt, and pepper, and mixed well.


Once the six hour spa treatment was over for the hens, I rinsed them well with cold water and patted them dry.  I then stuffed mine with the cornbread stuffing mixture, massaged the outside with some olive oil, and seasoned with some Dizzy Pig Raging River rub.


The hens went into a smoker that was rolling along at 350 F with a mix of apple, pecan, and hickory wood in the ash pan.  After one hour, I applied the Alabama White Sauce to my bird twice to make a nice even glaze. After thirty more minutes, the hens were at 165 F internal temperature.  Ready to remove from the smoker and eat.


Overall, I like how this hen turned out.  The sauce mixed well with the rub.  The meat was tender and juicy.  I was surprised at how much flavor the beer added to my standard brine.  It wasn't over powering, but it was detectable.  I just may have to try a variation on this recipe in the future.

Hope, on the other hand, liked her plain stuffing and unsauced bird...

Thanks for stopping by,

Bill

Sunday, December 6, 2015

Smoky French Onion Dip

Back in October, Hope and I were out for dinner one evening.  In the appetizer section of the menu was a listing for Caramelized French Onion Dip.  I was transported back to those times when Mom would whip up a batch of French Onion Dip with sour cream and the Lipton onion soup packet.  It was a good Saturday night when you were watching Chiller Theatre with a bowl of chips and dip.  Even better when you came upon a lump of undissolved soup mix or perhaps a dehydrated onion or two.  Memories...

Anyway, we ordered the appetizer to start our evening in anticipation that this dip would be an improvement upon a childhood favorite.  The menu said that the dip would be rich, creamy, and loaded with caramelized onions.  Unfortunately, it was none of the above.  Not nearly enough onions and they were nowhere near caramelized.  The base was rather bland, consisting of salted sour cream and lacking in other seasonings.  So, I decided, I can make this and I can make it better.  Off to the R&D labs we go.

Three Dogs Smoky French Onion Dip

1 small sweet onion, sliced then diced
2 large garlic cloves, roasted
1 cup mayonnaise
1 cup sour cream
4 oz cream cheese, softened
1.5 tsp celery salt
1 tsp Worcestershire sauce
1 tsp dried parsley (this was a substitute for the chives I didn't have)
1/2 tsp kosher salt
Olive oil for caramelizing your onion and roasting your garlic

First, I lit my smoker and brought to 250 F with a medium sized piece of hickory in the ash pan for flavor.  While the smoker was coming to temperature, I peeled, sliced, and diced my onion.


To dice my slices, I cut each slice into wedges like a pizza.  This way the smaller pieces would be completely caramelized and the larger pieces would be caramelized and add some crunch to the final product.  I mixed the onion with one tablespoon of olive oil and a healthy grinding of pink salt and ground pepper.  I also placed my garlic into a foil packet with a drizzle of olive oil and sealed the foil for roasting.  All of this was placed into a foil pan and then into the smoker.


After thirty minutes I went out and gave the onions a stir to promote even caramelization.


After one hour I checked the onions and decided they needed 30 more minutes.  So, I tired them and removed the garlic as it felt soft in the foil packet.


While the onions were smoking for their last 30 minutes, I removed the garlic cloves from their skins and placed in a large mixing bowl with all of the other ingredients.  I blended thoroughly with my trusty hand mixer until the mixture was smooth and the roasted garlic was distributed evenly.


When the onions were done, 1.5 hours at 250 F total time in the smoker, I brought them inside and folded them into the dip.


Then, I grabbed a chip to taste.  Did I succeed?  Oh yeah.  Better than what Mom made or the dairy aisle tubs of mass produced dip.  Great flavor and lots of caramelized and slightly crunchy onions.  New Years is around the corner.  If you want to try this out and don't have a smoker, no problem.  Just caramelize your onion in a skillet at low heat.  Mix it up, put out some chips, and stand back.

Thanks for stopping by,

Bill

Friday, November 27, 2015

Cioppino My Way

Good morning everyone.  How are we feeling?  Like me, you are probably still digesting that gut bomb from last night.  Lets be honest.  Turkey is a very small part of your Thanksgiving meal.  I had two slices last night.  Two!  But, I went back multiple times for stuffing, gravy, mashed potatoes, and all of those wonderful sides.  You will also be eating the leftovers until at some point in the weekend where you will say "Enough!".  Well, here is something nice and light that you might like to try when you reach that point.  Cioppino.

Cioppino is a dish made in San Francisco.  I was introduced to this dish on my first visit to the city by the bay.  It was love at first sight.  Cioppino is basically a seafood stew made primarily with a firm white fish, generally cod, as well as mussels and clams.  I have even seen Dungeness crab used.  We usually pick up what is on sale for our Cioppino.  This time it was cod, shrimp, and clams.

Cioppino, in my opinion is like chili.  There is a base recipe that you stick to, but it always changes.  This time around, here was my recipe:


Cioppino, Part Two

The Base

1 quart homemade canned tomato sauce with Italian spices added.  You could use the large can of plain from the store and add basil, oregano, thyme, and garlic to your taste.
2 cans of Chicken Broth
1 small can of tomato paste + 1 quart of water to make the paste mobile
1 medium sweet onion, diced
2 carrots, peeled and diced
2 ribs of celery, diced
2 cloves of garlic, minced
Olive oil for sauteing
1 tsp each oregano, thyme, and basil
1 bay leaf

The Rest

1 pint of cherry tomatoes, roasted
1 cup of dry white wine
1 lb of cod, cut into medium sized chunks
1/2 lb of medium raw shrimp, peeled and deveined, then cut into chunks
1 dozen clams and their juice.  We bought the frozen, precooked clams.  Don't judge.  They're going into stew, ok?
One cup of uncooked ditalini pasta
Salt and pepper to taste
Parmesan cheese for garnish

First, I brought my oven to 350 F, placed the cherry tomatoes into a 9 x 11 baking dish with one tablespoon of olive oil, plus salt and pepper to taste, and roasted for one hour.  I stirred them thirty minutes into the roasting process.  What you would like to see after one hour is a tomato that has popped and started to caramelize a bit.  Makes great pizza topping as well.  But, I digress.

Next, I added two tablespoons of olive oil to my five quart dutch oven, turned the heat to medium, and added the onions, carrots, and celery with some kosher salt and ground black pepper.  I sauteed until the onion started to turn translucent.  Then, I added my spices and sauteed two minutes more.


Next, I deglazed the pan with the white wine, then cooked until the wine had reduced in volume by 1/2.


Next, I added my tomato sauce, tomato paste/water mixture, and chicken broth.  Then I brought to a boil, reduced the heat, and simmered for one hour with the lid cracked to slightly reduce the liquid while simmering.


After the hour of simmer time, I added the pasta and seafood, brought back to a simmer, and cooked for seven more minutes.  At the very end, I added my roasted cherry tomatoes and stirred to mix.    That's it, ready to serve.


I topped with grated Parmesan cheese and served with a salad and crusty bread.  A nice light meal during the heavy holiday meal season.

Like I said, my Cioppino is never the same twice.  You could adapt this dish and make it spicy.  You could add whatever seafood you like, just as long as it is of a firm variety.  Take this idea a run with it.

Thanks for stopping by,

Bill

Thursday, November 19, 2015

Grilled Chicken and Sun Dried Tomato Pizza

We been going to the Church Brew Works in Pittsburgh for many years.  Since 1996 in fact.  It is an old, restored Catholic church in the Lawrenceville section of town.  Some might say that the opening of this brew pub was the catalyst for the revitalization of this section of town.  The beer is outstanding and so is the food.  While they have a diverse menu to choose from, I have two "go to" choices for dining: their French Onion Soup (made with the Pious Monk Dunkel) and their Chicken and Sun Dried Tomato pizza.  I have been meaning to recreate this pizza at home.  Finally, after almost 20 years, I got around to giving it a whirl at home.  So, here is my shot at recreating this masterpiece at home.

The base is a classic white sauce.  So, while the dough was rising, I took about 1/4 cup of olive oil and added thyme, minced garlic, oregano, basil, salt, and pepper to steep for awhile.  Al of the ingredients were added to personal taste.

Then, coated a chicken breast with olive oil and seasoned with thyme, granulated garlic, basil, and oregano.  The breast was grilled to an internal temperature of 160 F, brought inside to rest for about 10 minutes, then diced into bite sized pieces.  Now time to build the pie.

Hope stretched out the dough, then I spread the white sauce all over the skin, including the crust.  Next up was a layer of shredded mozzarella, followed by the chicken, sun dried tomatoes that had been packed in oil, sliced almonds, thinly sliced red onion, and a light sprinkling of dried parsley.


The pizza was slid into my hot pizza oven, lets say about 700 F, to cook for about eight minutes with a 180 degree flip halfway into the bake time.


Next, bring the pie inside and devour.


Good stuff and a fair recreation of one of my favorite pizza pies in town.  Now, if I get a craving for this pie, no need to drive 40 miles to get a fix.  Now, I just have to work on that French Onion Soup...

Thanks for stopping by,

Bill

Sunday, November 8, 2015

Smoked Goose Breast with a Citrus Glaze

BBQ Silly Season is upon us.  These are the cooks where we leave behind traditional meats, rubs, and sauces and try new recipes that are different and exciting.  Our first cook did not disappoint.  The Oldest had an outstanding first day of goose season and we were lucky enough to procure some beautiful looking breasts.  I brined the breasts, seasoned, then glazed with a recipe I found on line.  Let us head out to the smoker and see how this goose was cooked.

After some Google searches, I found a recipe for a glaze that looked pretty good.  You can find it here at allrecipes.com.  I didn't any honey on hand, so I substituted hot pepper jelly in place of the honey.  I changed up the method by brining the goose and using the marinade as a glaze.  After trimming up the breasts, removing as much silver skin as possible, and inspecting for any tooth cracking buckshot, I whipped up a batch of my poultry brine and let the breasts go for a six hour swim.  The brining process will remove most of the blood from the meat, infuse some flavor, and generally remove that gamy taste that you can experience when eating goose.  After removing the breasts from the brine, I rinsed them with cold water, patted dry, and applied a thin coat of olive oil.  Then, I seasoned two of the breasts with Oakridge BBQ Game Bird and Chicken rub.  The other two breasts were simply seasoned with pink salt and fresh cracked pepper.


I sit the breasts on the counter to come to room temperature, then I lit my smoker and brought to a temperature of 300 F. Then, I placed some pecan splits in the ash pan for smoke flavor.  Pecan is a nice mild smoking wood that pairs nicely with any kind of poultry or game bird.  The breasts were placed on hotter side of cooking racks.  After allowing to brown up for about 15 minutes, I applied my first application of glaze to all sides of the breast.


After allowing the first application of glaze to set for 30 minutes, I glazed the breasts a second time and allowed the goose to cook for 15 more minutes.  Total cook time was 60 minutes.

After removing the breasts from the smoker, I allowed them to rest for 10 minutes before slicing and serving.


Twenty-four hours from field to table.  You can't get much fresher than that.  We were very happy with how this goose turned out on the smoker.  No gamy flavor and tender, juicy meat.  The glaze would even work well for standard chicken on the grill.

Hunting season is young.  Stay tuned as hopefully we will have a few more opportunities to fire up the smoker with some local game.

Thanks for stopping by,

Bill

Saturday, October 31, 2015

Stuffed Pterodactyl Breasts

A couple of weeks ago, Hope stopped by the local Restaurant Depot to purchase some chicken to replenish the ice cave.  When she came home and we started trimming up the beasts in preparation for the vacuum sealer, I was amazed at their size.


These specimens could not have come from some standard barnyard, corn fed bird.  They were huge, almost prehistoric in stature.  These birds had to have escaped from some government run genetic engineering lab.  My mind started contemplating the possibilities of grilled stuffed chicken breast.  With the last plum tomatoes of the season staring at me from their counter top bowl, a plan came together.  The weather is still warm and our grilling days are few.  Grilled chicken breasts stuffed with tomato, mozzarella, and Italian spices were in order.

First, I grabbed a sharp knife and split the breast almost in half right down the long axis to create a pouch.


Next, I thinly sliced the plum tomatoes and some fresh mozzarella as well.  I set this aside, then rubbed the chicken with some olive oil, then seasoned inside and out with a blend of oregano, basil, thyme, granulated garlic, dried parsley, salt, and pepper.  After seasoning I stuffed the pocket with the tomato and mozzarella.


While I brought the sides of the breast together, Hope inserted toothpicks into place to close up the pocket and hold the breast together.


Yes, we did go a bit overboard with the toothpicks, but I didn't want the cheese to ooze out during the grilling process.

Next, I touched up the Italian seasoning on the outside and headed out to the hot grill to cook these behemoths.


To grill these breasts, I seared them for about five minutes a side, the moved them to indirect heat.  While on indirect heat, I placed them with the cut side up to minimize the amount of cheese that might escape.


I closed the grill lid and came back 20 minutes later and poked them with a thermometer.  Overall the cook time, including the 10 minutes of direct heat, was 40 minutes total to bring the meat to 165 F internal temperature.

One of these was big enough for me and Hope to split for dinner.  The Youngest dusted a whole one.


I was very happy with how these turned out.  To my surprise, the cheese ooze was minimal and probably would have been zero with some butchers twine.  In hindsight, these could be a great base for some sort of healthy grilled chicken parmesan.   I do know that since the Ice Cave is filled with these pterodactyl sized breasts, you might be seeing a few variations on this theme in the coming months.

Thanks for stopping by,

Bill

Sunday, October 18, 2015

Cajun Style Baby Back Ribs

It happens to almost everybody who takes part in competition BBQ.  Starting in mid-winter and continuing well into the early fall, after numerous practice cooks and competitions, you run into that wall.  You want ribs for dinner, but you cannot stand the taste of rub and sauce.  The sting of smoke in your eye and the smell that permeates your clothes is too much.  I made it to August this year before I ran into that wall.  I wanted some baby backs and it was time to experiment.  Last year it was Italian style vinegar pepper ribs.  This year, it was Cajun.  The guys at work have found this new Cajun seasoning that they have been putting on everything at lunch.  I was drawn to the smell one day and I strolled over to the table to conduct the finger test.  Good stuff this seasoning.  While I have not been pulled into their Cajun Cult and starting seasoning everything with a dash of blackening powder, I was inspired to try this combination with some baby back ribs.

The rub they have been using is Cajun Foreplay by Dinosaur BBQ.  It is nicely balanced with some heat, some sweet, and other familiar Cajun flavors.  You can get it at the local grocery store they said.  But, our local Grocery Monopoly had other ideas.  In a fit of madness they reset the store shelves and in the process, reduced their inventory.  Cajun Foreplay did not make the cut.  After some aimless wondering through the completely illogical rearranging of the store, I found the spice aisle and settled on a bottle of Paul Prudhomme's Blackened Redfish Magic.  I have used this product in the past and I have been very satisfied.  So, I grabbed a bottle, checked out, and went home to peaceful afternoon of culinary experimentation.

First, I removed the membrane from the back of my baby backs and added a liberal coating of the seasoning to my ribs, front and back.


I briefly considered using the smoker to cook this rack of ribs.  But, at the last minute, I decided to cook these ribs on a hot grill using indirect heat.  On one side of the grill I dumped a full chimney of hot coals, dialed the vents back to about 1/4 open, placed the ribs on the far side of the grill, and closed the lid.  After an hour, I placed some kale tossed in olive oil into a cast iron skillet and placed on indirect heat and moved the ribs above the fire on the top rack.


For a finishing glaze, I mixed equal parts stone ground creole mustard with honey and mixed until spreadable with a grill brush.


For the last half hour of cooking, I moved the kale and ribs over the hot coals and applied the rib glaze in two applications, 15 minutes apart.


Once the glaze had set, I removed from the grill and let them rest for 15 minutes before slicing.  Then I served with the kale and some fresh corn on the cob.


These ribs turned out pretty good.  The heat from the seasoning was nicely balanced with the tart from the mustard and the sweetness of the honey.  I had also forgot how good ribs could taste when cooked slowly on a hot grill versus low and slow on a smoker.  Most importantly, not one hint of traditional BBQ flavor.  Just what the doctor ordered for my acute case of BBQ fatigue.

Thanks for stopping by,

Bill

Sunday, October 11, 2015

Feeling Clammy

At Hudson Valley this past August, our some of our friends on another team have some New England connections and as a result, they had a lobster and clam boil at their site that I was lucky enough to sample.  I love lobster, there is no doubting that.  But it is pricey and I usually only buy one a year when it is on sale at the local grocery store for $9.99 a pound.  My second seafood addiction is fresh littleneck clams.  They are more affordable in these parts, usually running $0.49 a piece or less.  In some ways, I think a perfectly steamed clam is better than lobster.  The day after I had partaken in the clamfest, were were preparing for our pizza turn in that day and an idea popped into my head: White Clam Pizza.  A plan was coming together.  Here is the result.

My mother makes this simple white clam sauce that is quick and easy.  I have tweaked the recipe over the years to fit our tastes.  This would be the base for our pizza.

White Clam Sauce and now White Clam Pizza Base

1/4 cup olive oil
1/4 cup white table wine (not too sweet and not too dry)
1, 6.5 oz can of minced clams, juice included
1/3 of a sweet onion, diced medium
2 cloves of garlic, minced fine
1 tsp of dried parsley plus more for sprinkling
1/2 tsp of dried thyme
1/2 tsp of dried oregano
1/4 tsp of dried basil
Salt and pepper to taste (you could also use red pepper flakes for some heat if desired)

Add the olive oil to a deep sauté pan on medium heat.  Add the onion and sauté until it begins to become soft and translucent.  Next, add the parsley and garlic and sauté until the garlic starts to brown and become fragrant.  At this point, add the wine and the can of undrained clams to the mixture and reduce your heat to low.  Let the mixture cook until the volume is reduced by one half.  There you have it, your white clam pizza base.


At this point, you can choose to stop and toss this sauce with hot cooked pasta and top with fresh grated Parmesan cheese.  This is my recipe for Pasta with White Clam Sauce.  But, I had pizza in mind.  On to that step.

Hope whipped up a batch of homemade dough:

Pizza Dough

3 1/4 cups AP flour
1 tbsp yeast
1/4 tsp sugar
1 tsp salt
2 tbsp olive oil
1 1/4 cups warm water

Put it all in a bread machine, yeast on the bottom, and let it sit through one raise cycle on the white bread setting.  Then pull out of the bread maker, place in a bowl, and cover with a clean towel for 15 minutes.

When handling the dough, spray your hands with cooking spray.  You'll thank me later...

While Hope was working on the dough, I took a second can of clams and drained the juice.  Then, I built the pizza.

On a stretched out pizza skin, I evenly distributed the white clam sauce.


Then, I topped with shredded mozzarella cheese, the can of drained clams, and a sprinkling of dried parsley.


I placed into the oven at 450 F for 20 minutes, or until the crust was brown and the cheese was brown and bubbly.  Once cooled I sliced and served with Parmesan cheese and crushed red pepper for topping.


Crispy crust, browned cheese, lots of clams.  Yep, this pizza satisfied my pizza and clam addiction for  for at least a few weeks.  I was happy with how this turned out.  If you wish, you could add to or substitute shrimp into this recipe if clams are not your thing.  Either way, you will not be disappointed.

Thanks for stopping by,

Bill