If you haven't noticed, I have been on a bit of a home curing kick around the house lately. Since I have learned that it is as easy as sprinkling some salt and adding some seasoning, I have been trying to perfect my technique. My next subject was a nice, five pound, boneless, fresh ham...

My butcher boned it for me and tied together with some butcher string...

In a spice shaker, I added 1/4 cup of turbinado sugar and 1/4 cup of kosher salt and applied an even coat on all sides of the meat. I even made sure to get come down inside the cavity formed from tying the piece of pork (at this point) together. The sugar was added so that you get that hint of sweetness that all of us expect with a good piece of ham...

Every other day I would remove the pork from the refrigerator, drain the liquid, and reapply a coat of salt and sugar. This picture is after two days. As you can see, the salt is starting to do what it was meant to do, pull the water out of the meat and start the curing process...

After six days of cure, it was time to smoke the ham. So, I filled my sink with ice water and let the ham (and a few slabs of bacon) soak for 2 hours to remove the excess salt. After the soak, I rinsed thoroughly with fresh water and patted day. While i was doing this, the smoker was coming up to 190 F. Once the smoker was at temperature, I added hickory to the ash pan and loaded up the meat...

I wanted the try and hang the ham. I had ordered some ham stockings, but they had not arrived yet. Unfortunately, the string on the pork started to slip, so I had to put the ham to be on the rack with the bacon. This picture is after about two hours...

I took the internal temperature of the ham to 150 F. Total smoke time from refrigerator to 150 F was about five hours. Here is a pic as I pulled off the smoker...

I plunged the ham into ice water to stop the cooking process, the put the ham in a plastic bag for dinner the next night.
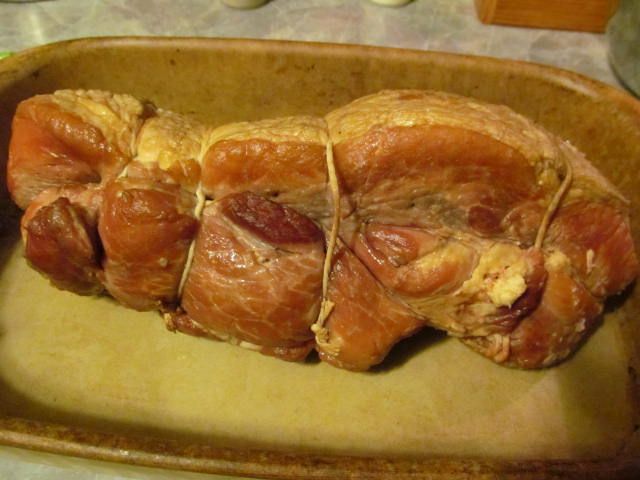
Since we only took the ham to 150 F, it was not quite done. So, the smoked partially, cooked ham went into our stoneware pan, then into a 350 F oven until the internal temperature came to 165 F.
Before...

After...

See the nice caramelized glaze the added sugar created on the outside of the ham. It mingled perfectly with the cured ham flavors...

The Review:
As you can see, the internal part of the ham looks like your standard pork roast. One reason why is that I did not use any nitrates in the cure of the ham. Nitrates help to add that pink color during the cooking process. The other reason is because I did not get the salt/sugar mix into the middle of the pork as well as I thought I did. Rest assured, it tasted like ham, 110%.
Hope is my biggest critic when it comes to cooking. She is never afraid to voice her opinion: good, bad or indifferent. Her opinion? It was the best ham she had had. Not too salty and just the right amount of sweet. Perfect!
What will I try differently the next time? I will dissolve some salt/sugar mix and inject into the middle of the meat in an attempt to get a more even cure. I might also lengthen the cure time to eight days. Other than that, there is nothing to change at all. I am happy at my first attempt at a home cured ham.
Thanks for stopping by...
Bill
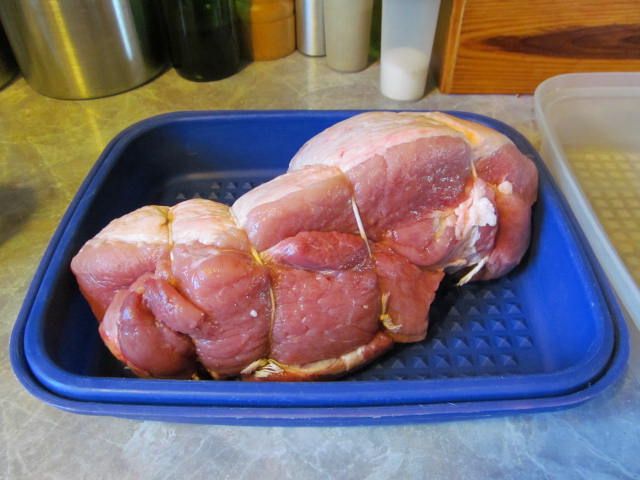
My butcher boned it for me and tied together with some butcher string...
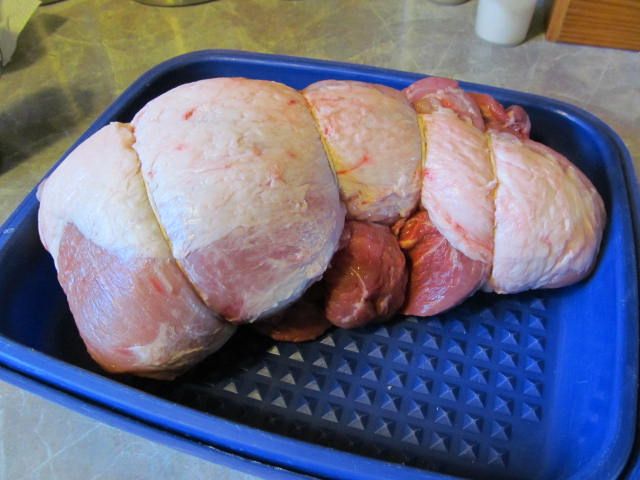
In a spice shaker, I added 1/4 cup of turbinado sugar and 1/4 cup of kosher salt and applied an even coat on all sides of the meat. I even made sure to get come down inside the cavity formed from tying the piece of pork (at this point) together. The sugar was added so that you get that hint of sweetness that all of us expect with a good piece of ham...
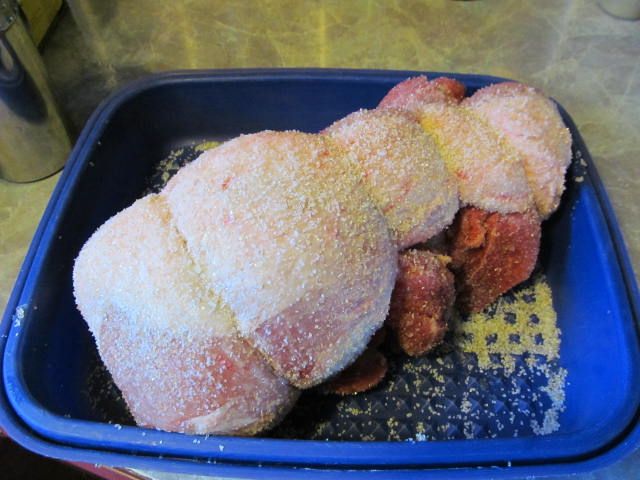
Every other day I would remove the pork from the refrigerator, drain the liquid, and reapply a coat of salt and sugar. This picture is after two days. As you can see, the salt is starting to do what it was meant to do, pull the water out of the meat and start the curing process...
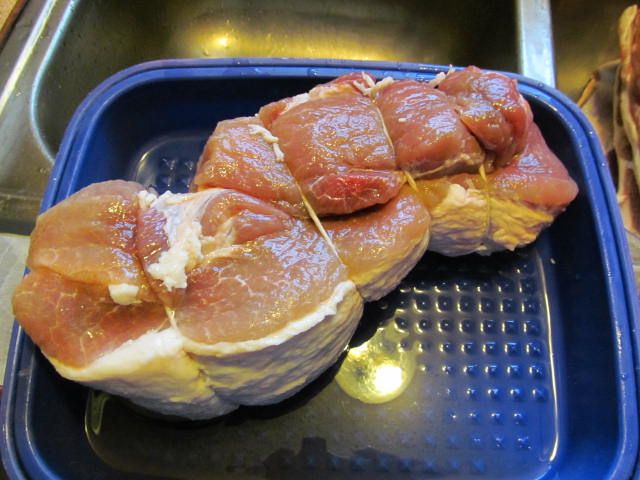
After six days of cure, it was time to smoke the ham. So, I filled my sink with ice water and let the ham (and a few slabs of bacon) soak for 2 hours to remove the excess salt. After the soak, I rinsed thoroughly with fresh water and patted day. While i was doing this, the smoker was coming up to 190 F. Once the smoker was at temperature, I added hickory to the ash pan and loaded up the meat...
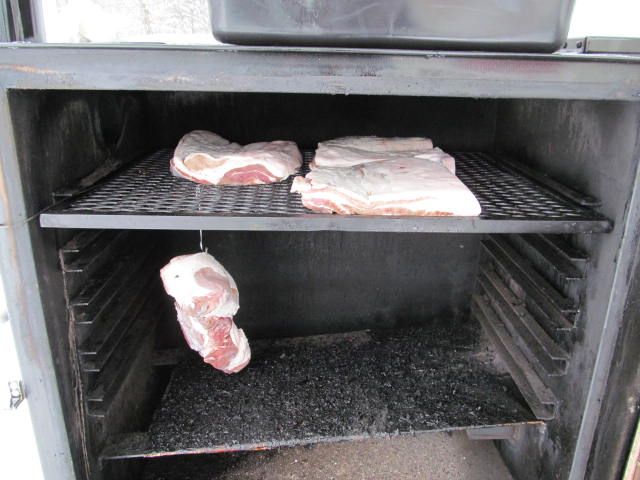
I wanted the try and hang the ham. I had ordered some ham stockings, but they had not arrived yet. Unfortunately, the string on the pork started to slip, so I had to put the ham to be on the rack with the bacon. This picture is after about two hours...
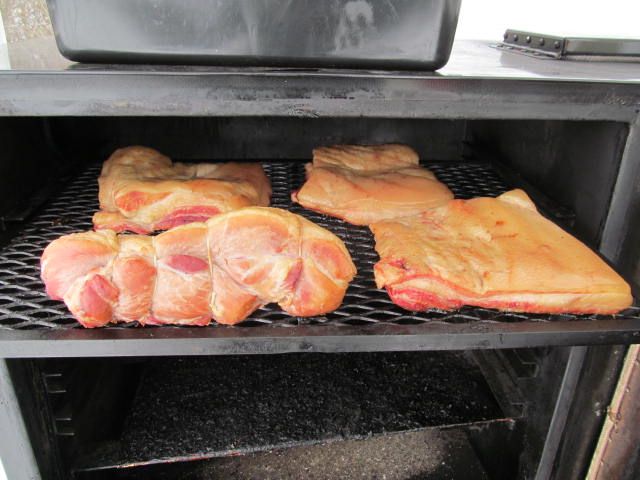
I took the internal temperature of the ham to 150 F. Total smoke time from refrigerator to 150 F was about five hours. Here is a pic as I pulled off the smoker...
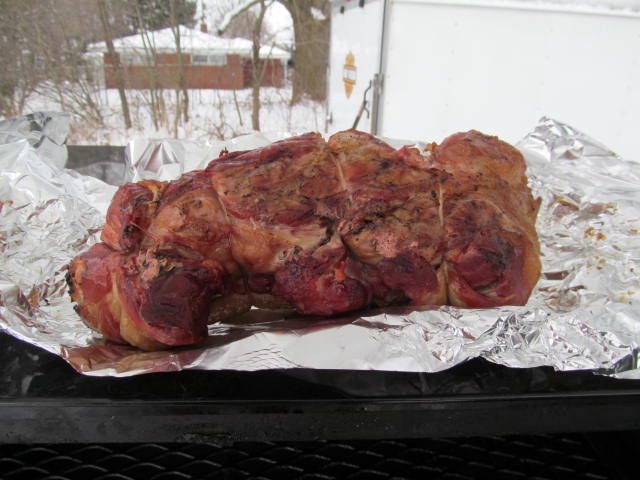
I plunged the ham into ice water to stop the cooking process, the put the ham in a plastic bag for dinner the next night.
Since we only took the ham to 150 F, it was not quite done. So, the smoked partially, cooked ham went into our stoneware pan, then into a 350 F oven until the internal temperature came to 165 F.
Before...
After...
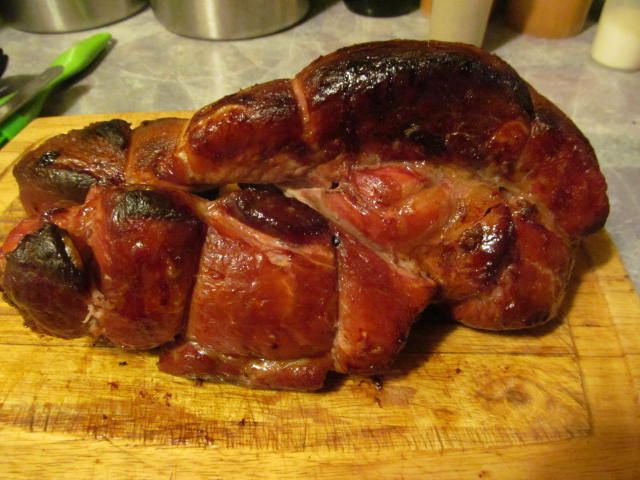
See the nice caramelized glaze the added sugar created on the outside of the ham. It mingled perfectly with the cured ham flavors...
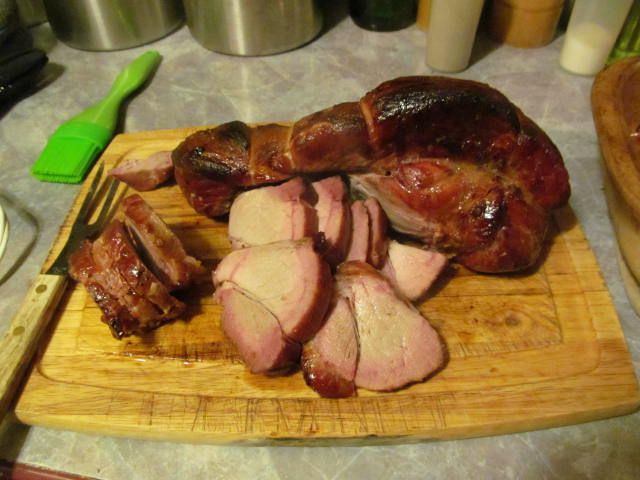
The Review:
As you can see, the internal part of the ham looks like your standard pork roast. One reason why is that I did not use any nitrates in the cure of the ham. Nitrates help to add that pink color during the cooking process. The other reason is because I did not get the salt/sugar mix into the middle of the pork as well as I thought I did. Rest assured, it tasted like ham, 110%.
Hope is my biggest critic when it comes to cooking. She is never afraid to voice her opinion: good, bad or indifferent. Her opinion? It was the best ham she had had. Not too salty and just the right amount of sweet. Perfect!
What will I try differently the next time? I will dissolve some salt/sugar mix and inject into the middle of the meat in an attempt to get a more even cure. I might also lengthen the cure time to eight days. Other than that, there is nothing to change at all. I am happy at my first attempt at a home cured ham.
Thanks for stopping by...
Bill