Search This Blog

Sunday, March 3, 2013

KCBS Competition Practice. Ribs, Part 2 of 4

Ok, it is noon, you have your chicken turned in, and you are in the groove.  You have 30 minutes to get you ribs cut, boxed, and ready for a 12:30 turn in time.  Honestly, ribs have given us our biggest problem in the past.  So, we ave been practicing to improve those scores this year.

Ribs have to be pork, bone in, either spares or baby backs.  We used to use baby backs, but have changed to a St. Louis style spare.  Judges just like spares.  The look better and they have more meat. So, here is what we have been doing... Spare Rib Practice

We'll be posting tons of practice in this category in the coming weeks.  Check back and feel free to comment with your favorite tips and tricks.

Thanks for stopping by...

Bill

Saturday, February 23, 2013

KCBS Competition Practice. Chicken, Part 1 of 4

Well everyone, I looked at the calendar this morning and guess what?  It is getting close to our first competition of the year, the Roc City Rib Fest in Rochester, NY.  Only 90 days to go, so it is time to start practicing and perfecting our recipes for the year.

For those who are new to competition BBQ, there are four categories for turn in: Chicken (regular or cornish game hen), Ribs (Pork only, baby backs or spares), Pulled Pork (Must be from whole shoulder five pounds or more in weight), Beef Brisket (point, flat, or both.  Cannot be corned beef).  Today we will focus on our first turn in, chicken.

Chicken is the first turn in of the day at high Noon.  You can turn your box in during a 10 minute window starting at 11:55 am.  Concentration on cooking chicken helps keep your mind off of the impending turn ins.  Your boxes are built with garnish and you are ready to roll.  Once you pull the cooked thighs off of the smoker, you pick our your best six (we cook 12), put them in the box, and run off to the judges tent to turn in your box.

Some say that chicken is the hardest category to cook.  We have done well with chicken at Three Dogs BBQ, scoring no less than 17th in the category, except for one aberration at Roc City last year when we tried a failed experiment with chicken legs...

I hate preparing for chicken.  You bone the thighs, trim to size, and scrape the back of the skin to remove the fat.  All in the search for the perfect moist piece of chicken with bite through skin that doesn't pull off in one big flap when you take a bite.  Here is a like to our prior efforts and the work that goes into preparing for this cut of meat: Competition Style Chicken

This year, we are looking to get a nice, uniform piece of chicken with a little less work.  So, here it goes...

First, we bought some leg quarters from our butcher and separated the thigh from the leg with a pair of poultry shears...


A side comment here.  If you have not ever used poultry shears, you don't know what you are missing. Cutting through bone was a snap.  Splurge and get yourself a pair.  But, I digress...

We removed the knuckle on each side of the thigh bone with the shears and trimmed the long, stringy pieces of skin off of the thigh so that we get a nice, uniform thigh.  


Next, we marinaded the chicken in a bottle of Italian salad dressing for about 6 hours.  After the marinade, we pulled out, drained away the marinade, and sprinkled a liberal coat of Butchers Honey Rub on all sides of the thigh.  I arranged nicely and place outside to keep cool until the smoker was ready.  We also snuck some wings into the mix for some variety...


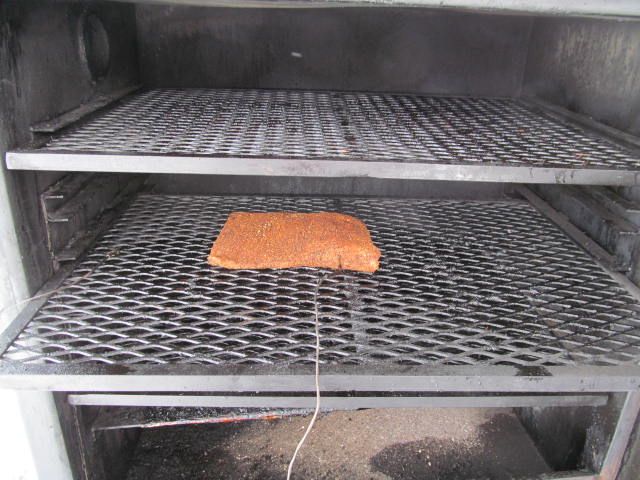
This time around, we used a temperature of 275 F in the smoker with 50:50 hickory/peach in the ash pan.  Our hopes are that the higher heat will allow us to obtain perfect, bite through skin.

We placed the chicken on the smoker for 1 1/2 hours:  30 minutes skin side up, 30 minutes skin side down, 30 minutes skin side up after dunking in sauce.  For sauce, just use 1 cup of your favorite sauce mixed with 1/4 cup of honey.

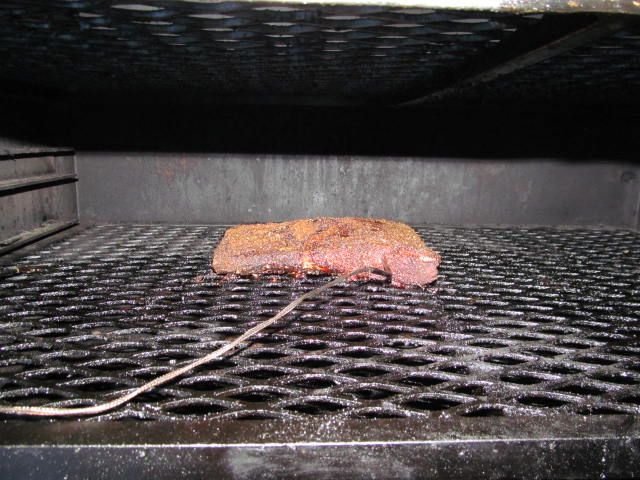
Here is the final product:

Wings...


Thighs...


Before you say something, yes, they look ugly.  But, it was midnight and I wanted to go to bed.  My main objective was to test the flavor profile.  We passed the test for sure.  I like how the Italian dressing adds a layer of flavor to the overall profile.  A winner for sure.  Everyone at work scarfed them down in no time.

But, the skin was not bite through.  We will have a few more practices before May to perfect our method.  But, we were not successful in our first attempt with this new method.  If all else fails, we can go back to our old cooking method that we know works.

Thanks for stopping by...

Bill

Saturday, February 16, 2013

Homemade Pastrami

I love pastrami.  Sliced and piled high on rye bread with swiss cheese and spicy brown mustard.  Pastrami is a veritable taste treat.  For those who don't know what pastrami is, it is a corned beef that is covered in rub and slow smoked until cooked.

Last year, I tried making one from scratch.  I brined and cured a beef brisket from scratch, rubbed with spices and smoked.  While the result was ok, I was not 100% happy.  So, I scoured the Internet for a new recipe.  After lots of looking, the Amazing Ribs website came through again.  Here is their method for making pastrami: Amazing Ribs Pastrami Recipe.  They model their efforts after Katz's Deli in New York.

I didn't cure the brisket.  I had a corned beef in the freezer.  So, I thawed it out, and soaked in ice water overnight to remove as much brine as possible.  Then I rinsed, patted dry, and trimmed some of the excess fat off of the top...


Then, I liberally covered in rub and let sit out for an hour while I lit the smoker and brought to temperature, 190 F...


After one hour of happy time...


What is in the rub?  The exact recipe is in the link above, but the main ingredients are coriander, black pepper, and brown sugar.

Once the smoker was up to temperature, I place some oak in the ash pan for smoking and put the to be pastrami on the middle rack, closed the door and walked away...


About three hours into the smoke...


I cooked until the internal temperature of the pastrami was between 155-160 F.  Then wrapped in foil and cooled overnight.  The next morning, I sliced, and took into work for everyone to devour...


Devour they did.  Not a scrap was left to take home.  They loved the perfectly seasoned pastrami and how the light oak flavor mingled nicely with their taste buds.  I highly suggest giving this a try.  The brine recipe for the brisket to corned beef step looks very good as well.  I will be trying this the next time around.  Thanks to the Amazing Ribs people for another great recipe.

Thanks for stopping by...

Bill

P.S. We will be getting back into BBQ in the near future.  It is time to practice for the upcoming season!

Thursday, February 14, 2013

A Great Use for your Smoked Bacon: Clam Chowder

As you may have determined by visiting here, I never take a recipe that I find and just follow "as is".  I tinker and try and mold to my tastes.  So, what I did here was take a great sounding recipe from the Neely's on Food Network and mold to our tastes.

For reference, here is the recipe on Food Network: Neely Food Network Clam Chowder Recipe

Here is our take on the recipe:

First, make your smoked bacon...

Home Cured Bacon, Step by Step

Then make your chowder.

3 Three 8-Ounce Canned Clams
3 8-Ounce Bottles Clam Juice
3 Thick End Pieces of Smoked Bacon Smoked BaconDiced
3 Cloves GarlicDiced
2 Ribs CeleryDiced
2 CarrotsPeeled and Diced
1 OnionDiced
2 tsp Chopped Fresh Thyme
1 Bay Leaf
Salt And Freshly Ground Pepper
5 Tbsp All-Purpose Flour
3 medium Idaho Potatoesscrubbed, peeled, and diced
1 cup Low Fat Half-And-Half
1 Tbsp Balsamic Vinegar
Dash Of Hot Sauce
Dash Of Worcestershire Sauce


Our changes?

3 slightly smaller cans of clams ultimately leads to more clams in the final product.  
1 extra bottle of clam juice.  More of that good clam flavor. 
Idaho potatoes instead of the red potatoes.  We feel in leads to a creamier end product.
Addition of carrots.  We feel it adds a slightly sweet taste.
Low fat half and half instead of the real deal.  You really don't need it at all.  
Balsamic vinegar instead of cider.  We feel it adds more depth of flavor.  
5 Tbsp of flour instead of 3 Tbsp.  We like our chowder on the thicker side.
We also simmered longer to give the mix a chance to cook down and thicken.

As for method, we kept it the same as the recipe:


Heat a large Dutch oven over medium heat.

Drain the canned clams over a measuring cup and reserve the juice. You will need 3 cups reserved juice in total, so add the 3 bottles of clam juice to make a total of 3 cups.  (We did not drain.  We added the whole can at once.  Why dirty something?)

Add the bacon to the Dutch oven and saute long enough for the bacon to begin to render its fat but not begin to brown, about 3 minutes. Turn up the heat and add the garlic, celery, onions, thyme, bay leaf and some salt and pepper. Saute until tender and fragrant, 4 to 5 minutes. Add the flour and cook until pasty and blonde. Stir in the clam juice, and then add the potatoes. Bring to a simmer and cook until the potatoes are just tender, about 8 minutes.

Add the half-and-half and clams and cook for an additional 5 minutes. Season with the vinegar, hot sauce, Worcestershire sauce and salt and pepper. 
Here are the results...
Rendered bacon...


Veggies for saute...


Add the flour...


In goes the liquid and potatoes...


In goes the half and half and clams.  Let simmer and cook down to thicken.  


Full of great clammy goodness with a hint of the smoked bacon.  Serve with a salad and crusty bread and you have something that everyone will love.

Thanks for stopping by...

Bill